The Tastiest Sweet Potato & Chickpea Curry

I recently did a lil’ catering gig for a restorative retreat at PranaShanti Yoga CentreAnne Tessier, the yogi who organized the retreat, requested that I make a comforting and warming meal for the participants. While the entire meal hit the mark and was very well received by the participants, my personal favourite recipe from that day was a sweet potato & chickpea curry that I made. The spices (particularly the ginger and red pepper flakes), combined with rich and creamy coconut milk, gives this curry a very warming and cozy feel. Not to mention that the the healthy fats, protein and fibre content keeps you full and satisfied.

This dish has been on high rotation in my house this past winter and I’m happy that I’ve finally managed to take a photo and post this recipe to my blog. I’ve served it with a mixtures of sides including sautéed garlicky green, steamed broccoli, rice and quinoa, but you can enjoy it as is.  Just a head’s up, although this dish doesn’t take take too long to prepare (besides a bit of chopping), you’ll want to allow a least 45 minutes to an hour of cooking time in the oven. The long cook time enables the sweet potatoes to soften and the flavours to merge creating a rich and flavourful dish. I personally haven’t used a slow cooker, but I’m sure it would work well too.

The full recipe is below. If you try it out, please let me know and share your feedback. I love hearing from you!

SWEET POTATO & CHICKPEA CURRY

Makes 6 to 8 servings.

Ingredients:

3 cups cooked chickpeas or 2 cans drained and rinsed
3 medium sized sweet potatoes, cut into small dice
1 red or yellow bell pepper, cut into small dice
1 Tablespoon coconut oil
2 medium sized red onions, cut into thin slices
1 Tablespoon mild curry powder
1 teaspoon mustard seed
1 teaspoon cinnamon
1 teaspoon turmeric
1 teaspoon cumin
1/2 teaspoon red chili flakes
1 Tablespoon finely grated or minced fresh ginger or 1 teaspoon dried ginger
3 tomatoes, roughly chopped
1 400 ml can full fat coconut milk
1 Tablespoon maple syrup, optional
Salt and pepper to taste
Micro greens, sprouts, chopped cilantro, or thinly sliced green onions, for garnish, optional

Instructions:

Preheat the oven to 400F.  Place the chickpeas, chopped sweet potatoes and bell pepper in a large baking dish.

Warm coconut oil in a medium sized saucepan or skillet. Add the sliced onions and a big pinch of salt. Sauté and stir the onions until they begin to soften and become translucent.  Add a little bit of water if they start to stick to the pan.

Add the spices, mix well, and cook for a minute. Stir in the coconut milk, tomatoes, maple syrup (if using), salt and pepper. Allow the mixture to simmer for about 5 minutes.

Pour the coconut milk mixture over the chickpeas, sweet potato and peppers, and then pop the baking dish in the oven. Bake for about 45 to 60 minutes, or until the sweet potatoes are nice and soft. Once you remove the baking dish from the oven, taste for salt and pepper and adjust the seasoning according to your preference.  Serve immediate with a garnish and a side dish of your choice.

This recipe is inspired by The Buddhist Chef's butternut squash curry recipe.

Chocolate Chia Pudding & Raw Brownie Bites

If you follow me on Facebook, Twitter, or Instagram, you may have noticed that I've been partnering up with Kardish Health Food Centre quite a bit lately.  Kardish is an Ottawa-based, family-run health food and natural products store with 9 locations across the city. I know many of the staff, the owners, and I've been to almost all of their stores and I couldn't have been more excited when Kardish's Director of Communications approached me to be its first nutrition ambassador. I'm so pleased to take on this role with such a fantastic local company.  This means I'll be doing lots of events and nutrition talks with Kardish in the coming year! Be sure to visit my events page regularly or sign-up for my newsletter to stay in the loop!

Recently Kardish created a Chocolate Guide (right on time for Valentine's Day!) and included a couple of my recipes. Both recipes are chocolate based, super easy to make and healthy too. The Guide also includes interesting chocolate facts, the health benefits of chocolate and also the best brands to buy.  CLICK HERE to access the guide. You can also scroll down to see the two recipe I provided. Please comment below or send me a message if you try any of the recipes. I always love getting feedback!

Kardish Chocolate Guide - Amy .png

Slow Cooker Vegetable, Farro & White Bean Stew

The photo of the stew below might look familiar to you. If you've been to my website before you've probably seen it. It's one of the beautiful photos taken by my friend Caroline of CY-iwander that now resides on my homepage. It was taken a couple of years ago when we did a little photo shoot together.  I figured it was finally time to share this fantastic recipe on my blog!

It's perfect for these cold days. It's hearty and warming, with a nice complexity of flavour. This is a slow cooker recipe and, although may seem fancy based on the ingredient list, it's quite easy to make!  I wish I could take credit for this delicious creation, but I can't. It was actual developed by restaurateur and chef, Grant Achatz. I have made a few adjustments and omissions to his original recipe to make it more "user friendly" and have also added some white beans for extra protein and satiety. 

You'll see that there are a few not-so-standard- yet readily available - ingredients that you may have seen at the grocery store, but have never incorporated into your cooking.  Farro is one of them.  It's an ancient grain that has been making a bit of a comeback in recent years. It's an excellent source of protein, fiber and nutrients like magnesium and iron.  It has a chewy texture and mild taste. While it does contain gluten, it has lower amounts than wheat.  If you've been wanting to try it out, this recipe will not disappoint!  You should be able to find farro at most larger grocery stores (among the grains or in the health food section), health food stores, or Middle Eastern grocers.  You may not have tried cooking with fennel, figs, or artichokes before either, but this recipe will give you the opportunity to do so!

VEGETABLE, FARRO & WHITE BEAN STEW

Makes 8 servings.

Ingredients:

  • 2 rosemary sprigs or 1/2 teaspoon dried rosemary

  • 5 oregano sprigs or 1 teaspoon dried oregano

  • 5 thyme sprigs or 1 teaspoon thyme

  • 1 teaspoon crushed red pepper flakes

  • 2 teaspoons sea salt, plus more for seasoning

  • 2 small artichokes or 14 oz can of water packed artichokes, drained

  • 1 cup farro

  • 1 14 oz can, white kidney beans, drained and rinsed

  • 1/4 cup extra-virgin olive oil

  • 1 1/2 cups tomato juice

  • 1/2 cup water

  • 2 heads of garlic, 1/4 inch cut off the tops

  • 1 lemon, sliced 1/8 inch thick

  • 1/2 red bell pepper, sliced 1/3 inch thick

  • 1/2 yellow bell pepper, sliced 1/3 inch thick

  • 1 medium onion, quartered

  • 1 large Japanese eggplant, cut into 6 wedges

  • 1 cup dried Black Mission figs or dried figs of your choice (5 ounces), stemmed

  • 1/2 cup golden raisins

  • 1 fennel bulb, trimmed and cut into 6 wedges

  • 1/2 pound large cherry tomatoes, halved

  • 1 large zucchini, cut into 2-inch pieces

  • 1 bunch of kale, stems removed, roughly chopped into bite-sized pieces

  • 1 bunch green onions, thinly sliced, for garnish

Directions:

If using fresh herbs: tie the rosemary, oregano and thyme sprigs into a bundle using kitchen twine. If using fresh artichoke: use a serrated knife to cut off the top third of the artichokes. Snap off the small leaves from around the artichoke stem. Cut the artichokes in half lengthwise. With a spoon, scrape out the hairy chokes and discard them.

Turn your slow cooker to high and set the timer for 6 hours. Starting at the crushed red pepper flakes, add all of the ingredient up to and including the cherry tomatoes. Then add the herb bundle or the dried herbs. Spread the ingredients in even layers. Cover the slow cooker and cook for 4 hours.

Stir the stew gently and add the zucchini ensuring to submerge them in the liquid. Cover and cook for 2 hours longer. 

About 10 minutes before serving, stir in the kale to allow it to wilt and soften.  Discard the herb bundle (if you were using it) and season the stew with salt. Serve immediately garnished with green onions.

Grant Achatz's original recipe can be found on Food & Wine.
 

Chickpea Crostini Melts with Aquafaba Aioli

This recipe was a long time in the making and I’m so happy that I waited until now to post it as series of serendipitous events has led me to create this fantastic Chickpea Melt recipe. If you if don't want to hear the story, scroll down to the bottom for the recipe (I won’t take offense, I promise). However, for those of you interested in how this recipe came to be, allow me to explain…

About 3 years ago I was at Pressed, a café here in Ottawa, and tried their chickpea salad sandwich. I don't think it's on the menu anymore, but at the time, the owner Jeff was kind enough to share the recipe with me. Since then, I’ve made the recipe countless times for myself, for friends or for yoga retreats, and over the years I’ve refined it to my liking.

Flash forward to a few weeks ago, I attended a wine and cheese party out in Alexandria, Ontario at the Zengarry HQ.  While there, I was speaking with Lynda, the owner and founder, and mentioned to her that I'd love to make a healthy appetizer for the holiday featuring chickpea salad and one of her cheeses. She happily obliged and handed over a round of her cashew-based Gruyère. 

At the Zengarry event also I met local vegan pastry chef, Kate of Kitty Kate Confections, and was super impressed by her beautiful and delicious macarons made using aquafaba. For those of you who haven't heard of aquafaba, it’s basically just chickpea brine.  Yep, the liquid from chickpeas that you usually pour down the drain! Turns out somebody came up with the genius idea of using chickpea brine as an egg replacer and it actually works. In fact, it works so well that vegan chefs and non-vegan chefs alike have begun using it as an egg substitute for making meringues, frothy egg whites on top of drinks (like pisco sour), in cakes and other baked goods, mayo and so on. I’ve observed the magic of aquafaba in the past since my mom has been experimenting with it and has had a lot of success, but I was never really interested in it (not sure why), until recently!

A few days ago at Loblaws cooking lesson, inspired by my mom and Kitty Kate Confections, I tried making aquafaba meringue (I followed this recipe). It’s almost unbelievable that chickpea brine, with a bit of cream of tartar, sugar, and vanilla could whip up so beautifully fluffy in a stand blender creating peaks (just like egg whites) and holding its shape and texture (likely better than egg whites).  Everybody in attendance was wowed by this incredible mock meringue and I was further inspired to play around with aquafaba.

A few days ago a light bulb went off. Since I was already planing to make chickpea salad melts for my blog, why not make aquafaba mayo to go along with it? I found several recipes online. I tried one, and it failed horribly. It was too runny, too yellow looking, and way too salty (it was not a lost cause though; I have since been reformatted into salad dressing). Then, I had a look at the Oh She Glows recipe, and it was a good starting point. However, I ended up altering it to make an aioli (garlic mayo) and I was so pleased with the results.

All of that to say, getting to this point was a process of sharing, learning, research, trial and error, and I hope you enjoy this yummy holiday appetizer.  If you’re reading this and it's not the Holidays, or if you aren’t in need of an appetizer, that’s okay. The Chickpea Salad recipe goes beautifully in sandwiches or wraps, on a bed of leafy greens, or even eaten as a dip with crackers. 

If you want more information on aquafaba check out the Aquafaba Hits and Misses Facebook page. It's mecca for aquafaba aficionados.  Or simply scroll down for the full step-by-step recipe. I hope you enjoy it!

CHICKPEA CROSTINI MELTS WITH ZENGARRY GRUYÈRE

Chickpea Salad:

Yields just under 5 cups.

  • 2 15 oz. cans of chickpeas or 3 cups cooked chickpeas, drained and rinsed (reserve 3 Tablespoons of the brine for Aquafaba Aioli)

  • 2/3 cup homemade Aquafaba Aioli (see below) or store bought vegan mayo

  • 2/3 cup celery (about 1 or 2 ribs of celery), minced

  • 1 bunch green onions (approximately 8), chopped

  • 1/3 cup minced dill pickle

  • 2 tablespoon nutritional yeast, optional

  • 2 tablespoon tamari, soy sauce or coconut aminos

  • 1 heaping tablespoon kelp or dulse powder

  • Freshly ground black pepper, to taste

  • 1 large handful, fresh dill, roughly chopped, divided (some for the salad + some for garnish)

Directions:

In a medium bowl, mash the chickpeas coarsely with a fork or potato masher. Mix in the remaining ingredients (except the dill). Once evenly combined, sprinkle in the dill and mix again. Transfer to a large airtight container. This may be stored in the fridge for up to 1 week.

Note: if you’re using store bought mayo and not the aquafaba aioli, you’ll want to add 1 small clove of minced garlic to the mix.

Aquafaba Aioli:

Yields approximately 1 cup

  • 3 tablespoons aquafaba (chickpea brine from canned or homemade chickpeas)

  • 1 teaspoon lemon juice

  • 1/2 teaspoon apple cider vinegar

  • 1/4 teaspoon sea salt

  • 3/4 cup grape seed oil (or other neutral oil)

  • 1 small clove of garlic, minced

Directions:

To make the aioli, you’ll need an immersion blender, or a blender with a narrow container.   If using an immersion blender, you’ll also need a large jar or a deep container/mixing jug that’s big enough to fit your immersion blender.  I personally used immersion blender and 5 cup mixing jug.

To begin, add the aquafaba, lemon juice, apple cider vinegar, and sea salt to the container or jug. Blitz these ingredients for a few seconds until you start seeing a bit of froth. Once your mixture is frothing, start pouring in the oil. Drizzle in the oil, very slowly, as you continue to blitz the mixture, allowing the oil to emulsify.

Within a minute, the mixture should begin to change colour and texture, very similar to that of mayo. Once you’ve added almost all the oil, add in the minced garlic and continue to process to ensure that the garlic mixes in nicely.  You’ll want to reserve 2/3 cups of your Chickpea Aioli for the Chickpea Salad, and transfer the rest to a container and store it refrigerator for up to 1 week.

To Assemble Your Chickpea Crostini Melts:

Ingredients: 

  • 1 baguette of your choice, cut into 1/4 inch slices (I used an organic sourdough)

  • 1 round of frozen Zengarry Gruyère

  • Chickpea Salad

Directions:

Set your oven to broil.  As it’s heating up, grab a baking sheet.  Place several baguette slices on to your baking sheet, then spread 1 heaping tablespoon of Chickpea Salad on to the sliced baguette.   Next, grate about a quarter of your frozen Zengarry Gruyère (grate more later, if needed). I prefer the larger grater setting on a box grater,  but you could also use micro-plane or small grater.  Use about 1/2 teaspoon of the grated Gruyère to top of each baguette.  Then put the baking tray in to the oven and broil for 4 to 5 minutes, watching closely to not overcook or burn your baguettes.

Once the baguettes are nicely crisp, and the Gruyère has melted and is slightly bronzed, remove the baking sheet from the oven. Garnish your Chickpea Crostini Melts with a bit of fresh dill and serve immediately.

Note: You may want to do this in small batches (about 8 to 10 baguettes at a time) so that you can serve and enjoy warm Chickpea Melts strait from the oven.   Use as much or as little of the Chickpea Salad and Gruyère as you need based on the number of people you’re serving. Any leftovers can be enjoyed later on for meals or snacks.
Roasted Acorn Squash & Apple Soup

I'm sure you've noticed that winter squash is abundant these days at both grocery stores and farmers' market. As we begin to bid farewell to Fall, I'd say it's time to start compiling warming recipes and making soups and stews. 

The soup recipe below is inspired by the Minimalist Baker's simple pumpkin soup, but I've changed things up a bit by adding roasted acorn squash, apple, onion and garlic, rather than pumpkin puree. The changes gives the soup a nice depth of flavour and also subtle natural sweetness from the roasted veggies and apples. In the Minimalist Baker's recipe, she also includes a kale "topping" for the soup. I loved this idea and have come up with a variation in my recipe as well. It's optional, but definitely recommended as it adds a nice pop of colour, flavour, and texture to the dish. 

I love cooking with winter squash. Many people write squash off because it's thought to be too starchy, but surprisingly it has a whole lot of nutritional value. In the case of acorn squash, it's a great source of beta carotene (the precursor to vitamin A) and vitamin C.  It's also rich in fiber. So yes, this is a healthy soup, but it's easy to make and delicious. The combination of roasted vegetables, apples, coconut milk and spices, paired with the bitter and garlickly kale topper, gives this soup complex and rich flavour.  Try it out and let me know what you think.

ROASTED ACORN SQUASH & APPLE SOUP + KALE & HEMP TOPPER

Makes 4 servings

Soup Ingredients:

Extra virgin olive oil
2 acorn squashes
2 small yellow onions, peeled and cut in large dice
3 cloves garlic, peeled
2 apples, peeled, cored and cut into bit sized pieces
2 cups low sodium organic vegetable broth
1 cup full fat coconut milk
1/4 teaspoon each sea salt, black pepper, cinnamon, nutmeg

Kale & Hemp Topper ingredients (optional):

1 bunch of kale, stems removed, ripped or chopped into bite sized pieces
3 cloves garlic, minced
1 tablespoon extra virgin olive oil
A few pinches of salt

Directions:

Preheat oven to 400 F and line 1 or 2 baking sheets with parchment paper. Using a sharp knife cut the acorn squashes in half. Use a spoon to scrape out all of the seeds and strings (reserve the seeds if you plan on roasting them later). 

Rub a bit of olive oil on to the flesh of the squash and place face down (skin side up) on the baking sheet. Place the onions, apples, and garlic on a baking sheet as well and drizzle them with a bit of olive oil. Bake for 40 minutes or until a fork easily pierces the skin of the acorn squash.

Remove the baking trays from the oven. Once the squash has cooled enough to handle, scrape out the flesh (it should be soft and easy to remove) and transfer it to a bowl. Discard the skin.  [*If you have a Vitamix or other high powered blender, scroll down for alternate instructions] Then add the squash, apples, onions, and garlic, along with all of the other soup ingredients to a sauce pan. Bring it to a simmer.

To puree the soup, you can either transfer it to a blender, food processor or use an immersion blender. If using a blender, place a towel over the top to avoid spilling. Once the soup has reached a nice, smooth consistency, pour the mixture back into pot. Continue cooking over medium-low heat for a few minutes to reheat and taste and adjust seasonings as needed. Serve immediately on its own or with Kale & Hemp topper.

Kale & Hemp Topper:

Warm the olive olive over medium heat in a small skillet. Add garlic and sauté for a few minutes until golden brown (be sure to watch the garlic closely as it will burn quickly). Add kale and toss, then add a few pinches of salt and cover to steam. Cook for another few minutes until kale is wilted and then add in the hemp hearts. Mix it up to ensure the kale is lightly coated with hemp and garlic, and set aside for topping soup.

*If you have a Vitamix or other high powered blender, you can skip a few of the aforementioned steps. After you're done roasting the squash, apples, onions and garlic, you can really simplify the process. Add the roasted squash puree, along with the roasted apples, onions and garlic, and all of the remaining soup ingredients to your Vitamix. Process the soup using a high setting - or the cooking setting - and you can blend and heat your soup at the same time.  This will only take about 6 minutes and save you the trouble of transferring the soup and will reduce the amount of dishes you have to clean.

Buddha Bowls with Tahini Dressing

I make Buddha Bowls a lot. Almost weekly. I make them for myself, for cooking demos and they are almost mandatory when I'm cooking at yoga retreats. They are always a hit! Everybody loves them. Plus, they are a great way to get rid of scraps of food that are still in the fridge.

The best thing about Buddha Bowls is that you can cater yours to your liking. There really is no set in stone recipe. However, the key is definitely to have a really, really great dressing. Below, I've shared the recipe for one of my favourite dressings, but you could choose to top your bowl with whichever dressing you like.

Most recently I was cooking for a yoga retreat organized by Anne Tessier near Tremblant, Quebec.  Below is a photo of the Buddha Bowl I prepared for the yogis. It had wild rice, chickpeas, grated raw beets and carrots, avocado, thinly sliced kale, roasted delicata squash, green onions, kimchi, peashoots, black sesame seeds, and my all time favourite tahini dressing.  And yes, it's as delicious as it looks! But no, it's not complicated at all. It's just a matter of chopping up a bunch of delicious things and throwing them into a bowl, and then pouring a really decadent (yet nutritious) dressing on top. Scroll down for my Buddha Bowl "recipe".

Let's get started! Here's what you'll need to make your own Buddha Bowl...

Base ingredients:

Your choice of cooked grains (quinoa, buckwheat, millet, brown rice, wild rice, sorghum, teff or amaranth)
Your choice of protein (beans, lentils, chickpeas, edamame, tofu, tempeh, etc)

Plus any combo of veggies:

steamed or roasted sweet potato, squash, or potatoes cut into bite sized pieces
broccoli or cauliflower (cut in tiny florets), steamed, roasted or raw
finely chopped greens (kale, romaine, arugula, spinach, etc)
thinly sliced cabbage
onion or scallions
grated carrot
grated raw beets or cooked/steamed beets
cucumber, cut up into small pieces
chopped celery
sliced avocados
sauerkraut or kimchi

Plus garnish options:

sprouts or pea shoots
sunflower seeds
hemp seeds
sesame seeds
dulse or kelp flakes (or any other seaweed for that matter)
ground flax seeds

Plus a dressing of your choice OR my all time favourite tahini dressing:

1/2 cups tahini (sesame paste)
1/2 cups olive oil
1/2 cups water
1/4 cup tamari
2 tablespoons apple cider vinegar
2 tablespoons lemon juice
Small piece (half thumb size) fresh ginger root, minced
2 cloves garlic, chopped
Black pepper to taste

Directions: Blend all the ingredients in a blender until smooth. Add water to loosen if it’s too thick. Dressing will keep in the fridge for 1 week.

Finally, to assemble your Buddha Bowl:

Combine 1/4 cup cooked grains and 1/4 cup protein of your choice, along with any combination of vegetables and garnishes. Drizzle about 1/4 cup of dressing on top. Serve immediately and enjoy!

You can also batch prepare your Buddha Bowls by storing single servings in containers. Reserve your dressing and add it just before you're about to eat.

If you enjoyed the recipe I shared above be sure to check out my Plant-Based Breakthrough program, which is a crash course in plant-based health, nutrition, and meal planning. For details about the program click here. You can also join the Plant-Based Breakthrough Community on Facebook where I share recipes, inspiration, and information on plant-based nutrition.

Power Pasta Salad

This recipe is actually my mom's creation so I can't take full credit for its deliciousness. She originally devised this concoction because it was cheap, filling and it did not spoil easily on road trips. During my childhood, we used to travel a lot during the summer, across the Atlantic Provinces, for soccer tournaments and Power Pasta became a family favourite. Back then I believe my mom used store bought Italian salad dressing and probably didn't include as many greens, but she was definitely a pioneer when it came to utilizing pulses as an efficient, inexpensive source of protein and healthy carbohydrates. This pasta salad kept her sporty children happy and satiated (without breaking the bank).

As I mentioned, I've made some of my own modifications, but at the heart of this recipe it's simple, filling, and nutrient dense. It's a great meal for active kids, but also for us adults who are looking for easy make-ahead lunch or dinner ideas. 

I haven't had a chance to take a super high quality photo, but I wanted to share this recipe now as I've had many requests.  Power Pasta is gluten free and vegan and can be modified many ways to suit your palate. If you don't like some of the ingredients, omit them, and add in other vegetables or proteins of your choice. Read on for the recipe and be sure report back once you've tried it.

POWER PASTA SALAD

Makes 8-10 servings.

Ingredients:

16 oz/454 g bag brown rice or quinoa spiral or elbow noodles, cooked according to package directions
2 398 ml cans of chickpeas or beans of your choice, drained and rinsed
1 can of water packed artichokes, drained, rinsed and roughly chopped
5 cups leafy greens of your choice (I like baby kale, spinach, or arugula), washed and chopped
1 large cucumber, peeled (if not organic) and chopped into bite-sized pieces
1 pint of grape or cherry tomatoes, sliced in half
1/2 cup of pitted kalamata olives, roughly chopped (optional)
1 bunch of green onions, chopped

Dressing Ingredients:

1/2 cup red wine vinegar
3 Tablespoons lemon juice
1 Tablespoon of maple syrup
1 Tablespoon Dijon mustard
2 teaspoons, sea salt
Freshly ground black pepper
1 small clove of garlic (optional)
1 cup extra virgin olive oil

Directions:

Add all of the salad ingredients into a very large bowl and mix well to combine.

For the salad dressing: blend the vinegar, lemon juice, maple syrup, Dijon, salt, pepper, and garlic (if using) in a blender. With the machine running, gradually blend in the oil. Once the dressing is ready, slowly pour it over the pasta salad. Stir to ensure that the noodles are well coated.  Serve immediately and enjoy!

Keeps in the fridge for 3 to 4 days, if you don't eat it all first.

Notes from the kitchen: At my Loblaws demo I used Rizopia brown rice noodles and they were great!

Super Simple Summer Slaw

I went on a shopping spree this weekend and spent all my money... at the Farmers' Market! This is the only kind of shopping I like and I happily lugged home a massive haul of fresh vegetables thanks to the good people at Hoople Creek Farm, Roots Down Organic Farm and Waratah Downs Organic Farm. I picked up green cabbage, kohlrabi, zucchini, summer squash,  patty pan squash, cucumber, fennel, and a bunch of bell peppers. Besides having all of these veggies to work with, I also have a fridge full of kale and beet greens (thanks to my soon-to-be father-in-law).  We have lots of cooking and eating to do this week, but I think we can handle it.

Last night, I made a huge pot of red lentil marinara (in which I used many of the veggies listed above) and served it on zucchini noodles, and today I was craving something fresh and light so opted to make a slaw. The recipe below is one of my favourites and I've enjoyed many versions of it, as have my nutrition clients.  This recipe should ultimately serve as a base for you and you can tweak it to your liking.

This time around I used kohlrabi, green cabbage, fennel bulb and fronds, and carrots because that's what I had on hand. However, adding in some grated apples, and opting for dill instead of fennel, will give it a different, but equally delicious flavour profile. Even going with red cabbage, instead of green, will offer a variation in taste and nutrients.  There are so many options!

This is definitely a choose-your-own-adventure style of slaw that you can serve as an appetizer, side dish, snack, or even as filler in sandwiches or wraps. It's very versatile and very nutritious. Try it out and let me know what you think!

SUPER SIMPLE SUMMER SLAW

Ingredients:

1 medium, kohlrabi, peeled and cut into matchsticks, or grated
1/4 head, cabbage (green or red), thinly sliced or shredded
1 small fennel bulb, thinly sliced or grated, optional
1 apple, peeled and grated, optional for a sweeter slaw
1 carrot, peeled and grated
1/4 cup, fennel fronds or fresh dill, roughly chopped
3 Tablespoons, extra virgin olive oil
1/2 lemon, juiced
1 small clove, garlic, finely minced
1 teaspoon, Dijon mustard
Sea salt and freshly ground pepper

Directions:

Add the slaw ingredients to a large mixing bowl. Toss until well combined.

In a measuring cup or small mixing bowl, whisk together the rest of the ingredients (olive oil, lemon juice, garlic, Dijon mustard and a few big pinches of salt and pepper). Whisk until you have a nice, even consistency.

Pour the dressing over the slaw ingredients and then toss until the dressing is evenly distributed. Taste your slaw and season with a bit more salt and pepper, if necessary.  Once you’re happy with the flavour, serve immediately and enjoy! This slaw will keep in the fridge for up to 5 days.

Notes from the kitchen: You can use a box grater or slice up the vegetables by hand, but for the quickest and most efficient method, I recommend using a food processor. I personally use the grating blade to process carrots, apples, kohlrabi and fennel, and the slicing blade for cabbage.

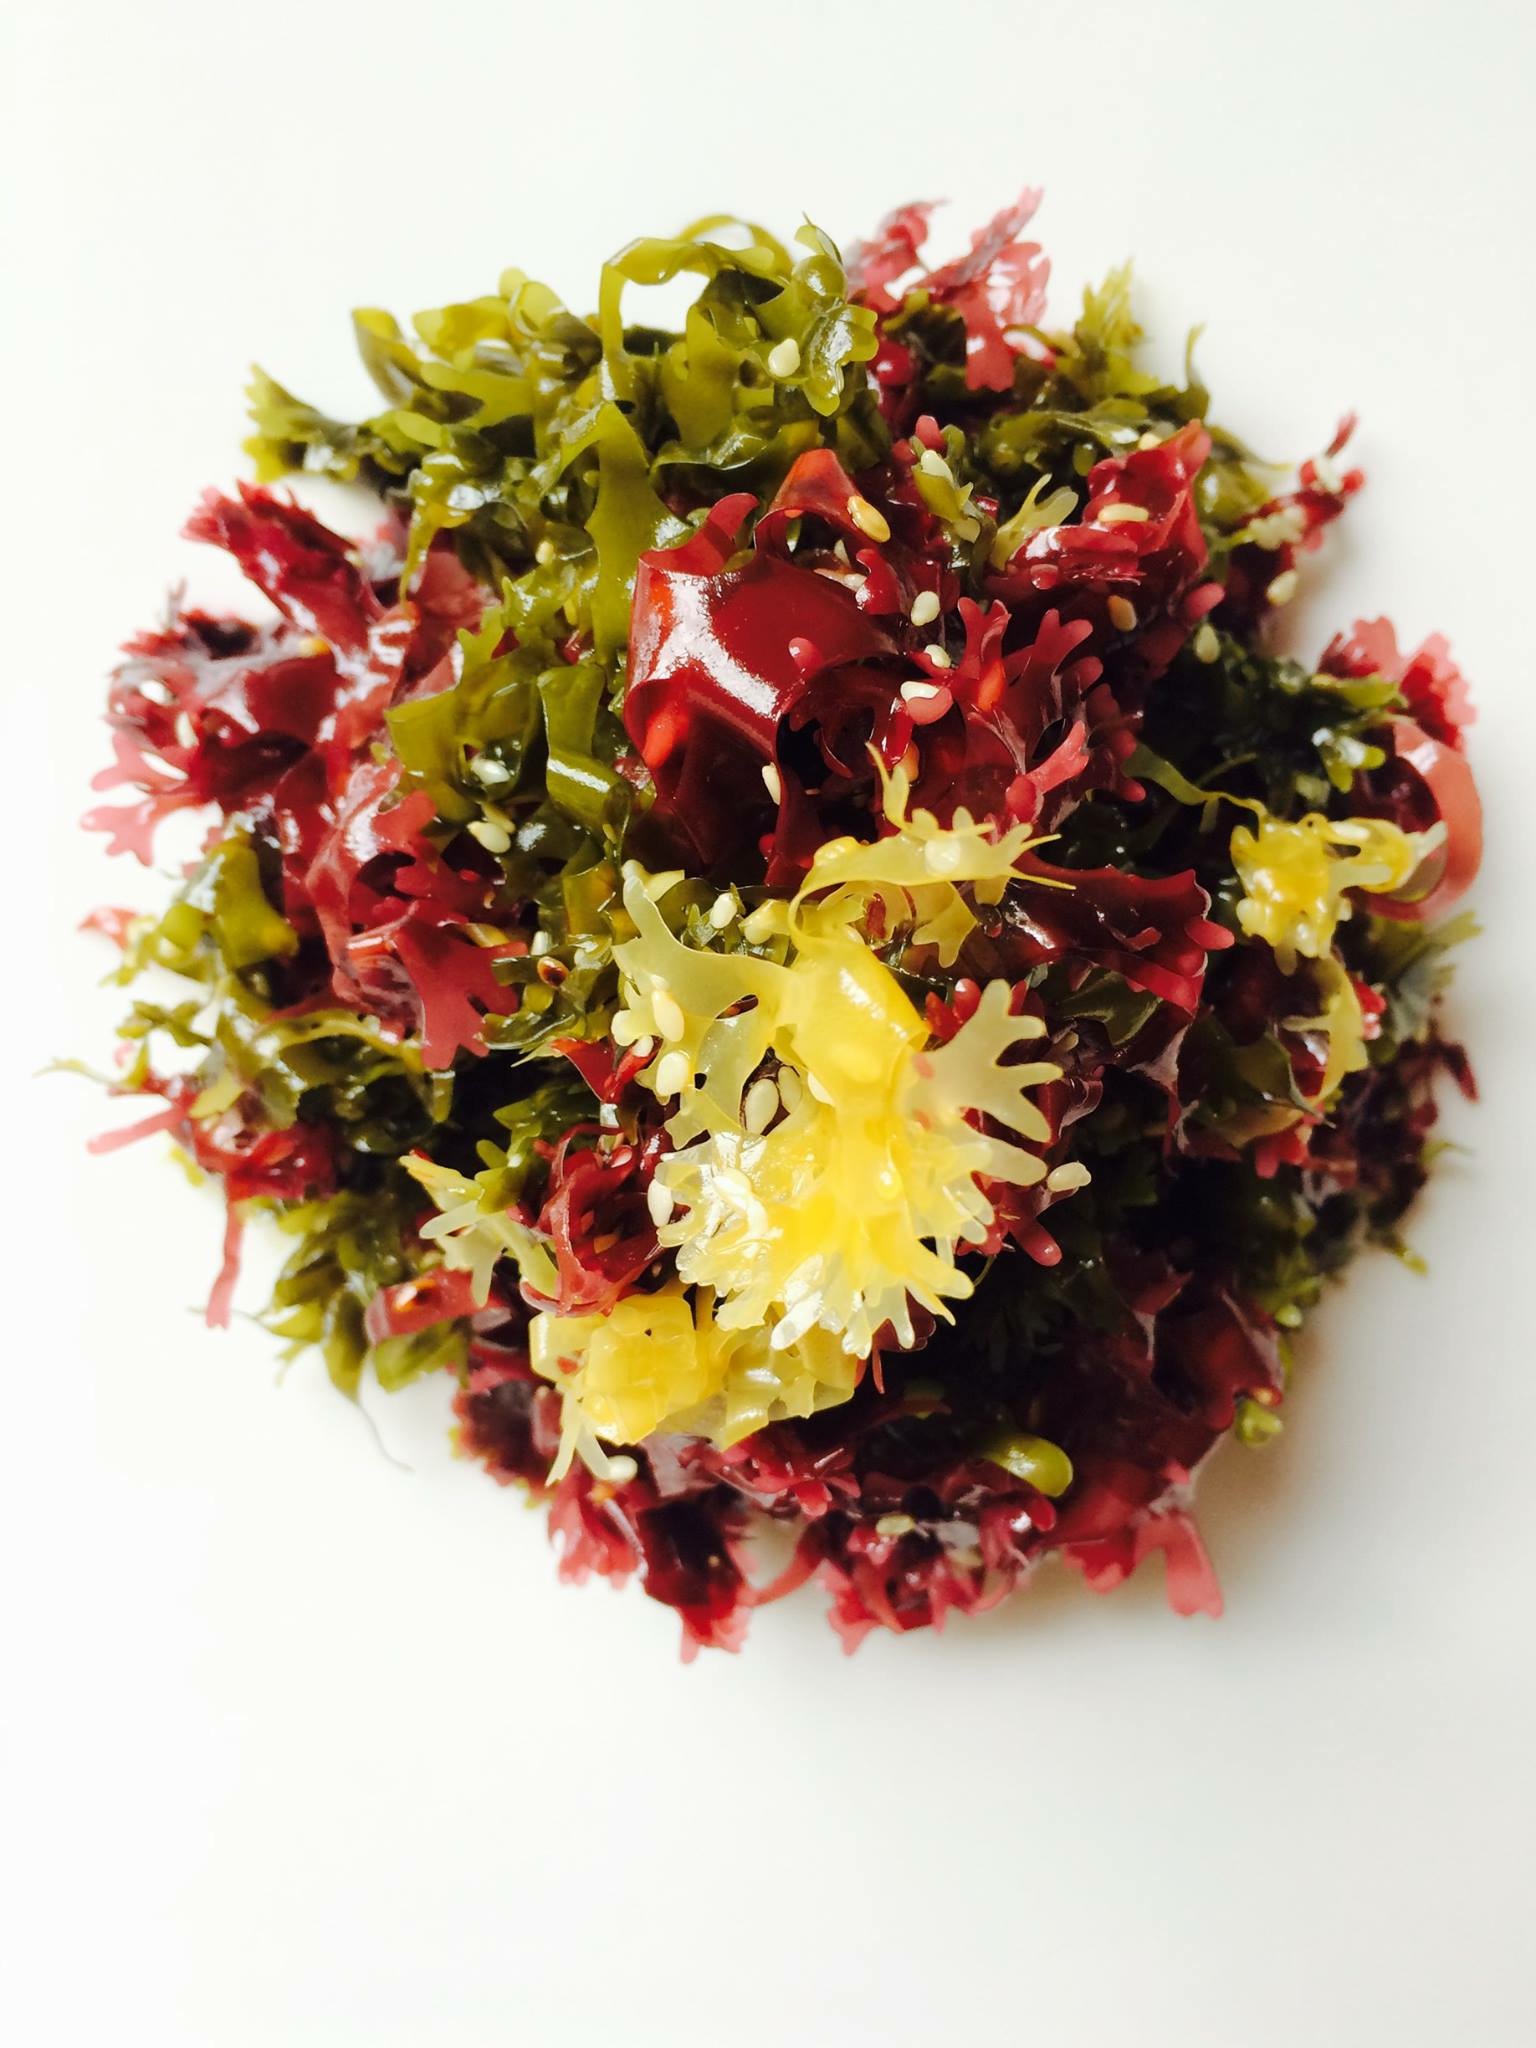
Seaweed Salad + Q&A with Mermaid Fare

If you didn’t already know, I’m a huge fan of sea vegetables. Growing up in Nova Scotia, I have memories of eating dulse chips with my dad.  My family also hosted Japanese exchange students throughout my childhood. During those years, I remember trying and loving the exotic seaweed-based snacks and learning how to make sushi using nori (a variety of seaweed) with our students. Overtime seaweed salad and sushi were mainstays in my diet, but it wasn’t until I went to culinary school and took a weekend course on seaweed that I truly began appreciated its versatility and vast health benefits.

I recently had the pleasure of meeting somebody who enjoys seaweed just as much as I do (if not more!). When I was home in Nova Scotia this past March, I met Taylor Widrig. As the owner of Halifax-based company Mermaid Fare, she's made an entire career out of sourcing and selling different kinds of seaweeds and creating seaweed food products. She sells seaweed snacks, seaweed salts, and varieties of seaweeds during the summer and fall at the Halifax Seaport Farmers' Market and in select retail locations. She also sources seaweeds for local restaurants and sells many of her products via her online store at www.MermaidFare.com. She's a true sea vegetable aficionado.

Besides running Mermaid Fare, Taylor is also a chef.  She spent the last few winters in the Caribbean living and working on yachts as a private chef. When she's home in Nova Scotia, her other culinary services include seaweed-based cooking lessons and the occasional catering gig (fun fact: she'll actually be working at my wedding this summer).  When she's not selling seaweed or busy cooking, she’s been known to put on a mermaid tail and go swimming in the ocean. Yep, she also moonlights as a mermaid! Clearly, Taylor is one of the most interesting gals around and I'm really excited to share my interview with her.

Read on to learn how her company came to fruition and how she sources the products she uses in her business. She also talks about the benefits, varieties and uses of seaweed, gives us the scoop on carrageenan (which is somewhat of a controversial topic in the natural health world these days) and she even shared one of her most popular recipes.

Amy: Mermaid Fare is such an amazing and unique concept! How did it come to be?
Taylor: Mermaid Fare was created in 2013 after completing Living Light Culinary Institutes’ Raw Culinary Arts program in Northern California. Initially it began as a raw food/vegan culinary education and catering company offering private cooking classes, dinner parties and retreats while actively promoting sea vegetables for health. Six months after starting, I decided I wanted to grow a product line that would benefit others and seaweed was front and center – combining my passion for sea vegetables and healthy snacks.

Amy: Seaweed is a true super food. Can you tell us a bit about the health benefits?
Taylor: Seaweeds, also known as sea vegetables, offer a wide range of nutrients including 56 minerals and trace elements, omega-3 fatty acids, and B vitamins. There are three families of seaweed – green, brown, and red. Kelp is a brown seaweed, Dulse and Irish Moss or Hana Tsunomata belong to the red kingdom, and sea lettuce in the green family. Sea vegetables are a wonderful source of plant based protein and iron, making them a suitable option for vegans, vegetarians and anyone looking to add more nutrients to their diet.

There are many studies being done today on the correlation between seaweed and weight loss, as well as sea vegetables ability to help remove heavy metals from the body while offering immune support after exposure to radiation. Apart from the internal health benefits, seaweeds have been used throughout the ages and in modern times in beauty products for their skin softening and clarifying effects.

Amy: Where do you source your products? What kinds of seaweeds are included in your product line?
Taylor: Mermaid Fare’s sea vegetables are sourced within the Canadian Maritimes. Our wild harvested varieties including wakame, kombu, dulse, and sea lettuce are sourced from the Bay of Fundy where sea vegetables thrive in the cool water and rising tides. Our cultivated variety, Hana Tsunomata is produced by Acadian Seaplants Ltd. in Nova Scotia which uses state of the art on-land aquaculture systems to create a traceable and aesthetically beautiful product. Mermaid Fare’s mission as a company is to promote sustainability, community, and to create quality and trusted products while constantly evolving within the industry.

Taylor in Copenhagen by the "Little Mermaid" statue.

Taylor in Copenhagen by the "Little Mermaid" statue.

Amy: I know you were recently in Copenhagen for the International Seaweed Symposium. You mentioned that carrageenan was the hot topic. I've heard mixed messages and I’m so curious to hear what you’ve learned!
Taylor: Some controversy surrounds ‘carrageenan’, which is extracted from Irish Moss and used widely in the food industry for it’s thickening, gelling, and stabilizing properties. Carrageenan is commonly found in vegetarian and vegan products because it replaces the animal ingredient ‘gelatin’, providing a similar and ethical result.

Carrageenan is a safe food product but has gotten a bad rap over the years due to a negative article that told readers carrageenan contributed to intestinal inflammation. It is suggested the author of this article may have had a bias motive for their research, and once the negative story was told it was hard to sway the public’s perception of the product.  (Amy’s notes: when I was away in West Cork, Ireland, cooking for a yoga retreat, I discovered that carrageenan was used often in cooking, particularly for thickening soups.)

Amy: Can you share a recipe that might appeal to somebody who's new to seaweed? Or maybe give us some tips on how to use seaweed?
Taylor: A super simple seaweed recipe is our signature vegan and gluten free Kaiso Seaweed Salad using Hana Tsunomata (see below for the recipe). Other popular ways to include sea vegetables in the diet is to use brown seaweed like kombu in soup stocks, or to use dried dulse or sea lettuce in place of salt sprinkled on soups, salads, sandwiches, etc.


MERMAID FARE'S KAISO SEAWEED SALAD

Ingredients:

15g Hana Tsunomata (approximately 1 cup)
1 tablespoons maple syrup
1 tablespoon rice vinegar
2 tablespoons gluten free tamari
2 teaspoons sesame oil
1/4 cup toasted sesame seeds

Directions:

Rehydrate Hana Tsunomata in room temperature water for ten minutes. Drain, and shake or pat dry excess water.

Whisk together wet ingredients, pour over seaweed and mix well. Stir in toasted sesame seeds. Let the salad marinate for a minimum of 20 minutes before serving.

Stays fresh for up to one week in the refrigerator. Freezes well.

Want more Mermaid Fare? Visit Taylor's website or follow her on Facebook, Instagram and Twitter.

Watermelon Mint Salad

If you follow me on Facebook or Instagram, you might have seen some posts about the cooking lessons or food demos I've been doing at Loblaws. I've been given an amazing opportunity to work for Canada's biggest grocer to cook and teach people about healthy food. I feel very fortunate for the opportunity, particularly because I've been meeting so many interesting and health-conscious people while on the job.

I also like that this sort of cooking gig presents an element of challenge and creativity. A few days prior to my cooking demos, the manager of the cooking school sends me an email indicating which food (or foods) she'd like me to use. I love this because it gives me the opportunity to seek out or come up with new recipes each time I'm doing a demo. In the past I've been asked to feature quinoa, hemp, black-eye peas, eggplant, bell peppers, zucchini and so on.

Most recently, I was asked to use watermelon. I had lots of ideas and considered making a gazpacho, salsa or possibly a smoothie, but after skimming over a few recipes online, I decided to go with a simple and refreshing watermelon and mint salad with some lime, cayenne and sea salt. The day of my demo it was hot, hot, hot and humid. It was probably the hottest day so far this year.  Needless to say, the salad was very well received!

This weekend I'm out in Westport (about an hour from Ottawa) and enjoying a few days in the woods near the Upper Rideau Lake. It's a hot, summery day here and I made this salad again today.  Watermelon is excellent for summer because it's a very refreshing food due to its water content (~92% water). It's also highly nutritious. It's a very good source of vitamin C and contains B vitamins, potassium, copper and magnesium.

Try it out and let me know what you think. The full recipe is below!

WATERMELON MINT SALAD

Makes 8 to 10 (1 cup) servings (depending on the size of the watermelon)

Ingredients:

1 large watermelon cut into ~1 inch chunks
1 - 2 limes, juiced
Pinch or two of cayenne pepper (optional, but recommended)
1 handful of fresh mint leaves, torn into small pieces (or 1 tablespoon dry mint)
Sea Salt

Directions:

In a large bowl, toss the watermelon with the lime juice and cayenne. Fold in the mint leaves, season with salt. Taste it and adjust the flavour by adding more sea salt or cayenne if necessary, and then serve immediately.

If you plan to make this ahead, the cubed watermelon can be refrigerated overnight. Add in the other ingredients just before serving.  The salad will keep for a few days, but is best served fresh.

Inspired by Matt Neal's recipe in Food & Wine.

The Best Zucchini Brownies

I've been making these brownies for a while now. I think I originally came across this recipe on Ambitious Kitchen, but modified it a bit to suit my liking. This recipe produces brownies that are chocolatey, ooey, gooey, chewy, and oh so good! They are also vegan, gluten free, nut free, low sugar, and high in fibre. They've been tried and tested on picky eaters and kids, only to receive rave reviews all round. Plus, many of the ingredients in this recipe can easily be swapped or modified. Scroll to the very bottom to see my suggestions.

These are the kind of brownies that don't need much introduction. Rather I'll just post a gratuitous close up photo of one that I ate yesterday afternoon. Scroll down for the recipes. I hope you'll enjoy these brownies as much as I do.

ZUCCHINI BROWNIES

Ingredients:

1/2 cup tahini
1/4 cup maple syrup
1/2 cup unsweetened natural applesauce or 1/2 cup mashed ripe bananas
2 teaspoons of vanilla
1/2 cup unsweetened cocoa powder
3/4 cup, oat flour (store bought or make your own, see instructions below)
1 teaspoon baking soda
1/4 teaspoon sea salt
1 1/2 cups grated/shredded zucchini (approximately 2 zucchinis) 
3/4 cup dark chocolate chips (dairy free - I use Camino brand)

Instructions:

Preheat oven to 350 degrees F.  Grease a loaf pan or 8 x 8 baking pan with coconut oil.

In a large bowl whip together tahini, apple sauce,  maple syrup and vanilla until smooth. Add in zucchini, cocoa powder, oat flour, baking soda, and sea salt. Mix until well combined. Gently fold in 1/2 cup of chocolate chips. Pour batter into prepared baking pan or loaf ban and sprinkle remaining chocolate chips over the top. Bake for approximately 40 minutes.  Enjoy!

Notes from the Kitchen:
-
To make your own oat flour, place rolled oats in blender or food processor and process until they are finely ground (flour consistency).
-I’ve used spelt and whole wheat flour in the place of oat flour with great results.
-I’ve swapped zucchini with grated summer squash in equal measure and that worked perfectly.
-If you prefer very low sugar recipes, you can even swap in unsweetened chocolate chips. I’ve used Camino brand’s unsweetened chocolate chips and really enjoyed the brownies even with less sweetness.
-Finally, I’ve swapped tahini with peanut butter and that worked fantastically as well. You could really use any natural nut or seed butter for this recipe.


Chili Roasted Chickpeas

Did you know that 2016 has been designated International Year of Pulses by the UN’s Food and Agriculture Organization? In case you are not yet familiar with pulses, they are part of the legume family and include chickpeas, beans, lentils and split peas. These dry, edible seeds are distinguished from other legumes (such a soy beans and peanuts) due to their low fat content. Humble pulses are often overlooked, forgotten and left to collect dust in the back of your cupboard (am I right?). However, due to their many benefits, pulses shouldn’t be an afterthought. Instead, they should play a vital role in your diet.

Pulses are highly nutritious, loaded with vitamins and minerals including iron, zinc, folate and other B vitamins. They are high in protein and fiber and they can help balance blood sugar and support weight management. Consuming pulses regularly will help reduce cholesterol (LDL in particular) and prevent cardiovascular disease. Pulses are good for Mother Nature too! They are a sustainable form of agriculture and promote biodiversity.  They are also delicious and incredibly inexpensive.  A fun fact for you: Canada is the world’s leading exporter of lentils.

To bring awareness to this unassuming family of super foods, the Canada Agriculture and Food Museum invited me to come teach a class in their beautiful kitchen facilities at the Experimental Farms. Last week, along with my amazing sous chef/future husband Jeremy, I facilitated a fun, food-filled Power Pulse Workshop. I spoke about the health benefits, the many varieties,  the environmental impacts, how to incorporate them in to dishes, and the cooking methods.  {Click on the images below to enlarge them}

I brought along multiple jars of beans, lentils, and split peas, and one jar of sprouted lentils, to showcase their diversity and versatility.  Of course, the most important part of the workshop was the food! We prepared 5 recipes: a white bean and parsley dip, black bean mango salsa, split pea soup, chocolate peanut butter and red lentil brownies, and chili roasted chickpeas. The recipe for the roasted chickpeas is below.

It was a fantastic evening! I think it's safe to say that everybody learned a few things and really enjoyed the food. Thanks to the Museum for hosting and coordinating this event and to Tom Alfoldi for the photography.

CHILI ROASTED CHICKPEAS

Ingredients:

2 cans of chickpeas, drained and rinsed (or 3.5 cups cooked chickpeas)
2 tablespoons olive oil
2 tablespoons chili powder
1/2 teaspoon sea salt

Directions:

Preheat your oven to 400°F. Combine all of the ingredients in a bowl, making sure the chickpeas are evenly coated. Spread the chickpeas out on a parchment lined baking sheet and then put them in the oven. Stir the chickpeas around every 8 to 10 minutes and keep roasting them until they are crispy. This will take about 25 minutes. Enjoy immediately as a snack or top them onto soups or salads.  Enjoy!

Cocao Energy Bites

Last week, I joined Andrea Robertson of Body and Balance and lululemon for a fantastic community event that combined so many of my favourite things: great people, Gatineau Park, snowshoeing, yoga and food! The event, Snowshoe, Soulfood, & Savasana, was something that Andrea had been dreaming up for a while and she was finally able to bring it together with a little help from lululemon and some of my hearty, healthy cooking. 

About 30 of us met at the entrance to Gatineau Park in Old Chelsea just as the sun was setting. We strapped on our snowshoes and, as a group, we hiked about 4 km through the snowy paths to Heritage cabin. In the cabin, we warmed up by the fire and enjoyed a candlelit dinner of veggie chili with avocado, cashew & cilantro cream and cocao bites (made by me!). After dinner, I spoke to the group about food and immunity and shared some tips on how to maintain a strong immune system during the winter months. Andrea also led the group through a fantastic yoga class, which was much needed as we prepared to make the trek back to the parking lot. This was such a fun and memorable evening, I look forward to similar events in the near future. Stay tuned!

Since the cocoa bites were such a hit, I’ve decided to share the recipe. As you’ll see, this is a “choose your own adventure” style recipe. Play around with it to create your favourite version. Lately I’ve been using sunflower butter and omitting the chocolate chips altogether, sticking with cocao nibs for a lower sugar option and they taste fantastic. The full recipe is below.

COCAO ENERGY BITES

Makes approximately 40 balls.

Ingredients :

  • 3 cups nut butter (sunflower, cashew, smooth almond or peanut butter)

  • 2/3 cup maple syrup

  • ¼ cup cocao powder

  • 1 cup dried cranberries (Amy’s tip: choose juice sweetened cranberries for a healthier, lower sugar option)

  • 1 ½ cup desiccated unsweetened coconut

  • 1 cup mini dairy free chocolate chips (reduced sugar options: 1/2 cup cocao nibs & 1/2 cup chocolate chips OR 1 cup cocao nibs)

  • 2 tablespoons chia seeds

  • 1 teaspoon cinnamon

  • 1 or 2 big pinches of sea salt

Directions:

Stir together the nut butter and maple syrup. Once well combined,  mix the rest of the ingredients together (reserving ¾ cup coconut) until it is sticky and you can form balls. I use a heaping tablespoon of the nut butter mixture and roll it into balls in the reserved coconut to create a nice even coating (see the photo below). Place the balls in an airtight container and transfer to the refrigerator where they can be stored for up to 2 weeks.  You can also store the balls in the freezer for up to 2 months.  Enjoy!

Amy Approved 4-Layer Dip

When it comes to watching sports and rooting for teams, I'm usually a band wagon jumper.  I will forgo an entire season of [insert sport] only to watch the very last game. This is not to say that I'm not sporty or that I don't like sports (because I am and I do), but I'd much rather play a sport, then be a spectator. As for being a bandwagon jumper, I should probably clarify a bit. When it comes to watching the playoffs or Super Bowls or final whatevers, I generally don't pay much attention to the game, instead, I've always been much more interested in the food, the beer, and socializing with friends.  

Over the past decade my diet has changed a lot, and I have finally surrendered to food allergies. When I find myself at a party, I tend to pick over the spread for foods I can actually eat (which in certain cases can be limited to none).  There is really nothing that breaks my heart more than being left out when it comes to food. To avoid disappointment, I always try to show up with foods that I can enjoy, but I go the extra mile to show my fellow party goers that game-time grub needn't contain chemicals, artificial flavours, ridiculous amounts of sodium, mystery meats,  and all that other horrible stuff that tastes good, but feels really bad after the fact. I love to show people that spectator snacks can be really, really delicious without any of the adverse side effects. 

This past weekend, I brought my 4-layer dip and a bag of organic corn chips to a friend's party. After trying a few bites and loving it, one of the guys said it tasted like a "burrito on a chip".  Little did he know that this "burrito on a chip" was loaded with healthy proteins and fats, fiber and chock full of nutrients. A healthy, delicious layered dip that tastes like a bite-sized burrito? Yep. Dreams do come true!

The full recipe for the dip is below. You'll want to allot about an hour or so to make and assemble since there's a bit of chopping, mixing and blending involved. I promise you, it'll be worth it.

"BURRITO ON A CHIP" 4-LAYER DIP

Vegan - Gluten Free

Refried Beans

Ingredients:

1 Tablespoon, olive oil
1/2 red onion, diced
3 cloves, garlic, minced
2 hot peppers (jalapeño or serrano), seeded & minced
1 teaspoon, ground cumin
1/2 teaspoon, dried oregano
1/2 teaspoon, chili powder
3 cups, cooked/canned beans of your choice (I like pinto beans) 
1 bay leaf
1 cup, water
1 teaspoon, sea salt
Freshly ground black pepper to taste

Directions: 

On your stove top, warm the oil in a saucepan or skillet on medium heat.  Add the onion and a big pinch of sea salt. Give it a stir and allow the onions to cook for a minute or two.  Add garlic and hot pepper. Cook for about 7 to 10 minutes to sweat the onions.  Sprinkle in the spices and cook for another 30 seconds. 

Stir in the beans, bay leaf and water and bring the mixture up to a boil.  Reduce heat and simmer for 15 to 20 minutes, or until at least half of the water has been absorbed. 

Remove and discard the bay leaf.  Using a potato masher or hand blender,  mash and the blend beans until they become a thick paste consistency.  If the mixture is very dry, add some water, a few tablespoons at a time, until desired consistency is reached.  Set aside to cool. 

Cashew Cream Sauce

Ingredients:

2 cups, raw cashews, soaked for a few hours and rinsed
1/4 to 1/2 cups, water
2 Tablespoons, lemon juice
2 Tablespoons, nutritional yeast
1 Tablespoon, onion powder
1/2 teaspoon,  sea salt

Directions: 

Starting with 1/4 water and the remaining ingredients, blend everything in a high powered blender, stopping from time to time to scrape down the sides with a spatula, until smooth.  If the consistency is too thick, slowly add more water to loosen.  

Guacamole

Ingredients:

3 - 4 ripe avocados, peeled and chopped
1 - 2 limes (1/2 lemon), juiced
1/4 bunch, cilantro, roughly chopped
A few big pinches of sea salt & freshly ground black pepper to taste

Directions:

Combine all ingredients and mix well.

Pico de Gallo (Salsa)

Ingredients:

1 pint, cherry or grape tomatoes, quartered
2-3 limes (or 1 lemon), juiced
1/2 red onion, small dice
3/4 bunch, cilantro, roughly chopped
1 jalapeño, seeded & minced
1 bunch, green onions, roughly chopped
1 -2 cloves, garlic, minced
A few pinches of sea salt & freshly ground black pepper to taste

Directions: 

Combine all ingredients and mix well.

To Assemble the Layered Dip

Once the refried beans have cooled off a bit, spread them evenly at the bottom of an 8 x 8 casserole dish.  Then spread an even layer of the cashew cream sauce on top. Next up, add the guacamole in an even layer, and last but not least, add the pico de gallo over top. If you don't have a large casserole dish, simply portion out the layers in to several smaller dishes or jars. Enjoy immediately with organic corn chips, cut up veggies, pita chips, or by the spoonful!

If you have leftovers of the individual components, you can re-purpose them into a healthy salad by adding some leafy greens, or make wraps using fresh collard leaves or whole grain tortillas.  The ingredients can be stored in the fridge for up to 1 week. 

Beautiful, colourful whole foods. Nothin' better than this.

Beautiful, colourful whole foods. Nothin' better than this.

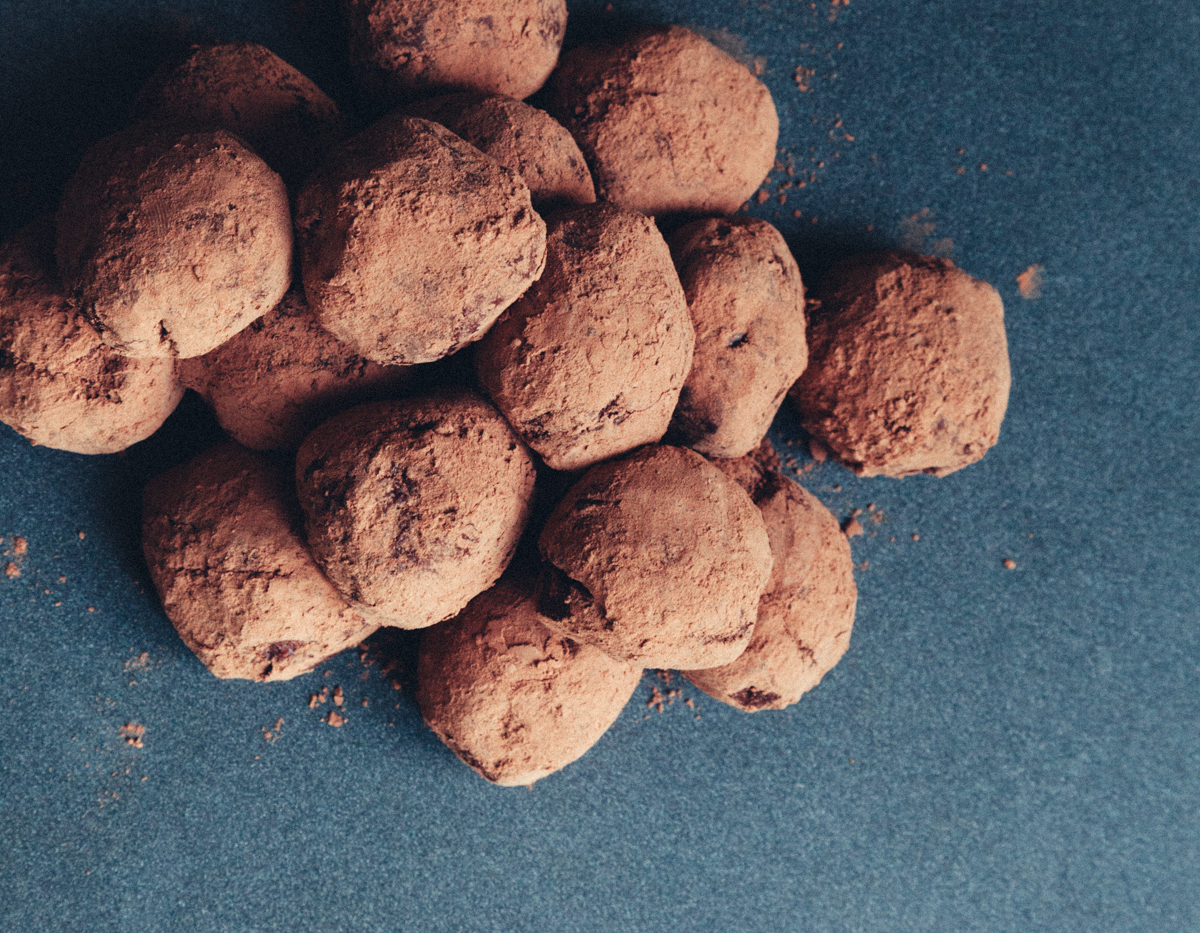
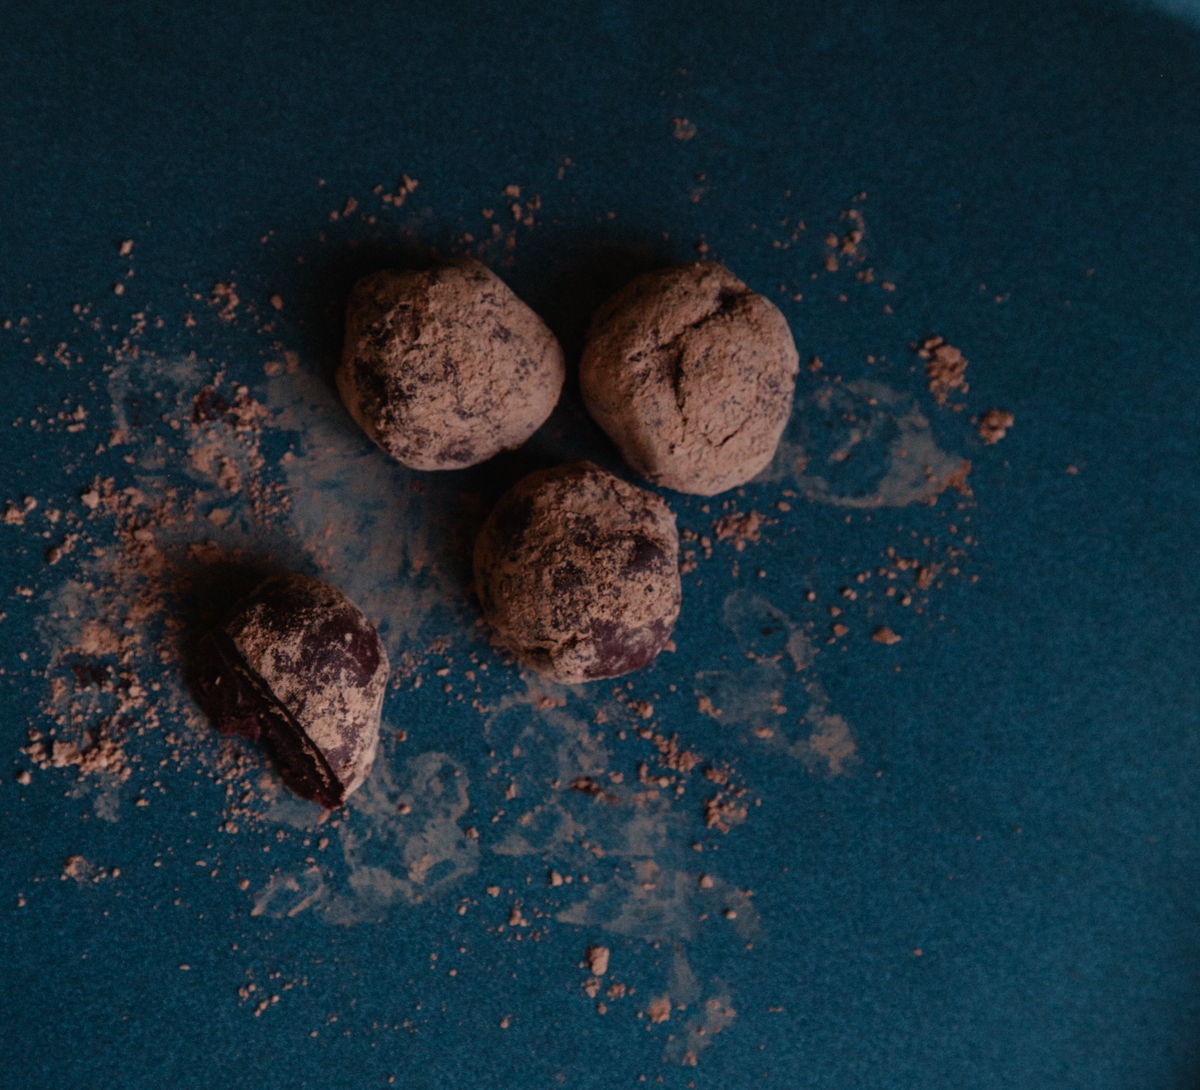
Chili Chocolate Truffles

Since my last few recipe posts have been savoury soups, today I decided to switch things up by sharing something sweet. Although I don't have much of a sweet tooth myself, I really, really enjoy chocolate truffles. These truffles in particular are rich, creamy, and bitter (but not too bitter), with a pop of spice. I've made them on many occasions and they've always been very well received. They are dairy free, gluten free, and the perfect dessert for you upcoming holiday parties.

See below for a few beautiful photos (courtesy of my friend Caroline of CY-iwander) and the full recipe.

CHILI CHOCOLATE TRUFFLES

Vegan - Gluten Free - Makes about 20 - 25 truffles

Ingredients:

1/2 cup, full fat coconut milk
1 tablespoon, vanilla extract
1 cup, organic dairy-free semi-sweet chocolate chips (I like Camino brand)
2 - 3 tablespoons, cocoa powder
1 teaspoon, cinnamon
1/2 teaspoon, ground ginger
1/8 teaspoon, cayenne
A big pinch of sea salt

Directions:

In a saucepan combine coconut milk and vanilla extract and bring to a boil over medium heat. Reduce heat to a low. Simmer for about 5 minutes to allow the liquid to evaporate.

Remove the saucepan from the heat and add chocolate, spices and salt, stirring with a fork or whisking until the chocolate has melted and the mixture is evenly combined.

Transfer the mixture to a bowl and chill in the freezer for about 1 hour, or until the mixture is firm enough to shape into balls.  At this point, you'll want to add the cocoa powder to another bowl. Then scoop out about a tablespoon of the mixture and roll it into a truffle ball. Transfer the truffle in to the cocoa powder and roll it around to coat the exterior. Repeat this process until you have used up all of the mixture. Transfer the truffles to a baking sheet lined with parchment paper and refrigerate to set completely.

Storage: place the truffles in an airtight container in the refrigerator, where they will keep about 3 weeks, or in the freezer, where they will keep for about two months.

This recipe is inspired by Ottawa chef Caroline Ishii's trademark truffles from her restaurant Zen Kitchen, which is sadly now closed. 

Hearty Leek, Lentil & Leafy Green Soup

If you follow my blog, you might have noticed my affinity for lentils. I really do love them! They are an excellent source of protein, fiber, and complex carbohydrates.  Lentils are incredibly nutrient dense. They contain iron, potassium, magnesium, zinc,  and B vitamins.  They are also a low-glycemic food, meaning lentils do not spike blood sugar. Plus, they're super inexpensive and can be easily adapted into soups, salads, stews, and can be blended into spreads or dips. If you haven't tried lentils yet, what are you waiting for? 

A few weeks ago, I posted a recipe for butternut squash and red lentil soup. This time around, my soup includes hearty and robust brown lentils, loads of leeks and leafy greens.  On cold days, this soup will warm you up, fill you up, and will make your belly very happy. 

Give it a try and let me know what you think. See below for the recipe. 

HEARTY LEEK, LENTIL & LEAFY GREEN SOUP

Ingredients:

  • 2 tablespoons, extra virgin olive oil

  • 3 leeks, ends trimmed (keeping the white and pale green parts), halved lengthwise, thinly sliced

  • 2 carrots, peeled, chopped into bite sized pieces

  • 2 ribs of celery, chopped

  • 3 cloves of garlic, minced

  • 1 tablespoon, cumin

  • 1 tablespoon, herbes de provence (or a spice mixture of your choice including herbs such as savoury, marjoram, rosemary, thyme, and oregano)

  • A pinch or two of red pepper flakes (or more if you want a spicier soup)

  • 3 medium sized potatoes (of your choice), roughly chopped to the size of a dice

  • 1 cup brown or green lentils, picked over and rinsed

  • 1 or 2 bay leaves

  • 6 cups, water

  • 1 28 oz (796 ml) can of diced tomatoes

  • 2 loosely packed cups, leafy greens (I used kale), stems removed, ripped into bite sized pieces

  • Sea salt & freshly ground black pepper

Directions: 

Warm the olive oil in a large pot over medium heat. Add the leeks, carrots and celery with a big pinch of salt.  Stir often, until the vegetables have softened, about 5 minutes. Add the garlic, cumin, herbs de provence and red pepper flakes. Stirring constantly, cook until fragrant, for about 30 seconds.

Add the potatoes, lentils, bay leaves and water. Raise the heat and bring the mixture to a boil, then partially cover the pot and reduce heat to maintain a gentle simmer. Cook for 30 minutes, or until the lentils are tender but still hold their shape. 

At this point, you can add the tomatoes and give the soup a stir. Add the kale, mix well, and cook for a few more minutes. Taste your soup for flavour and season with salt and pepper. Remove the bay leaves, then serve immediately. 

Butternut Squash & Red Lentil Soup

Despite the drastic fluctuations in Ottawa weather and temperatures, it is indeed fall. In my last blog post,  I shared a recipe for hemp and oat pumpkin spice muffins that I made recently while cooking for Jackie Beaudoin's yoga retreat in Lac Pemichangan. These muffins were perfect for the yogis and also very seasonal. Another recipe that everybody really loved was my butternut squash and red lentil soup. This is soup is warming and satiating, thanks to a robust mix of spices and a healthy balance of protein, carbohydrates and fat. 

Butternut squash is readily available this time of year. It's a variety of winter squash and grown is locally here in Ottawa (and throughout the Western hemisphere). It's touted as an antioxidant super star, thanks to its uniquely high percentage of certain carotenoids. Although butternut squash is not a fatty food, it's interesting to note that it contain omega-3 fats in the form of anti-inflammatory alpha-linolenic acid (ALA). Simply put, butternut squash is an incredibly health supportive food, that offers cancer protective properties. Health benefits aside,  it's also delicious and versatile. You can try incorporating butternut squash into stews, soups, spreads, lasagnas, chili, salads, and it can even be added to cakes, brownies and pies.  The seeds are edible too and can be roasted in the same way you would roast pumpkin seeds.

This recipe also includes red lentils, one of my favourite fibrous foods. As you may know, fibre helps with weight management, the body's natural detoxification, gut health and protects against colon cancer. One of the main reasons I love red lentils is that they blend, dissolve and even disappear,  when added to soups and stews. I like to call them "sneaky lentils" because they can be added to cooked dishes and go unnoticed, even by the pickiest eaters. 

Without further ado, please find the recipe below. If you make it, I'd love to hear your feedback. This is one of my favourites, and I'm pretty sure it'll become one of yours too. 

BUTTERNUT SQASH SOUP & RED LENTIL SOUP

Vegan ~ Gluten Free ~ Makes 4 servings

Ingredients: 

1 Tablespoon, coconut oil
1 onion, diced
1 rib of celery, small diced
1 carrot, small diced
1 clove of garlic, minced
1” piece of ginger, peeled and minced
1 cup, red lentils
1 can, coconut milk
4 cups, vegetable stock or water
1 Tablespoon, ground cumin
1 Tablespoon, ground coriander
1 teaspoon, allspice
1 small butternut squash, peeled and diced
1 bunch cilantro stems and leaves, roughly chopped
2 limes, zest and juice
Sea salt & pepper
Chilli flakes or hot sauce, to taste 

Directions: 

In a heavy bottomed pot, melt the coconut oil and add the onion, celery, and carrot and a big pinch of sea salt. Cook for a few minutes until the onions start to become translucent and then add ginger and garlic. Cook for 2-3 minutes. Add the lentils and cook for a minute. Add all the spices and stir for another minute.

Add the stock or water, squash, and half of the chopped cilantro. Simmer over medium heat until the squash is soft and the lentils are cooked. Stir in coconut milk.

Add the lime zest and juice and add the remainder of the cilantro. Season with salt and pepper. Enjoy with a sprinkle of chilli flakes or good dousing of hot sauce and a hearty slice bread. 

Pumpkin Spice Muffins

Last week, I was working as the chef at Jackie Beaudoin's cottage yoga retreat. I love these kind of cooking gigs. They are a great opportunity for me to showcase some of my favourite healthy foods to very receptive and open-minded groups of people. Typically everything I make is vegan, gluten free, super healthy, but also loaded with flavour. I also make a concerted effort to feature as many seasonal and local vegetables as possible.  During the weekend, we ate lots of  root vegetables and squash. I also conjured up a great new recipe featuring one of my fall favourites: pumpkin!

Below, you'll find the recipe for my oat & hemp pumpkin spice muffins. The base for these is oat flour.  Lately, it's been my go-to for baking. I like that it has a bit more fibre than most flours and that I can easily make it myself. If you have a high powered blender or a good food processor at home, you can too!  Simply place rolled oats in a blender or food processor and process until they are finely ground (flour consistency).  I'm also a big fan of hemp hearts. Most people don't realize this, but hemp hearts are grown exclusively in Canada. They are also great source of protein, vitamins, minerals and fibre. They add a nice nutty flavour to the muffins. 

As for the pumpkin purée,  the canned version works, but it's very easy to make your own. Use one small pie pumpkin, cut it in half and remove the seeds (put them aside and you can roast them later for a healthy snack). Rub a little bit of oil on to the inner pieces before placing the halves (skin side up) on a parchment-lined cookie sheet, then bake for 30 minutes at 400 F. Honestly, there's nothing quite like the taste of roasted pumpkin. It's so good! If you have the time, and a pie pumpkin, I recommend this method.

Given that it's Halloween weekend, this recipe is very timely. If you're trying to stay away from candy, but still hoping to satisfy your sweet tooth, I've got you covered! 

OAT & HEMP PUMPKIN SPICE MUFFINS

Vegan ~ Gluten Free ~ Makes 12 large muffins

Ingredients: 

2 1/2 cups oat flour or spelt flour
2/3 – 3/4 cup hemp hearts
2 teaspoon baking powder
1⁄4 teaspoon, sea salt
1 tablespoon pumpkin spice
1 cup pumpkin purée (canned or homemade)
1⁄2 cup, pure maple syrup
3⁄4 cup unsweetened plant-based milk
1 1/2 teaspoon pure vanilla extract
1/3 cup medjool or cooking dates, chopped into small pieces, optional
1/4 cup raw pumpkin seeds or hemp hearts for topping

Directions: 

Preheat oven to 350°F. In a large bowl, combine the dry ingredients, sifting or whisking in the baking powder. Stir through until well combined.

In another bowl, combine pumpkin purée, maple syrup, milk, vanilla, and dates and mix together. Add the wet mixture to the dry mixture, and gently fold and mix through, until well combined (but do not overmix).

Spoon the mixture into a muffin pan lined with cupcake liners (this will fill 12 muffins quite full).  Top with pumpkin seeds. Bake for 21-23 minutes, or until a toothpick inserted in the center comes out clean. Allow them cool completely before trying to remove them from the muffin tray, or they may fall apart.  

Store in an airtight container for up to a week. 

Pumpkin Spice Chia Pudding

Happy Thanksgiving! Like most Canadians, I typically spend this weekend eating lots of foods among family or friends (for me the terms are a pretty much synonymous).  Generally, our plates are full of roasted or steamed root vegetables, peas, sauerkraut (growing up in Nova Scotia it was always Tankcook), mashed potatoes, and turkey (nowadays I swap out the turkey for homemade chickpea patties or a bean-based casserole).  Of course, there always has to be pumpkin, usually a pumpkin pie.  Keeping with the theme of friends, family and pumpkins, I invited my long time friend Heather to contribute one of her fantastic fall recipes. And yes, it includes pumpkin. 

Although Heather's been working in the financial industry for most of her career, she's one of the best home chefs I've had the pleasure of knowing. Her meals are always beautifully plated and full of flavour. Not only is she a great chef, but she's a foodie and is always in the know of food trends. Her trend spotting ability also applies to health products and health foods.  Naturally, we always have lots to talk about. 

As you may remember, I've written about chia in the past, and just to give credit where credit is due, it was actually Heather who first told me about these nutrient dense seeds. Years ago, I remember her talking about chia puddings and to this day, she's still making these puddings and coming up with new and creative recipes. In her post below, Heather shares her recipe for Pumpkin Spice Chia Pudding.  Read on and enjoy!

Guest blogger, Heather

Photo courtesy of Katia Pershin.

Photo courtesy of Katia Pershin.

‘Tis the season: pumpkin spice muffins, pumpkin spice lattes, pumpkin spice everything. For some reason in the fall, I have a tendency to rebel against the pumpkin for a few weeks, but inevitably give in by Thanksgiving weekend. 

I’m a bit of a creature of habit. I actually don’t get bored by eating the same things over and over (and over) again. Lunches and dinners are varied, but my morning always begins with a smoothie, and rarely a day goes by where I don’t have hummus and celery sticks or Mary’s crackers for an afternoon snack. 

One of my habitual morning treats is chia pudding. I tend to make it year round, and I change up the flavours depending on the season. Last week, for the first time, I tried a seasonal autumn version by adding some pumpkin and spice. 

Chia seeds are a superfood that supplies a lot of bang for your buck. They are high in fibre, omega-3 fatty acids, magnesium, and protein. They’re also loaded with antioxidants, and very easy to add to your diet! Pumpkins aren’t so shabby either, with one cup providing well over your recommended daily intake of vitamin A, and like other bright orange vegetables, are full of beta-carotene. Their fibre content keeps you feeling full longer, and they’re high in vitamin C. Don’t throw away the seeds, either—those delicious, snackable pepitas are full of tryptophan, an animo acid that produces serotonin, a mood booster. 

Just one warning about the Pumpkin Spice Chia Pudding: it ain’t pretty. 

unnamed-1.jpg

PUMPKIN SPICE CHIA PUDDING

Makes approximately 6  to 8 servings.  

Ingredients:

3 cups of pumpkin purée
1/3 cup of chia seeds
2 1/2 cups of unsweetened almond milk
1/4 cup pure maple syrup
1 1/2 tablespoons pumpkin pie spice
1 to 2 tablespoons cinnamon

There are two different methods of making this, depending on where your pumpkin purée comes from. I’ve tried it with both canned and roasted pumpkin. 

Roasting your own pumpkin version: 

Use one small pie pumpkin, cut it in half and remove the seeds. Rub a little bit of coconut oil on to the inner pieces before placing the halves (skin side up) on a parchment-lined cookie sheet, then bake for 30 minutes at 400°. 

Once the pumpkin is cooked and cooled, the skin should come off easily. Then place the pumpkin flesh in to a blender or food processor with one cup of the almond milk and blend until smooth. 

In a mason jar or BPA-free plastic container, mix the chia seeds with the remaining almond milk and maple syrup. Then add the purée a cup at a time, and mix well with a wooden spoon, and continue with the recipe below. (This version, in my opinion, is much better tasting than the canned pumpkin version. Don’t forget to reserve the pumpkin seeds for roasting!) 

Canned pumpkin version: 

In a container with a tight-fitting lid, like a mason jar or BPA-free plastic container, mix the chia seeds, almond milk, and maple syrup, and shake until combined. Add the purée a cup at a time, and mix well with a wooden spoon.  (It will be very liquidy, but once the chia seeds start to absorb the almond milk, it will become much thicker.) 

Now that you've combined your purée, chia seeds, almond milk, and maple syrup, add the spices and mix well again. 

Put the jar or plastic container in the fridge overnight. By morning you will have a thick, slightly lumpy, superfood pudding, ready to eat for a healthy breakfast or snack. The seeds don’t break down, but rather expand with liquid, so the texture is reminiscent of tapioca. And like I mentioned above, this recipe would never make the cover of a food magazine; she’s no supermodel. Just remember, it’s what on the inside that counts! 

Healing Turmeric Elixir

It's been a while since I've had the chance to sit down and write a proper blog post. August was a crazy month, but crazy in a good way. I was really busy with HappinessHabits613, working with nutrition clients, teaching cooking lessons at the CAG kid's summer camps, helping plan EPIC Fitness' 3 year anniversary party, and also preparing and menu planning for the Body and Balance yoga retreat in Ireland. 

I'm now back in Ottawa, I arrived on Monday night, and I'm just starting to get back in to the swing of things after a few busy weeks in West Cork. Even though I came home absolutely spent, I'm so thankful that Andrea, the owner of Body and Balance, asked me to be part of this experience again this year. Since it was the second time around, I was ready for the hard work and planning, as well as the physical and mental stamina required to cook for a week strait in a very remote location. I'll admit that I was sleep deprived, on my feet for many hours a day, and often preoccupied with the next meal -- but I had such a fantastic time!  The hard work paid off and all of the dishes turned out well. Everybody was happy with the food and I love that I was able to introduce people to an extremely healthy way of eating, without compromising taste.  

Despite the busyness, I was much more relaxed this year.  It was less stressful since I was more prepared. I also had a lot of help from my two amazing sous chefs, Aoife and Kristen. They were so helpful in the kitchen and, with our combined efforts, I was able to participate in some of the yoga and all of the outings with the participants. 

The retreat HQ was the beautiful Linden House in Glengarrif. However, we spent many days exploring picturesque West Cork by coach, foot and by bike. Our exploits included a 20 km bike ride along the coast to Sheep's Head Way with a blustery trek to the lighthouse at tip of the peninsula; a hike to the historic Three Castles; a warm and sunny beach day at Barleycove;  a quick stop at the Mizen Head signal station; a visit to the Dzogchen Beara Tibetan Buddhist Centre, at which we discovered a donkey sanctuary (definitely a personal highlight); and day trips to Glengarriff Village and Bantry, both of which are lovely costal villages with quaint shops and pubs.  In fact, Bantry is home to one of my favourite shops of all time, Organico. It's a health food store, plus cafe, bakery and eatery, with really awesome (mostly) vegetarian and vegan fare.  If you're ever in the area, please do yourself a favour and try their seaweed salad. It's amazing! 

Before and after the retreat, I also spent time in Cork City. I stayed with Aoife and really enjoyed exploring the city, checking out the pubs, coffee shops, and all of the farmers' markets and health food shops. Rather than elaborate too much, I'll spare you the 1000 words, and share some photos. See below.  

Now that you've had a glimpse into my Ireland adventure, let's talk about the turmeric elixir I alluded to in the blog title. As I mentioned above, I was very busy when I was away. I was run down and I wasn't taking great care of myself. That said, I drank a turmeric elixir almost every day and so did all the participants, and none of us got sick.

Every single ingredient in the turmeric elixir comes with one or many health benefits. If you're curious to know more, just ask google. This drink is basically a glowing yellow mug of healthy goodness, and even with all its healing powers, it's actually very palatable. In fact, all of the participants really looked forward to their daily turmeric drink.  See below for the recipe and prepare yourself for a taste explosion! Try it out and let me know what you think.

IMG_6259.jpg

HEALING TURMERIC ELIXIR

Makes approximate two large mugs of zingy goodness

Ingredients: 

3 cups, water
1/4 teaspoon, turmeric powder or 1 inch fresh turmeric, chopped
1 inch piece fresh ginger, peeled and chopped
1/2 lemon, skin removed, and roughly chopped (no need to remove pith or seeds)
1/2 clove of garlic, peeled, optional
1/2 cup, raw apple cider vinegar
1 heaping tablespoon, raw local honey or maple syrup
2 big pinches of cinnamon
A pinch of black pepper

Directions: 

In a kettle or pot, bring water to a boil. Remove pot or kettle from heat and prepare the remaining ingredients. Add all of the ingredients to a blender (including the hot water) and blend until a smooth consistency is reached (approximately 1 to 2 minutes). Be sure to hold the top of your blender with a dry dish cloth to protect your hand from the steam.  Carefully pour the liquid through a fine metal strainer in to your mug(s). Enjoy immediately and brace yourself for the zing! Option to add a bit more honey or maple syrup, if desired.

Notes from the kitchen: the turmeric will stain your blender. The best way to remove the yellow stain is to give your blender a quick scrub, then leave it sitting out in the sunlight for a few hours. I usually leave mine on the windowsill and the stain is gone by the end of the day. I don't know why or how this work, but in my experience sunlight is the only tried, tested and true method for removing turmeric stains.