Zucchini Garlic Soup
Yesterday morning, I was on Daytime Ottawa to make zucchini garlic soup with hosts Derick Fage and Julie Beun. I love showcasing foods that are both seasonal and local, and this soup definitely fit the bill. Plus, it's very easy to make, requires very few ingredients and very little kitchen equipment.
On the show, I spoke with Derick and Julie about the my role as holistic nutritionist, about teaching cooking lessons to kids, and working as a chef for yoga retreats. We also spoke at length about the many health benefits associated with both zucchini and garlic.
First and foremost, did you know that zucchini is actually a fruit? In the culinary world, it's generally treated as a vegetable, but from a botanical standpoint, it's considered a fruit. Also, were you aware that, like carrots, zucchini can be beneficial for eyesight? Thanks to high contents of the carotenoids lutein and zeaxanthin, zucchini may help protect against age-related macular degeneration (in the retina) and cataracts. Zucchini contains a nice compliment of B-complex vitamins, including folate, B6, B1, B2, B3, and choline, which helps support blood sugar regulation. It also offers vitamin C, magnesium, and Omega-3 fatty acids (found in the seeds) making zucchini a great anti-oxidant and anti-inflammatory food.
Garlic has been highly researched and its health properties are well documented. Garlic is great for heart health, may support iron metabolism and it's also antibacterial and antiviral. Garlic is also incredibly anti-inflammatory and may help protect against cancer. Besides being a true super food, garlic also adds taste, aroma, and complexity of flavour to whatever you're making.
Being on Daytime Ottawa was a really good learning experience for me and it definitely took me out of my comfort zone. I've done many cooking lessons and demonstrations in the past, but never on live television. Even though I had a bit of stage fright, I felt at ease quickly and I really enjoyed chatting with Derick and Julie. In fact, we got so carried away talking, that we weren't even able to finish cooking. Luckily, I came prepared with a batch of readymade soup and both hosts were able to give it a try. They were impressed by how rich, creamy and flavourful it was.
You can find the full recipe below. If you plan on making this soup, please don't peel your zucchini as most of the anti-oxidant properties are found in the skin. I hope you'll give it a try and let me know what you think.
ZUCCHINI GARLIC SOUP
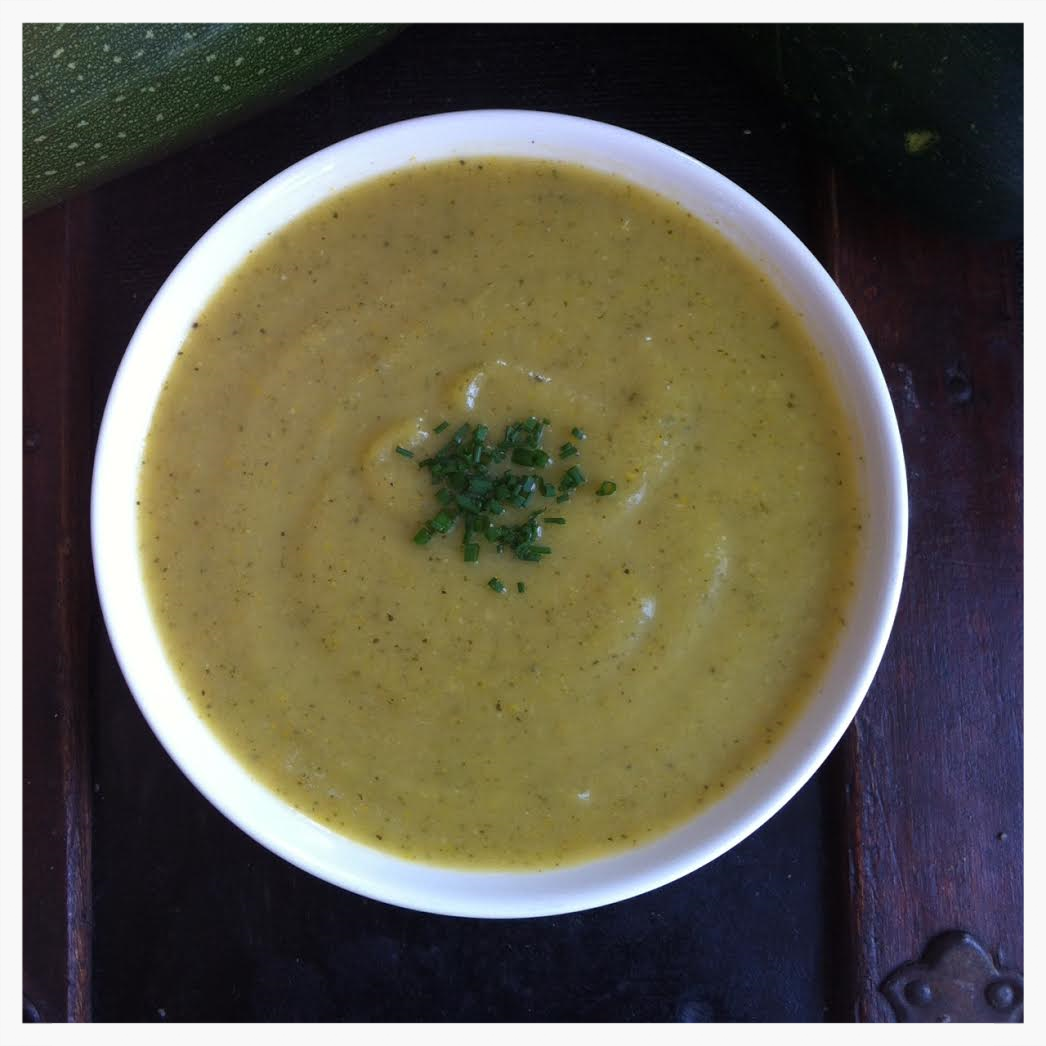
Even without dairy, this soup is incredibly rich and creamy.
Makes 8 to 10 servings.
Ingredients:
4 tablespoons, extra virgin olive oil
1 yellow onion, sliced
8 to 9, large cloves garlic, sliced thinly
1 tablespoon, fresh ginger, finely minced or grated
4 medium zucchini, chopped into small pieces
4 cups, organic vegetable broth
Sea salt and freshly ground pepper
Handful of chives, chopped, for garnish
Directions:
Warm the olive olive in a large pot over medium heat. Add the onions and garlic, with a big pinch of sea salt, and cook on medium-low heat for about 10 minutes. Keep the heat low as you want to sweat, not brown or caramelize, the onions and garlic.
Once the onions have softened and become translucent, add the zucchini and ginger. Increase the heat just a bit, cook with the lid on but slightly ajar, stirring every few minutes. After about 10 minutes or once the zucchinis have softened and released a lot of liquid, add the broth and bring to a simmer. Simmer at a low heat for about 45 minutes to bring out the flavours.
Either blend your soup with an immersion blender until it’s smooth and creamy, or transfer to a high powered blender. If you’re using a blender, you may want to transfer in batches. Fill the blender half full, and hold the lid down tightly with a towel, and blend until you’ve reached a smooth consistency.
Taste and season your soup with salt and pepper. Serve immediately and garnish with chives.
This soup was inspired by Faith Durand’s recipe featured on The Kitchn.

Daytime Ottawa hosts, Derick and Julie, and I showing off a colourful array of zucchinis from Roots Down Organic Farm.