Roasted Acorn Squash & Apple Soup

I'm sure you've noticed that winter squash is abundant these days at both grocery stores and farmers' market. As we begin to bid farewell to Fall, I'd say it's time to start compiling warming recipes and making soups and stews. 

The soup recipe below is inspired by the Minimalist Baker's simple pumpkin soup, but I've changed things up a bit by adding roasted acorn squash, apple, onion and garlic, rather than pumpkin puree. The changes gives the soup a nice depth of flavour and also subtle natural sweetness from the roasted veggies and apples. In the Minimalist Baker's recipe, she also includes a kale "topping" for the soup. I loved this idea and have come up with a variation in my recipe as well. It's optional, but definitely recommended as it adds a nice pop of colour, flavour, and texture to the dish. 

I love cooking with winter squash. Many people write squash off because it's thought to be too starchy, but surprisingly it has a whole lot of nutritional value. In the case of acorn squash, it's a great source of beta carotene (the precursor to vitamin A) and vitamin C.  It's also rich in fiber. So yes, this is a healthy soup, but it's easy to make and delicious. The combination of roasted vegetables, apples, coconut milk and spices, paired with the bitter and garlickly kale topper, gives this soup complex and rich flavour.  Try it out and let me know what you think.

ROASTED ACORN SQUASH & APPLE SOUP + KALE & HEMP TOPPER

Makes 4 servings

Soup Ingredients:

Extra virgin olive oil
2 acorn squashes
2 small yellow onions, peeled and cut in large dice
3 cloves garlic, peeled
2 apples, peeled, cored and cut into bit sized pieces
2 cups low sodium organic vegetable broth
1 cup full fat coconut milk
1/4 teaspoon each sea salt, black pepper, cinnamon, nutmeg

Kale & Hemp Topper ingredients (optional):

1 bunch of kale, stems removed, ripped or chopped into bite sized pieces
3 cloves garlic, minced
1 tablespoon extra virgin olive oil
A few pinches of salt

Directions:

Preheat oven to 400 F and line 1 or 2 baking sheets with parchment paper. Using a sharp knife cut the acorn squashes in half. Use a spoon to scrape out all of the seeds and strings (reserve the seeds if you plan on roasting them later). 

Rub a bit of olive oil on to the flesh of the squash and place face down (skin side up) on the baking sheet. Place the onions, apples, and garlic on a baking sheet as well and drizzle them with a bit of olive oil. Bake for 40 minutes or until a fork easily pierces the skin of the acorn squash.

Remove the baking trays from the oven. Once the squash has cooled enough to handle, scrape out the flesh (it should be soft and easy to remove) and transfer it to a bowl. Discard the skin.  [*If you have a Vitamix or other high powered blender, scroll down for alternate instructions] Then add the squash, apples, onions, and garlic, along with all of the other soup ingredients to a sauce pan. Bring it to a simmer.

To puree the soup, you can either transfer it to a blender, food processor or use an immersion blender. If using a blender, place a towel over the top to avoid spilling. Once the soup has reached a nice, smooth consistency, pour the mixture back into pot. Continue cooking over medium-low heat for a few minutes to reheat and taste and adjust seasonings as needed. Serve immediately on its own or with Kale & Hemp topper.

Kale & Hemp Topper:

Warm the olive olive over medium heat in a small skillet. Add garlic and sauté for a few minutes until golden brown (be sure to watch the garlic closely as it will burn quickly). Add kale and toss, then add a few pinches of salt and cover to steam. Cook for another few minutes until kale is wilted and then add in the hemp hearts. Mix it up to ensure the kale is lightly coated with hemp and garlic, and set aside for topping soup.

*If you have a Vitamix or other high powered blender, you can skip a few of the aforementioned steps. After you're done roasting the squash, apples, onions and garlic, you can really simplify the process. Add the roasted squash puree, along with the roasted apples, onions and garlic, and all of the remaining soup ingredients to your Vitamix. Process the soup using a high setting - or the cooking setting - and you can blend and heat your soup at the same time.  This will only take about 6 minutes and save you the trouble of transferring the soup and will reduce the amount of dishes you have to clean.
Chickpeas?! Yes, Please! Q&A With Restaurant Owner Omer Abdallah.

As soon as it opened in August, there was a ton of buzz around one of Ottawa's newest restaurants, Chickpeas. Aptly named, chickpeas are featured in pretty much all of the Middle Eastern-inspired dishes at the restaurant. The menu is entirely plant-based and focuses on fresh, organic ingredients, offers many gluten free options, and practically everything is made in-house.  In fact, to avoid using canned chickpeas, the owner soaks an upward of 30,000 dry chickpeas each night in preparation for the next day's service. Knowing all this and hearing that Chickpeas has a great selection of hummus and falafel (two of my favourite things!), and I couldn't wait to try it out! 

 I went to Chickpeas a few weeks ago with a couple friends. We were all pleasantly surprised as soon as we walked in the door.  The modern décor, natural light, and friendly staff gave us a great vibe right from the get go. We ordered the hummus plate to share (which featured a small sampling of six unique varieties of hummus) and we each ordered the Fawaffle (the falafel waffle).  Our meals were colourful, flavourful and nicely plated.  We all loved the Fawaffle and appreciated that the food didn't feel too heavy or greasy. Special mention goes to the mango hummus. It was my favourite from the platter.  I would have liked to try more items off the menu, the salads and the falafel wraps looked really tempting, but I was stuffed!  I'll definitely be going back again.

Chickpeas is located in the Trainyards.  This part of town isn't exactly a foodie destination, but I have no doubt that Chickpeas will become a fixture to those of you who live, work, or shop in the area. Chickpeas could compare price-wise to some fast food restaurants (like its neighbour Subway),  but the overall experience and food quality vastly sets it apart from other establishments in the same price range.

The owner, Omer Abdallah, has clearly put a lot thought and heart into the concept, and he is definitely committed to providing his customers with fresh, whole foods. I had the opportunity to interview him and below he shares more about himself, his restaurant, the secret to great hummus, and his plans for the future.

Amy: Congrats on opening Chickpeas. I absolutely love the concept. What was your motivation or inspiration for starting a restaurant focused on chickpeas?
Omer: I’ve always been passionate about food - ever since I can remember. It started with loving to eat food at first, then I fell in love with making it. My journey with chickpeas began when I was growing up. My family and I would eat falafel and hummus in the Middle-East all the time - it was a family tradition. I guess you can say it was much more than chickpeas to me, it created a special bond between my family and I. When I decided to open a restaurant, I knew it had to be related to chickpeas! I wanted to take ancient chickpea recipes and add a modern Western twist to it. As a result, I came up with a menu that, in my opinion, you can't find anywhere else.  

Amy: I know you have very high standards when it comes to food quality and food preparation. Can you tell us a bit about that?
Omer: We are a scratch kitchen, meaning we make everything in-house. Canned food is against my policy. As a result, none of my food has any chemicals, preservatives, or additives!  There is no secret ingredient; it's just real food! The chickpeas that I make all my dishes from are organic which contributes enormously to the quality of my food.  

Amy: Your hummus is amazing.  Any tips of the trade that you can share with us?
Omer: Peel your chickpeas! It makes a world of a difference. (Amy's edit: to clarify, after soaking and boiling chickpeas, Omer peels off the outer layer, or "skin", of the chickpeas. It makes for smoother hummus.)

Amy: What have been the most poplar items off your menu?
Omer: The Fawaffle, mango hummus (since it's my own creation and no one else makes it in the world), and the falafels have been a big hit given that we cook them fresh on the spot.

Amy: I know you just opened in August, but are there any exciting plans on the horizon for Chickpeas?
Omer: We plan to focus on our first location for now. But in the near future, we would like to open a few more locations across the city and eventually  across the country. If we ever became a multinational restaurant, we will always be proud to be Canadian.

Chickpeas is located at 500 Terminal Avenue, Unit A-05, in Trainyards, across from Walmart and next to Subway. You can also find Chickpeas on Facebook, Instagram, and Twitter

Chickpea's Fawaffle topped with tahini, fresh parsley, tomatoes, and paired with pickled peppers. Pure genius!

Chickpea's Fawaffle topped with tahini, fresh parsley, tomatoes, and paired with pickled peppers. Pure genius!

Buddha Bowls with Tahini Dressing

I make Buddha Bowls a lot. Almost weekly. I make them for myself, for cooking demos and they are almost mandatory when I'm cooking at yoga retreats. They are always a hit! Everybody loves them. Plus, they are a great way to get rid of scraps of food that are still in the fridge.

The best thing about Buddha Bowls is that you can cater yours to your liking. There really is no set in stone recipe. However, the key is definitely to have a really, really great dressing. Below, I've shared the recipe for one of my favourite dressings, but you could choose to top your bowl with whichever dressing you like.

Most recently I was cooking for a yoga retreat organized by Anne Tessier near Tremblant, Quebec.  Below is a photo of the Buddha Bowl I prepared for the yogis. It had wild rice, chickpeas, grated raw beets and carrots, avocado, thinly sliced kale, roasted delicata squash, green onions, kimchi, peashoots, black sesame seeds, and my all time favourite tahini dressing.  And yes, it's as delicious as it looks! But no, it's not complicated at all. It's just a matter of chopping up a bunch of delicious things and throwing them into a bowl, and then pouring a really decadent (yet nutritious) dressing on top. Scroll down for my Buddha Bowl "recipe".

Let's get started! Here's what you'll need to make your own Buddha Bowl...

Base ingredients:

Your choice of cooked grains (quinoa, buckwheat, millet, brown rice, wild rice, sorghum, teff or amaranth)
Your choice of protein (beans, lentils, chickpeas, edamame, tofu, tempeh, etc)

Plus any combo of veggies:

steamed or roasted sweet potato, squash, or potatoes cut into bite sized pieces
broccoli or cauliflower (cut in tiny florets), steamed, roasted or raw
finely chopped greens (kale, romaine, arugula, spinach, etc)
thinly sliced cabbage
onion or scallions
grated carrot
grated raw beets or cooked/steamed beets
cucumber, cut up into small pieces
chopped celery
sliced avocados
sauerkraut or kimchi

Plus garnish options:

sprouts or pea shoots
sunflower seeds
hemp seeds
sesame seeds
dulse or kelp flakes (or any other seaweed for that matter)
ground flax seeds

Plus a dressing of your choice OR my all time favourite tahini dressing:

1/2 cups tahini (sesame paste)
1/2 cups olive oil
1/2 cups water
1/4 cup tamari
2 tablespoons apple cider vinegar
2 tablespoons lemon juice
Small piece (half thumb size) fresh ginger root, minced
2 cloves garlic, chopped
Black pepper to taste

Directions: Blend all the ingredients in a blender until smooth. Add water to loosen if it’s too thick. Dressing will keep in the fridge for 1 week.

Finally, to assemble your Buddha Bowl:

Combine 1/4 cup cooked grains and 1/4 cup protein of your choice, along with any combination of vegetables and garnishes. Drizzle about 1/4 cup of dressing on top. Serve immediately and enjoy!

You can also batch prepare your Buddha Bowls by storing single servings in containers. Reserve your dressing and add it just before you're about to eat.

If you enjoyed the recipe I shared above be sure to check out my Plant-Based Breakthrough program, which is a crash course in plant-based health, nutrition, and meal planning. For details about the program click here. You can also join the Plant-Based Breakthrough Community on Facebook where I share recipes, inspiration, and information on plant-based nutrition.

Wedding Photos: A Sneak Peek...

Jeremy and I have been married for just over a week now and we've been reminiscing and reliving our beautiful wedding day via these photos.  Our wedding was at my parents' cottage in Lower Lahave, Nova Scotia, and it was a very much a do-it-yourself style celebration that came together with a lot of hard work and effort by us and our fantastic and talented family and friends. With very little time and a whole lot of teamwork, our collective efforts paid off! Our wedding truly reflected us and our personalities, we threw a fun-filled and memorable party, and we had the most amazing day with 130 of our favourite people and pets (yes, Gimley, our dog was there, and even my parents' dog Jake!). Some of the photos below were taken at our hotel, the Spinnaker Inn, in Lunenburg. Others were taken on the Lunenburg waterfront, at my parents' cottage, and at Oxner's Beach in Lower Lahave.

Big thanks to our friend and super talented photographer Anne-Marie Bouchard of AMBphoto for capturing these magical moments and sharing a few of her favourite shots. We expect to receive the entire package of photos in the next month or so (oh, the anticipation!).  I also plan on writing a blog post with more details about how it all came to fruition. Stay tuned for more on both fronts, but in the meantime, I'm so happy to share a small glimpse into our wedding day with you. Enjoy!

Power Pasta Salad

This recipe is actually my mom's creation so I can't take full credit for its deliciousness. She originally devised this concoction because it was cheap, filling and it did not spoil easily on road trips. During my childhood, we used to travel a lot during the summer, across the Atlantic Provinces, for soccer tournaments and Power Pasta became a family favourite. Back then I believe my mom used store bought Italian salad dressing and probably didn't include as many greens, but she was definitely a pioneer when it came to utilizing pulses as an efficient, inexpensive source of protein and healthy carbohydrates. This pasta salad kept her sporty children happy and satiated (without breaking the bank).

As I mentioned, I've made some of my own modifications, but at the heart of this recipe it's simple, filling, and nutrient dense. It's a great meal for active kids, but also for us adults who are looking for easy make-ahead lunch or dinner ideas. 

I haven't had a chance to take a super high quality photo, but I wanted to share this recipe now as I've had many requests.  Power Pasta is gluten free and vegan and can be modified many ways to suit your palate. If you don't like some of the ingredients, omit them, and add in other vegetables or proteins of your choice. Read on for the recipe and be sure report back once you've tried it.

POWER PASTA SALAD

Makes 8-10 servings.

Ingredients:

16 oz/454 g bag brown rice or quinoa spiral or elbow noodles, cooked according to package directions
2 398 ml cans of chickpeas or beans of your choice, drained and rinsed
1 can of water packed artichokes, drained, rinsed and roughly chopped
5 cups leafy greens of your choice (I like baby kale, spinach, or arugula), washed and chopped
1 large cucumber, peeled (if not organic) and chopped into bite-sized pieces
1 pint of grape or cherry tomatoes, sliced in half
1/2 cup of pitted kalamata olives, roughly chopped (optional)
1 bunch of green onions, chopped

Dressing Ingredients:

1/2 cup red wine vinegar
3 Tablespoons lemon juice
1 Tablespoon of maple syrup
1 Tablespoon Dijon mustard
2 teaspoons, sea salt
Freshly ground black pepper
1 small clove of garlic (optional)
1 cup extra virgin olive oil

Directions:

Add all of the salad ingredients into a very large bowl and mix well to combine.

For the salad dressing: blend the vinegar, lemon juice, maple syrup, Dijon, salt, pepper, and garlic (if using) in a blender. With the machine running, gradually blend in the oil. Once the dressing is ready, slowly pour it over the pasta salad. Stir to ensure that the noodles are well coated.  Serve immediately and enjoy!

Keeps in the fridge for 3 to 4 days, if you don't eat it all first.

Notes from the kitchen: At my Loblaws demo I used Rizopia brown rice noodles and they were great!

Super Simple Summer Slaw

I went on a shopping spree this weekend and spent all my money... at the Farmers' Market! This is the only kind of shopping I like and I happily lugged home a massive haul of fresh vegetables thanks to the good people at Hoople Creek Farm, Roots Down Organic Farm and Waratah Downs Organic Farm. I picked up green cabbage, kohlrabi, zucchini, summer squash,  patty pan squash, cucumber, fennel, and a bunch of bell peppers. Besides having all of these veggies to work with, I also have a fridge full of kale and beet greens (thanks to my soon-to-be father-in-law).  We have lots of cooking and eating to do this week, but I think we can handle it.

Last night, I made a huge pot of red lentil marinara (in which I used many of the veggies listed above) and served it on zucchini noodles, and today I was craving something fresh and light so opted to make a slaw. The recipe below is one of my favourites and I've enjoyed many versions of it, as have my nutrition clients.  This recipe should ultimately serve as a base for you and you can tweak it to your liking.

This time around I used kohlrabi, green cabbage, fennel bulb and fronds, and carrots because that's what I had on hand. However, adding in some grated apples, and opting for dill instead of fennel, will give it a different, but equally delicious flavour profile. Even going with red cabbage, instead of green, will offer a variation in taste and nutrients.  There are so many options!

This is definitely a choose-your-own-adventure style of slaw that you can serve as an appetizer, side dish, snack, or even as filler in sandwiches or wraps. It's very versatile and very nutritious. Try it out and let me know what you think!

SUPER SIMPLE SUMMER SLAW

Ingredients:

1 medium, kohlrabi, peeled and cut into matchsticks, or grated
1/4 head, cabbage (green or red), thinly sliced or shredded
1 small fennel bulb, thinly sliced or grated, optional
1 apple, peeled and grated, optional for a sweeter slaw
1 carrot, peeled and grated
1/4 cup, fennel fronds or fresh dill, roughly chopped
3 Tablespoons, extra virgin olive oil
1/2 lemon, juiced
1 small clove, garlic, finely minced
1 teaspoon, Dijon mustard
Sea salt and freshly ground pepper

Directions:

Add the slaw ingredients to a large mixing bowl. Toss until well combined.

In a measuring cup or small mixing bowl, whisk together the rest of the ingredients (olive oil, lemon juice, garlic, Dijon mustard and a few big pinches of salt and pepper). Whisk until you have a nice, even consistency.

Pour the dressing over the slaw ingredients and then toss until the dressing is evenly distributed. Taste your slaw and season with a bit more salt and pepper, if necessary.  Once you’re happy with the flavour, serve immediately and enjoy! This slaw will keep in the fridge for up to 5 days.

Notes from the kitchen: You can use a box grater or slice up the vegetables by hand, but for the quickest and most efficient method, I recommend using a food processor. I personally use the grating blade to process carrots, apples, kohlrabi and fennel, and the slicing blade for cabbage.

Seaweed Salad + Q&A with Mermaid Fare

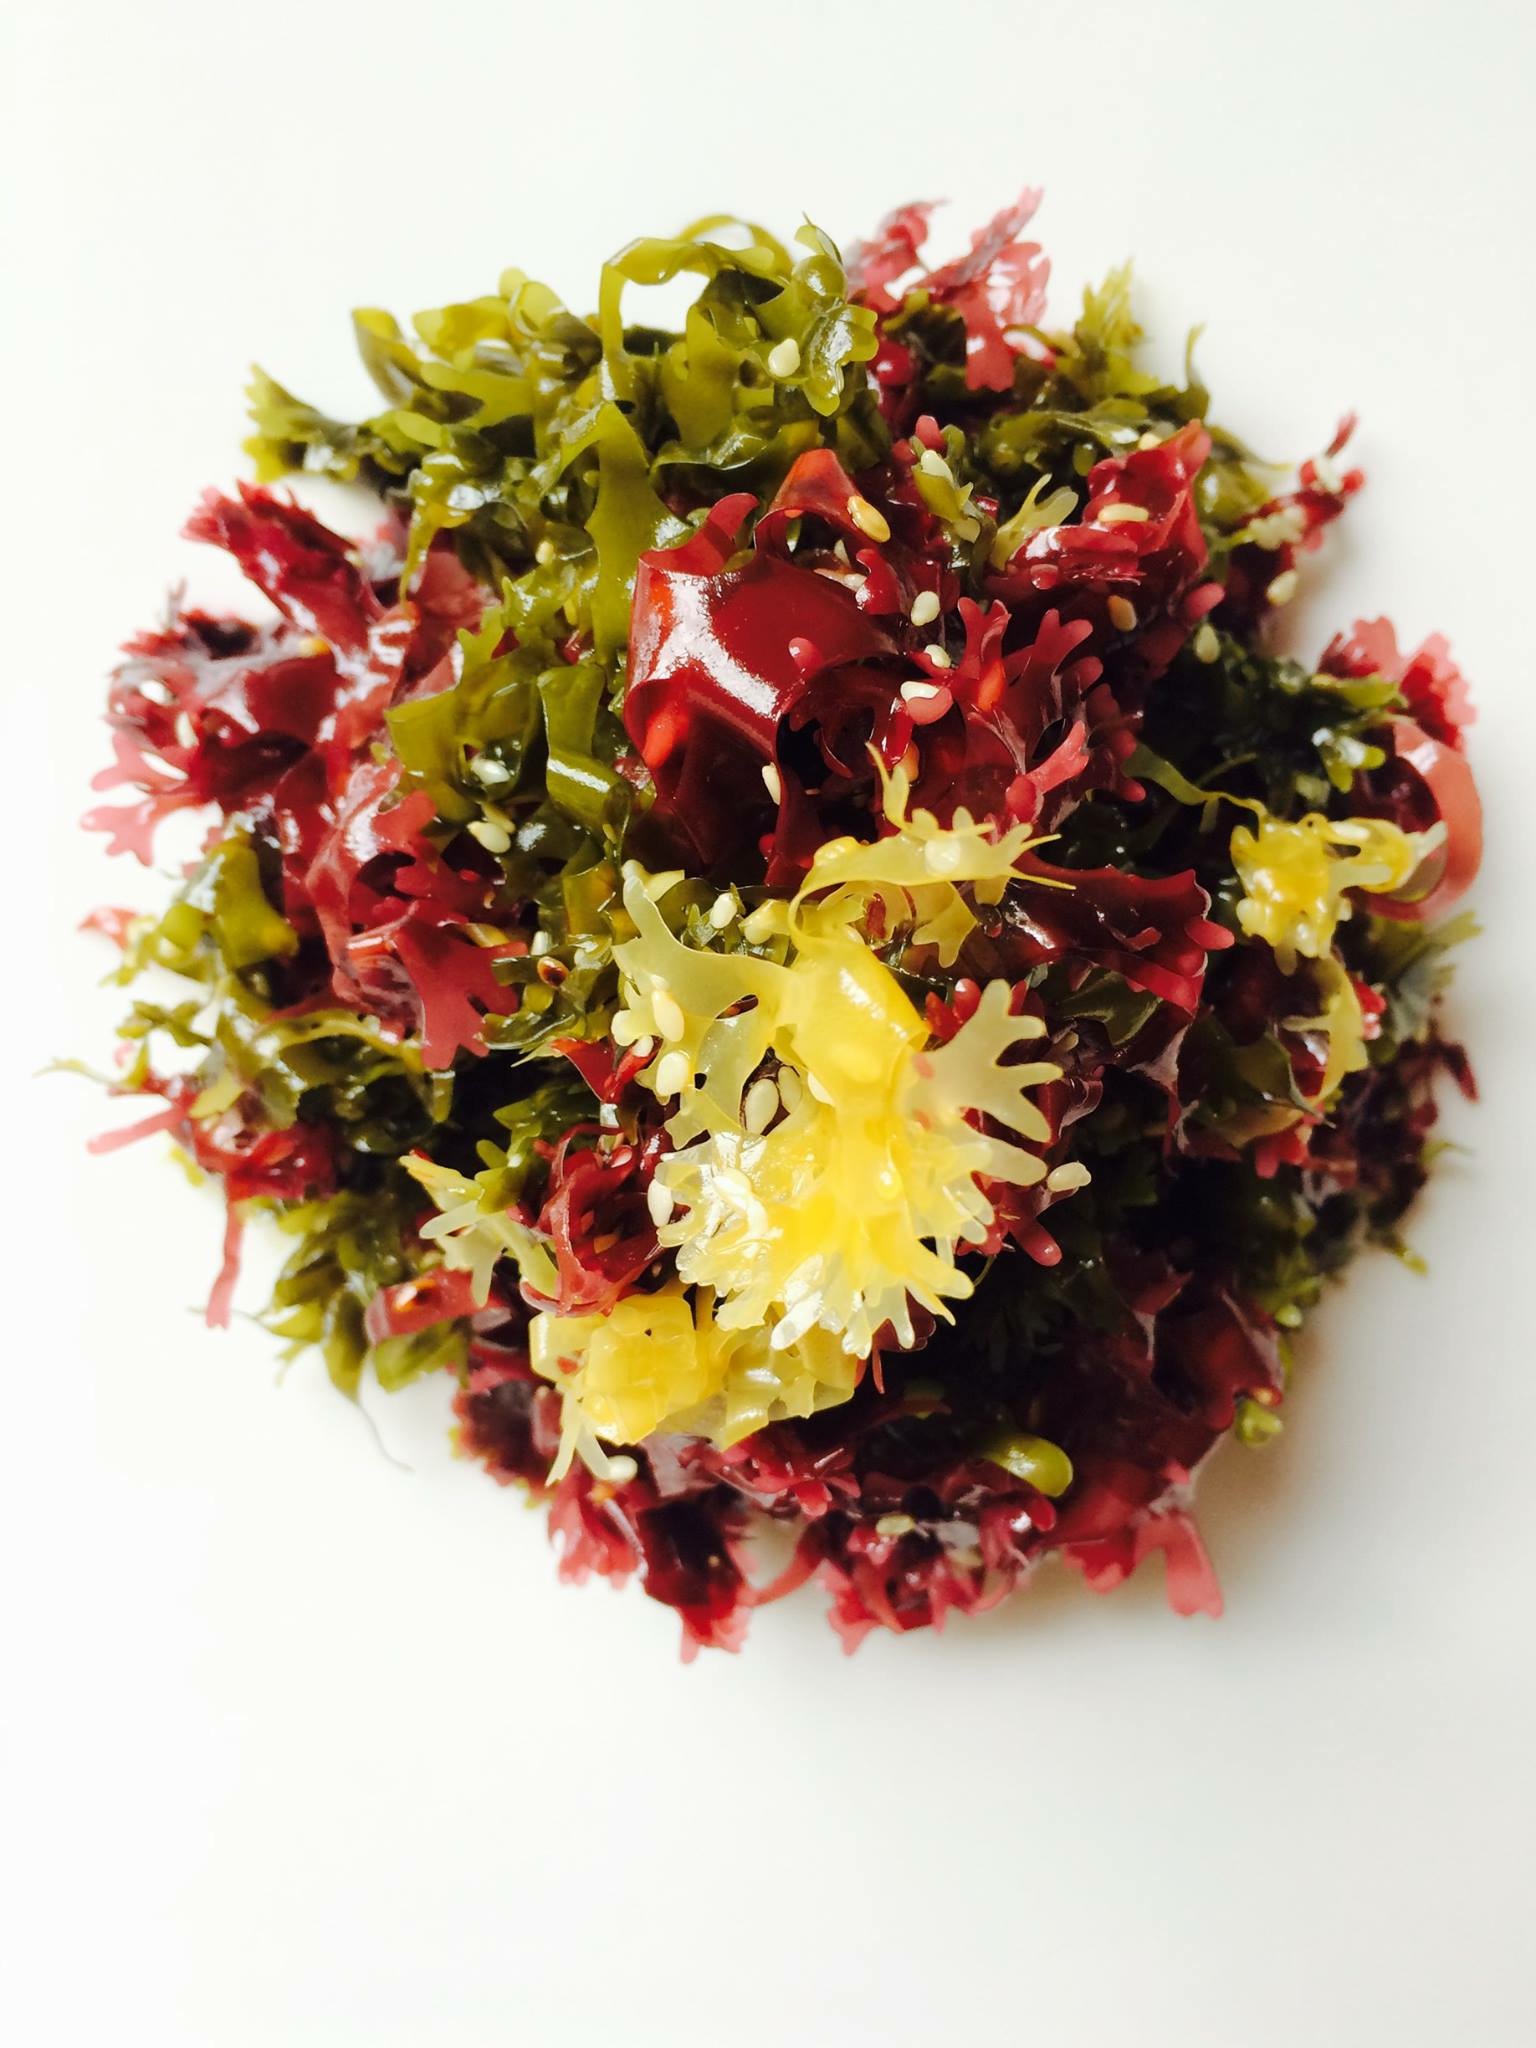
If you didn’t already know, I’m a huge fan of sea vegetables. Growing up in Nova Scotia, I have memories of eating dulse chips with my dad.  My family also hosted Japanese exchange students throughout my childhood. During those years, I remember trying and loving the exotic seaweed-based snacks and learning how to make sushi using nori (a variety of seaweed) with our students. Overtime seaweed salad and sushi were mainstays in my diet, but it wasn’t until I went to culinary school and took a weekend course on seaweed that I truly began appreciated its versatility and vast health benefits.

I recently had the pleasure of meeting somebody who enjoys seaweed just as much as I do (if not more!). When I was home in Nova Scotia this past March, I met Taylor Widrig. As the owner of Halifax-based company Mermaid Fare, she's made an entire career out of sourcing and selling different kinds of seaweeds and creating seaweed food products. She sells seaweed snacks, seaweed salts, and varieties of seaweeds during the summer and fall at the Halifax Seaport Farmers' Market and in select retail locations. She also sources seaweeds for local restaurants and sells many of her products via her online store at www.MermaidFare.com. She's a true sea vegetable aficionado.

Besides running Mermaid Fare, Taylor is also a chef.  She spent the last few winters in the Caribbean living and working on yachts as a private chef. When she's home in Nova Scotia, her other culinary services include seaweed-based cooking lessons and the occasional catering gig (fun fact: she'll actually be working at my wedding this summer).  When she's not selling seaweed or busy cooking, she’s been known to put on a mermaid tail and go swimming in the ocean. Yep, she also moonlights as a mermaid! Clearly, Taylor is one of the most interesting gals around and I'm really excited to share my interview with her.

Read on to learn how her company came to fruition and how she sources the products she uses in her business. She also talks about the benefits, varieties and uses of seaweed, gives us the scoop on carrageenan (which is somewhat of a controversial topic in the natural health world these days) and she even shared one of her most popular recipes.

Amy: Mermaid Fare is such an amazing and unique concept! How did it come to be?
Taylor: Mermaid Fare was created in 2013 after completing Living Light Culinary Institutes’ Raw Culinary Arts program in Northern California. Initially it began as a raw food/vegan culinary education and catering company offering private cooking classes, dinner parties and retreats while actively promoting sea vegetables for health. Six months after starting, I decided I wanted to grow a product line that would benefit others and seaweed was front and center – combining my passion for sea vegetables and healthy snacks.

Amy: Seaweed is a true super food. Can you tell us a bit about the health benefits?
Taylor: Seaweeds, also known as sea vegetables, offer a wide range of nutrients including 56 minerals and trace elements, omega-3 fatty acids, and B vitamins. There are three families of seaweed – green, brown, and red. Kelp is a brown seaweed, Dulse and Irish Moss or Hana Tsunomata belong to the red kingdom, and sea lettuce in the green family. Sea vegetables are a wonderful source of plant based protein and iron, making them a suitable option for vegans, vegetarians and anyone looking to add more nutrients to their diet.

There are many studies being done today on the correlation between seaweed and weight loss, as well as sea vegetables ability to help remove heavy metals from the body while offering immune support after exposure to radiation. Apart from the internal health benefits, seaweeds have been used throughout the ages and in modern times in beauty products for their skin softening and clarifying effects.

Amy: Where do you source your products? What kinds of seaweeds are included in your product line?
Taylor: Mermaid Fare’s sea vegetables are sourced within the Canadian Maritimes. Our wild harvested varieties including wakame, kombu, dulse, and sea lettuce are sourced from the Bay of Fundy where sea vegetables thrive in the cool water and rising tides. Our cultivated variety, Hana Tsunomata is produced by Acadian Seaplants Ltd. in Nova Scotia which uses state of the art on-land aquaculture systems to create a traceable and aesthetically beautiful product. Mermaid Fare’s mission as a company is to promote sustainability, community, and to create quality and trusted products while constantly evolving within the industry.

Taylor in Copenhagen by the "Little Mermaid" statue.

Taylor in Copenhagen by the "Little Mermaid" statue.

Amy: I know you were recently in Copenhagen for the International Seaweed Symposium. You mentioned that carrageenan was the hot topic. I've heard mixed messages and I’m so curious to hear what you’ve learned!
Taylor: Some controversy surrounds ‘carrageenan’, which is extracted from Irish Moss and used widely in the food industry for it’s thickening, gelling, and stabilizing properties. Carrageenan is commonly found in vegetarian and vegan products because it replaces the animal ingredient ‘gelatin’, providing a similar and ethical result.

Carrageenan is a safe food product but has gotten a bad rap over the years due to a negative article that told readers carrageenan contributed to intestinal inflammation. It is suggested the author of this article may have had a bias motive for their research, and once the negative story was told it was hard to sway the public’s perception of the product.  (Amy’s notes: when I was away in West Cork, Ireland, cooking for a yoga retreat, I discovered that carrageenan was used often in cooking, particularly for thickening soups.)

Amy: Can you share a recipe that might appeal to somebody who's new to seaweed? Or maybe give us some tips on how to use seaweed?
Taylor: A super simple seaweed recipe is our signature vegan and gluten free Kaiso Seaweed Salad using Hana Tsunomata (see below for the recipe). Other popular ways to include sea vegetables in the diet is to use brown seaweed like kombu in soup stocks, or to use dried dulse or sea lettuce in place of salt sprinkled on soups, salads, sandwiches, etc.


MERMAID FARE'S KAISO SEAWEED SALAD

Ingredients:

15g Hana Tsunomata (approximately 1 cup)
1 tablespoons maple syrup
1 tablespoon rice vinegar
2 tablespoons gluten free tamari
2 teaspoons sesame oil
1/4 cup toasted sesame seeds

Directions:

Rehydrate Hana Tsunomata in room temperature water for ten minutes. Drain, and shake or pat dry excess water.

Whisk together wet ingredients, pour over seaweed and mix well. Stir in toasted sesame seeds. Let the salad marinate for a minimum of 20 minutes before serving.

Stays fresh for up to one week in the refrigerator. Freezes well.

Want more Mermaid Fare? Visit Taylor's website or follow her on Facebook, Instagram and Twitter.

Watermelon Mint Salad

If you follow me on Facebook or Instagram, you might have seen some posts about the cooking lessons or food demos I've been doing at Loblaws. I've been given an amazing opportunity to work for Canada's biggest grocer to cook and teach people about healthy food. I feel very fortunate for the opportunity, particularly because I've been meeting so many interesting and health-conscious people while on the job.

I also like that this sort of cooking gig presents an element of challenge and creativity. A few days prior to my cooking demos, the manager of the cooking school sends me an email indicating which food (or foods) she'd like me to use. I love this because it gives me the opportunity to seek out or come up with new recipes each time I'm doing a demo. In the past I've been asked to feature quinoa, hemp, black-eye peas, eggplant, bell peppers, zucchini and so on.

Most recently, I was asked to use watermelon. I had lots of ideas and considered making a gazpacho, salsa or possibly a smoothie, but after skimming over a few recipes online, I decided to go with a simple and refreshing watermelon and mint salad with some lime, cayenne and sea salt. The day of my demo it was hot, hot, hot and humid. It was probably the hottest day so far this year.  Needless to say, the salad was very well received!

This weekend I'm out in Westport (about an hour from Ottawa) and enjoying a few days in the woods near the Upper Rideau Lake. It's a hot, summery day here and I made this salad again today.  Watermelon is excellent for summer because it's a very refreshing food due to its water content (~92% water). It's also highly nutritious. It's a very good source of vitamin C and contains B vitamins, potassium, copper and magnesium.

Try it out and let me know what you think. The full recipe is below!

WATERMELON MINT SALAD

Makes 8 to 10 (1 cup) servings (depending on the size of the watermelon)

Ingredients:

1 large watermelon cut into ~1 inch chunks
1 - 2 limes, juiced
Pinch or two of cayenne pepper (optional, but recommended)
1 handful of fresh mint leaves, torn into small pieces (or 1 tablespoon dry mint)
Sea Salt

Directions:

In a large bowl, toss the watermelon with the lime juice and cayenne. Fold in the mint leaves, season with salt. Taste it and adjust the flavour by adding more sea salt or cayenne if necessary, and then serve immediately.

If you plan to make this ahead, the cubed watermelon can be refrigerated overnight. Add in the other ingredients just before serving.  The salad will keep for a few days, but is best served fresh.

Inspired by Matt Neal's recipe in Food & Wine.

Ready, Set, Glow is back! Join me starting July 18.

In May, I launched my first group nutrition program, Ready, Set, Glow!, in partnership with my friends at Urban Juice Press here in Ottawa.  The 4-week program was designed to not only help people adopt healthier, more nutritious diets, but to make complimentary lifestyle changes as well.  Through emails, workshops and our private Facebook group, participants learned about meal planing and prep, how to improve digestion and the body's natural ability to detoxify, and they also received tons of new recipes and had the opportunity to try out new foods.

Launching and running Ready, Set, Glow! was a great experience for me. Particularly because I was responsible for pulling together all the recipes each week. I wanted to make sure that I offered meals and snacks that were not only tasty, nutrient dense, and macro-nutrient balanced, but also easy enough that people wouldn't feel intimidated. Since all of my meals were vegan and gluten free, many of the participants were worried that they might not feel full or satiated, but I was happy to hear that most people not only felt satisfied, but their cravings started going away, they noticed increased energy, and they felt "healthier" overall.  It was such a great experience that I'm going to offer the program again this summer!

On a related note, my wedding is fast approaching (just over two months away!) and for that reason I'm even more motivated to run the program again. Mainly because I want to make sure that I'm taking good care of myself. When I say this, I'm not talking about weight loss, but rather I'd like to make sure that I'm eating fantastic food, feeling great, stress free and as rested as possible leading up to the Big Day.  Wedding planning can be overwhelming, especially since both Jeremy and I are running our own businesses, and I want to make sure that this is a fun, memorable time! That said, having glowing skin on my wedding day may be a motivating factor in all of this too! 💁

I already cook at home regularly and eat very well for the most part, but I figured that setting up another round of Ready, Set, Glow! would keep me on track and it'll be beneficial for others as well. I'll be pulling together loads of healthy recipes for myself and focusing on sleep, hydration and stress management... and I'd love to invite others join in on this experience! Although summer can be a busy time with travel and vacations, I think it presents a great opportunity to eat well (thanks to the abundance of local produce), spend time outdoors, connect with nature, and focus on optimal health before Fall rolls around.

If you're interested in signing up for Ready, Set, Glow! you can read more about it and get all the details HERE. I hope you'll join me!

Flotation Therapy: I Tried It, I Liked It.

Growing up in Nova Scotia, I spent my summers swimming in the ocean or the lake near my house.  I could (and did) spend hours upon hours and days up on days swimming. Being immersed in water, floating and weightless, provided a sense of calm for me.   It’s no surprise I was intrigued when I first learned about flotation therapy.

Most recently I decided to try “floating” at ISÖ Spa, Ottawa’s newest flotation therapy centre. As you’ll see in the photos below, it’s impeccably clean with private rooms and state-of-the-art flotation pods.  The aesthetics and cleanliness of ISÖ Spa immediately gave me a good vibe.  Not to mention that the staff and the owners are super friendly and welcoming.

If you’re thinking of trying it out, let me tell you a bit about my first experience at ISÖ Spa. I will admit that despite my open-mindedness and East Coast water-loving upbringing, I was a little bit leery as I entered the private flotation room. Seeing the large coffin-like pod full of water evoked a teeny bit of underlying claustrophobia. Regardless, I decided to take the plunge. I stripped down and hopped into the pod, closed the hatch and settled in for 60 minutes of what I assumed might feel like an eternity.

During the first 10 or 15 minutes of floating, I was a bit restless and couldn’t quiet my mind. After a while, I felt my consciousness drifting somewhere between awake and asleep. I guess you could say I was in a deep state of relaxation for an upwards of 30 to 40 minutes. I was so relaxed, in fact, that I continued floating after my allotted time. I was completely oblivious to the audio prompts (sounds of crashing waves and seagulls) and ultimately I was jolted “awake” (for lack of better words) when the water filtration system turned on.  It took me by surprise because I honestly didn’t expect to feel that relaxed.

I left pod feeling really good, contented and at ease. I also couldn’t believe how quickly time passed and how my initial anxieties were long forgotten. I have tried floating 3 times now and I have to say that it’s been different each time.  I’m sure if you decide to give it a try, your experience could be entirely different than mine.  If you’ve tried floating before, I’d love to hear about your experiences in the comment section below. If you’re just learning about the concept of flotation therapy or if you’d like to learn more, please read on.

I recently spoke with Mika Husband, the co-owner of ISÖ Spa, for some insight on this practice. Below, Mika gives us the full scoop on the mental and physical benefits of this alternative therapy, his experience with floating, and why he left his career in Calgary to launch ISÖ Spa in Ottawa.

Amy: I have been to ISÖ Spa a few times now and really enjoyed the experience. For those who are not familiar with floating, can you explain how it works and what to expect?
Mika: Well it’s a pretty simple concept really. Floating is simply the act of entering into an environment that is devoid of light and sound and lying back in water that is super saturated with Epsom salts. At ISÖ Spa, we use isolation pods to create this environment, whereas other places might build specific float rooms or have tanks in which people float. By closing the lid on one of our pods and shutting off the light, people are able to disconnect from the outside world and simply let their minds and bodies relax.

The Epsom salts create an amazingly buoyant, low gravity environment where clients are able to float effortlessly to help ease pain and fatigue while the lack of any stimuli (no sound or light) allows the brain to slow down and relax. (Amy’s note: if you don’t want to be in complete darkness, you have the option to turn on dim lighting)

That’s pretty much what its all about…it’s the ability to put our phones aside and reconnect with ourselves for a change!

Amy: What are the health benefits of floating?
Mika: For me, the greatest benefit is stress relief. But then that’s just me.

A lot of our clients report having reduced pain and inflammation in their joints, reduced back and muscular pain, and migraine/headache relief. But in reality, I’d say that those are just some of the potential benefits for the body.

Additionally, I think there are a vast array of benefits for the mind. In today’s world, its really hard to get away from the constant barrage of emails and phone calls and just be alone with one’s thoughts. That’s what floating provides…the ability to disconnect and tune out. Some of our clients report a feeling of euphoria, increased clarity of thought, reduced anxiety and just a general feeling of wellbeing.
 
There have been a number of medical studies over the years that back some of these claims as well. Some of the research points to the following potential benefits for the mind: reduced stress/hypertension, improved sleep patterns and reduced fatigue/jetlag, increased mental acuity and clarity of thought, and reduced anxiety/depression.
While other research points to the following potential benefits for the body: chronic pain relief associated with arthritis & fibromyalgia, reduced back/neck pain, improved circulatory function and muscle relaxation and healing.

Amy: What's your favourite part about floating?
Mika: Well first of all, I’d say that everyone has a different experience when they float in one of our pods and that no two floats are the same. It really is a unique and individual experience.
That said, my favourite part about floating is the calmness that it instills in me. I’m naturally a restless person and don’t find it all that easy to just switch off and relax, so floating works wonders for me!

Whether I’ve drifted off to a sleepy state or if I’ve simply been alone the whole time with my thoughts, I always emerge from the pods in a much more relaxed state. I truly don’t know of any other environment or pastime where you can disconnect so completely and just be…its really quite an amazing experience!

Amy: Why did you decide to open ISÖ Spa in Ottawa?
Mika: Well, at about this time last year I was living in Calgary where I used to float quite frequently. I found it helped with some back problems but then also found that it was the perfect way to get away from a pretty high stress industry that I was in.

Then I found myself spending a fair bit of time here last winter and realized that there really wasn’t the same thing available here. So, I got together with a long-time buddy of mine (Jasson Grant) and pitched him on the idea. At first, he was skeptical but then he fell in love with the idea and thought that we could potentially do very well as flotation therapy is becoming more and more mainstream. And that was pretty much the genesis of our business!

You know, we opened ISÖ Spa with a view of running a business, which is natural. But one of the added benefits that we get from it is the ability to chat with our clients and share their experiences in the pods. We’ve had a great time so far in getting to know our clients and see their reactions as they sit and ponder their float sessions. It has really been fun and we look forward to getting to know more and more people in our community!

Amy: Do you have any plans for growth or expansion?
Mika: I’d love to say yes! But for right now, we’re really focussed on getting this store fully going and to spread the word about floatation therapy. Its still a very new concept to Ottawa, so we are doing everything in our power to get the word out to people. Once we do that, then maybe we can look forward to other plans.

If you'd like to learn more about ISÖ Spa you can visit their website, or follow them on Facebook, Twitter, and Instagram.

The Best Zucchini Brownies

I've been making these brownies for a while now. I think I originally came across this recipe on Ambitious Kitchen, but modified it a bit to suit my liking. This recipe produces brownies that are chocolatey, ooey, gooey, chewy, and oh so good! They are also vegan, gluten free, nut free, low sugar, and high in fibre. They've been tried and tested on picky eaters and kids, only to receive rave reviews all round. Plus, many of the ingredients in this recipe can easily be swapped or modified. Scroll to the very bottom to see my suggestions.

These are the kind of brownies that don't need much introduction. Rather I'll just post a gratuitous close up photo of one that I ate yesterday afternoon. Scroll down for the recipes. I hope you'll enjoy these brownies as much as I do.

ZUCCHINI BROWNIES

Ingredients:

1/2 cup tahini
1/4 cup maple syrup
1/2 cup unsweetened natural applesauce or 1/2 cup mashed ripe bananas
2 teaspoons of vanilla
1/2 cup unsweetened cocoa powder
3/4 cup, oat flour (store bought or make your own, see instructions below)
1 teaspoon baking soda
1/4 teaspoon sea salt
1 1/2 cups grated/shredded zucchini (approximately 2 zucchinis) 
3/4 cup dark chocolate chips (dairy free - I use Camino brand)

Instructions:

Preheat oven to 350 degrees F.  Grease a loaf pan or 8 x 8 baking pan with coconut oil.

In a large bowl whip together tahini, apple sauce,  maple syrup and vanilla until smooth. Add in zucchini, cocoa powder, oat flour, baking soda, and sea salt. Mix until well combined. Gently fold in 1/2 cup of chocolate chips. Pour batter into prepared baking pan or loaf ban and sprinkle remaining chocolate chips over the top. Bake for approximately 40 minutes.  Enjoy!

Notes from the Kitchen:
-
To make your own oat flour, place rolled oats in blender or food processor and process until they are finely ground (flour consistency).
-I’ve used spelt and whole wheat flour in the place of oat flour with great results.
-I’ve swapped zucchini with grated summer squash in equal measure and that worked perfectly.
-If you prefer very low sugar recipes, you can even swap in unsweetened chocolate chips. I’ve used Camino brand’s unsweetened chocolate chips and really enjoyed the brownies even with less sweetness.
-Finally, I’ve swapped tahini with peanut butter and that worked fantastically as well. You could really use any natural nut or seed butter for this recipe.


Chili Roasted Chickpeas

Did you know that 2016 has been designated International Year of Pulses by the UN’s Food and Agriculture Organization? In case you are not yet familiar with pulses, they are part of the legume family and include chickpeas, beans, lentils and split peas. These dry, edible seeds are distinguished from other legumes (such a soy beans and peanuts) due to their low fat content. Humble pulses are often overlooked, forgotten and left to collect dust in the back of your cupboard (am I right?). However, due to their many benefits, pulses shouldn’t be an afterthought. Instead, they should play a vital role in your diet.

Pulses are highly nutritious, loaded with vitamins and minerals including iron, zinc, folate and other B vitamins. They are high in protein and fiber and they can help balance blood sugar and support weight management. Consuming pulses regularly will help reduce cholesterol (LDL in particular) and prevent cardiovascular disease. Pulses are good for Mother Nature too! They are a sustainable form of agriculture and promote biodiversity.  They are also delicious and incredibly inexpensive.  A fun fact for you: Canada is the world’s leading exporter of lentils.

To bring awareness to this unassuming family of super foods, the Canada Agriculture and Food Museum invited me to come teach a class in their beautiful kitchen facilities at the Experimental Farms. Last week, along with my amazing sous chef/future husband Jeremy, I facilitated a fun, food-filled Power Pulse Workshop. I spoke about the health benefits, the many varieties,  the environmental impacts, how to incorporate them in to dishes, and the cooking methods.  {Click on the images below to enlarge them}

I brought along multiple jars of beans, lentils, and split peas, and one jar of sprouted lentils, to showcase their diversity and versatility.  Of course, the most important part of the workshop was the food! We prepared 5 recipes: a white bean and parsley dip, black bean mango salsa, split pea soup, chocolate peanut butter and red lentil brownies, and chili roasted chickpeas. The recipe for the roasted chickpeas is below.

It was a fantastic evening! I think it's safe to say that everybody learned a few things and really enjoyed the food. Thanks to the Museum for hosting and coordinating this event and to Tom Alfoldi for the photography.

CHILI ROASTED CHICKPEAS

Ingredients:

2 cans of chickpeas, drained and rinsed (or 3.5 cups cooked chickpeas)
2 tablespoons olive oil
2 tablespoons chili powder
1/2 teaspoon sea salt

Directions:

Preheat your oven to 400°F. Combine all of the ingredients in a bowl, making sure the chickpeas are evenly coated. Spread the chickpeas out on a parchment lined baking sheet and then put them in the oven. Stir the chickpeas around every 8 to 10 minutes and keep roasting them until they are crispy. This will take about 25 minutes. Enjoy immediately as a snack or top them onto soups or salads.  Enjoy!

Simplicity & Eating Well Ottawa

This year my goal has been to simplify things. My plan for 2016 was to make friends with minimalism and embrace efficiency.  During the month of January, after an embarrassingly long stretch of procrastination, Jeremy and I finally purged our disastrous crawlspace of clothes, household items, books, boxes, sports gear, and trinkets that haven’t seen the light of day in years. We’ve also slowly been organizing our kitchen and we plan to tackle other areas of our house step by step.

In last month or so, I’ve been doing a lot of work-related cooking. These jobs usually result in a huge grocery list with specialty items and lots of produce, which means several trips to grocery stores and health food stores. Oh, and lugging around lots and lots of heavy bags of food. As you can imagine, this isn’t very efficient, it’s time consuming and is definitely not in line with my goal for 2016. 

Thankfully, early into the new year I met Brendan Gorman, owner of Eating Well Ottawa. His company is an online grocery delivery service focused on fresh, organic, non-GMO fruits and vegetables, as well as natural products. Customers place their grocery orders online and they can either pick up their groceries or have them delivered. It’s as easy as that! I had heard a lots of great things about Eating Well Ottawa and had known of the company for a while. However, the serendipitous meeting with Brendan and learning more about his company prompted me to give the service a try.  I’ve used Eating Well Ottawa a few times now (for both big and small orders) it has saved me so much time and loads of mileage on my car.  This is an amazing service for people in the Ottawa region. It offers easy access to fresh, organic produce and an array of products that you may or may not find at your local grocery. Plus, the price is very reasonable too!

I could go on and on, but instead, I decided to ask Brendan to tell us more about Eating Well Ottawa, his commitment to local producers, and his plans for expansion. You can read the full interview below.

Amy: Eating Well Ottawa is a fantastic concept. Can you give a quick run-down of how it works?
Brendan: Thanks! Eating Well Ottawa is an online organic produce and healthy grocery delivery service. We have tried to make the entire experience as convenient as possible!

You start by signing up on our website at www.eatingwellottawa.ca. There are a couple of different shopping options. We have pre-designed Harvest Boxes that are filled with a mix of organic fruits and veggies. The variety changes every week and we design these boxes in a way that allows you to try new things and get creative in the kitchen! Recipes come with all of the Harvest Boxes as well so that is a fun feature!

You also have the ability to totally design your own grocery cart from scratch! Simply browse through the grocery categories and build your box! We have a huge selection of organic produce, groceries, meats, dairy and even an in-house artisan bakery!

Amy: What inspired you to start your own organic food delivery service?
Brendan: I went to University in the USA on a soccer scholarship and so I have always attributed my athletic successes to my eating habits. My peak level of performance came when I was eating whole, clean foods! With that being said, I also realized that it is hard for people to buy healthy food at an affordable price… much less organic foods! This lead to the creation of Eating Well Ottawa. I thought hard about creating a system that made eating healthy affordable AND accessible!

Amy: I really love your commitment to working with local producers. Can you tell me a bit about that?
Brendan: We love working with local producers and local farmers! Our motto is Local, Regional, Canada First – meaning we try to source things from local sources before we go anywhere else. In the winter months it is a bit more difficult but during the local season, Eating Well is abundantly sourcing local produce. We also carry local grocery products like raw honey, marinades, meats, you name it! And we are constantly looking to expand our list of local farmers and producers!

Amy: What’s your favourite part about owning and operating Eating Well Ottawa?
Brendan: My favourite part of owning Eating Well Ottawa is the enjoyment we bring to people’s kitchens. A lot of my customers tell me that it is like Christmas every week when their green box of groceries arrives at their doorstep. Not only are we bringing affordable organics and clean foods to people’s homes, we are encouraging creativity in the kitchen and helping people make better choices!
Though shopping for groceries online is definitely a new concept, once customers get their first box, they are hooked!

Amy: Do you have any plans for expansion?
Brendan: We sure do! We are currently undergoing construction on a new and improved website with some fun new features! (I have to keep it a secret until the launch!) We plan to launch the new site by the end of March and are very excited!

We also have plans to do more outreach to our local community and get involved in more community events. The more local producers and farmers we can support, the better.

Lastly, we are working on improving our offerings and variety of products. We want to be a fully functioning online healthy grocery store by the end of 2016!

To learn more about Eating Well Ottawa visit their website, or follow them on Facebook, Twitter, and Instagram.

Cocao Energy Bites

Last week, I joined Andrea Robertson of Body and Balance and lululemon for a fantastic community event that combined so many of my favourite things: great people, Gatineau Park, snowshoeing, yoga and food! The event, Snowshoe, Soulfood, & Savasana, was something that Andrea had been dreaming up for a while and she was finally able to bring it together with a little help from lululemon and some of my hearty, healthy cooking. 

About 30 of us met at the entrance to Gatineau Park in Old Chelsea just as the sun was setting. We strapped on our snowshoes and, as a group, we hiked about 4 km through the snowy paths to Heritage cabin. In the cabin, we warmed up by the fire and enjoyed a candlelit dinner of veggie chili with avocado, cashew & cilantro cream and cocao bites (made by me!). After dinner, I spoke to the group about food and immunity and shared some tips on how to maintain a strong immune system during the winter months. Andrea also led the group through a fantastic yoga class, which was much needed as we prepared to make the trek back to the parking lot. This was such a fun and memorable evening, I look forward to similar events in the near future. Stay tuned!

Since the cocoa bites were such a hit, I’ve decided to share the recipe. As you’ll see, this is a “choose your own adventure” style recipe. Play around with it to create your favourite version. Lately I’ve been using sunflower butter and omitting the chocolate chips altogether, sticking with cocao nibs for a lower sugar option and they taste fantastic. The full recipe is below.

COCAO ENERGY BITES

Makes approximately 40 balls.

Ingredients :

  • 3 cups nut butter (sunflower, cashew, smooth almond or peanut butter)

  • 2/3 cup maple syrup

  • ¼ cup cocao powder

  • 1 cup dried cranberries (Amy’s tip: choose juice sweetened cranberries for a healthier, lower sugar option)

  • 1 ½ cup desiccated unsweetened coconut

  • 1 cup mini dairy free chocolate chips (reduced sugar options: 1/2 cup cocao nibs & 1/2 cup chocolate chips OR 1 cup cocao nibs)

  • 2 tablespoons chia seeds

  • 1 teaspoon cinnamon

  • 1 or 2 big pinches of sea salt

Directions:

Stir together the nut butter and maple syrup. Once well combined,  mix the rest of the ingredients together (reserving ¾ cup coconut) until it is sticky and you can form balls. I use a heaping tablespoon of the nut butter mixture and roll it into balls in the reserved coconut to create a nice even coating (see the photo below). Place the balls in an airtight container and transfer to the refrigerator where they can be stored for up to 2 weeks.  You can also store the balls in the freezer for up to 2 months.  Enjoy!

Amy Approved 4-Layer Dip

When it comes to watching sports and rooting for teams, I'm usually a band wagon jumper.  I will forgo an entire season of [insert sport] only to watch the very last game. This is not to say that I'm not sporty or that I don't like sports (because I am and I do), but I'd much rather play a sport, then be a spectator. As for being a bandwagon jumper, I should probably clarify a bit. When it comes to watching the playoffs or Super Bowls or final whatevers, I generally don't pay much attention to the game, instead, I've always been much more interested in the food, the beer, and socializing with friends.  

Over the past decade my diet has changed a lot, and I have finally surrendered to food allergies. When I find myself at a party, I tend to pick over the spread for foods I can actually eat (which in certain cases can be limited to none).  There is really nothing that breaks my heart more than being left out when it comes to food. To avoid disappointment, I always try to show up with foods that I can enjoy, but I go the extra mile to show my fellow party goers that game-time grub needn't contain chemicals, artificial flavours, ridiculous amounts of sodium, mystery meats,  and all that other horrible stuff that tastes good, but feels really bad after the fact. I love to show people that spectator snacks can be really, really delicious without any of the adverse side effects. 

This past weekend, I brought my 4-layer dip and a bag of organic corn chips to a friend's party. After trying a few bites and loving it, one of the guys said it tasted like a "burrito on a chip".  Little did he know that this "burrito on a chip" was loaded with healthy proteins and fats, fiber and chock full of nutrients. A healthy, delicious layered dip that tastes like a bite-sized burrito? Yep. Dreams do come true!

The full recipe for the dip is below. You'll want to allot about an hour or so to make and assemble since there's a bit of chopping, mixing and blending involved. I promise you, it'll be worth it.

"BURRITO ON A CHIP" 4-LAYER DIP

Vegan - Gluten Free

Refried Beans

Ingredients:

1 Tablespoon, olive oil
1/2 red onion, diced
3 cloves, garlic, minced
2 hot peppers (jalapeño or serrano), seeded & minced
1 teaspoon, ground cumin
1/2 teaspoon, dried oregano
1/2 teaspoon, chili powder
3 cups, cooked/canned beans of your choice (I like pinto beans) 
1 bay leaf
1 cup, water
1 teaspoon, sea salt
Freshly ground black pepper to taste

Directions: 

On your stove top, warm the oil in a saucepan or skillet on medium heat.  Add the onion and a big pinch of sea salt. Give it a stir and allow the onions to cook for a minute or two.  Add garlic and hot pepper. Cook for about 7 to 10 minutes to sweat the onions.  Sprinkle in the spices and cook for another 30 seconds. 

Stir in the beans, bay leaf and water and bring the mixture up to a boil.  Reduce heat and simmer for 15 to 20 minutes, or until at least half of the water has been absorbed. 

Remove and discard the bay leaf.  Using a potato masher or hand blender,  mash and the blend beans until they become a thick paste consistency.  If the mixture is very dry, add some water, a few tablespoons at a time, until desired consistency is reached.  Set aside to cool. 

Cashew Cream Sauce

Ingredients:

2 cups, raw cashews, soaked for a few hours and rinsed
1/4 to 1/2 cups, water
2 Tablespoons, lemon juice
2 Tablespoons, nutritional yeast
1 Tablespoon, onion powder
1/2 teaspoon,  sea salt

Directions: 

Starting with 1/4 water and the remaining ingredients, blend everything in a high powered blender, stopping from time to time to scrape down the sides with a spatula, until smooth.  If the consistency is too thick, slowly add more water to loosen.  

Guacamole

Ingredients:

3 - 4 ripe avocados, peeled and chopped
1 - 2 limes (1/2 lemon), juiced
1/4 bunch, cilantro, roughly chopped
A few big pinches of sea salt & freshly ground black pepper to taste

Directions:

Combine all ingredients and mix well.

Pico de Gallo (Salsa)

Ingredients:

1 pint, cherry or grape tomatoes, quartered
2-3 limes (or 1 lemon), juiced
1/2 red onion, small dice
3/4 bunch, cilantro, roughly chopped
1 jalapeño, seeded & minced
1 bunch, green onions, roughly chopped
1 -2 cloves, garlic, minced
A few pinches of sea salt & freshly ground black pepper to taste

Directions: 

Combine all ingredients and mix well.

To Assemble the Layered Dip

Once the refried beans have cooled off a bit, spread them evenly at the bottom of an 8 x 8 casserole dish.  Then spread an even layer of the cashew cream sauce on top. Next up, add the guacamole in an even layer, and last but not least, add the pico de gallo over top. If you don't have a large casserole dish, simply portion out the layers in to several smaller dishes or jars. Enjoy immediately with organic corn chips, cut up veggies, pita chips, or by the spoonful!

If you have leftovers of the individual components, you can re-purpose them into a healthy salad by adding some leafy greens, or make wraps using fresh collard leaves or whole grain tortillas.  The ingredients can be stored in the fridge for up to 1 week. 

Beautiful, colourful whole foods. Nothin' better than this.

Beautiful, colourful whole foods. Nothin' better than this.

Simple, Sustainable Resolutions For 2016

The new year is a great time to start anew.  It’s an opportunity to drop habits that don’t promote optimal health, and replace them with with those that do.  In my nutrition practice, I don’t usually encourage my clients to make drastic changes. Instead, I support the notion of adopting small dietary and lifestyle changes over time. I’ve found that this method tends to be the most successful and increases the likelihood that these changes will be long-lasting, and will ultimately lead to a healthier lifestyle. 

Even tiny adjustments can have huge impacts on our health. Big change doesn’t happen over night. It’s the result of many little changes practiced daily, again and again, until they become habits. Below, I’ll share a few surprisingly simple nutrition tips that will have a profound impact on your health and well-being in the year ahead. Whether or not you subscribe to new year's resolutions, there's no time like the present to do something good for yourself.  Here are 3 simple, sustainable tips that will keep you on track for a healthy, happy 2016.

Stay Hydrated.  Water is vital to our health. We literally cannot live without it. It supports good digestion, absorption, and elimination. However, despite being a necessity, the simple act of drinking water throughout the day is often overlooked.  It is recommends that men consume roughly 13 cups (3 litres) of water per day, and that women consume approximately 9 cups (2.2 litres) per day. A good way to reach this goal is to start your day with a big glass of water. Have the water ready and waiting on your bed-side table so that it’s the first thing you see when you wake up. I suggest you also take a water bottle with you everywhere you go (stash it in your purse, briefcase, or backpack) and, if you have trouble remembering to drink water, you may also want to set a timer on your phone to remind you.

Eat More Vegetables.  Vegetables provide dietary fiber, vitamins, and minerals. They also add colour, variety, texture, and taste to meals. Like drinking water, eating vegetables should be a priority, but without proper planning it can be easily overlooked.  Allotting a few hours, one or two days per week, to meal prep can play a big role in upping your vegetable intake. An easy first step would be to chop and store vegetables in your fridge for easy access. Get in the habit of cutting up carrots, celery, cucumber, radishes, and broccoli (or whichever veggies you prefer!) to have with hummus or use later on in cooked dishes.  You should also have pre-washed (DIY or store bought) greens, like spinach, kale, or arugula, in your fridge to add into smoothies, salads, stews, soups, wraps, sandwiches, or stir fry. If you aren’t already in the habit of making vegetable rich meals, challenge yourself to try one new vegetarian dish each week with the goal of expanding your culinary skills as well as your palate.

Chew-Chew-Chew Your Food. It may sound silly, but your mother was right when she cautioned you to “chew your food”. Chewing is a fundamental part of eating, and it is also crucially important in terms of nutrition. Our saliva contains digestive enzymes that help breakdown and absorb the foods we eat. Thoroughly chewing your food will allow these enzymes to do their job and will also lessen the burden on your stomach and small intestine, leading to greater nutrient absorption. As an added bonus, research shows that eating slowly can help you to eat less and, ultimately, prevents weight gain and may even contribute to weight loss.  When you sit down for your next meal, start by taking small bites, chew slowly, be patient, focus on your food, and enjoy what you are eating. Keep chewing until your food has lost its texture and is mostly liquefied. Make sure to completely finish chewing and swallowing before taking another bite of food.  This may sound tedious or trivial, but give it a try! Your body will thank you.

The Essentials For Winter Skincare : Q & A with Magdalena Tomczak of Woman Divine

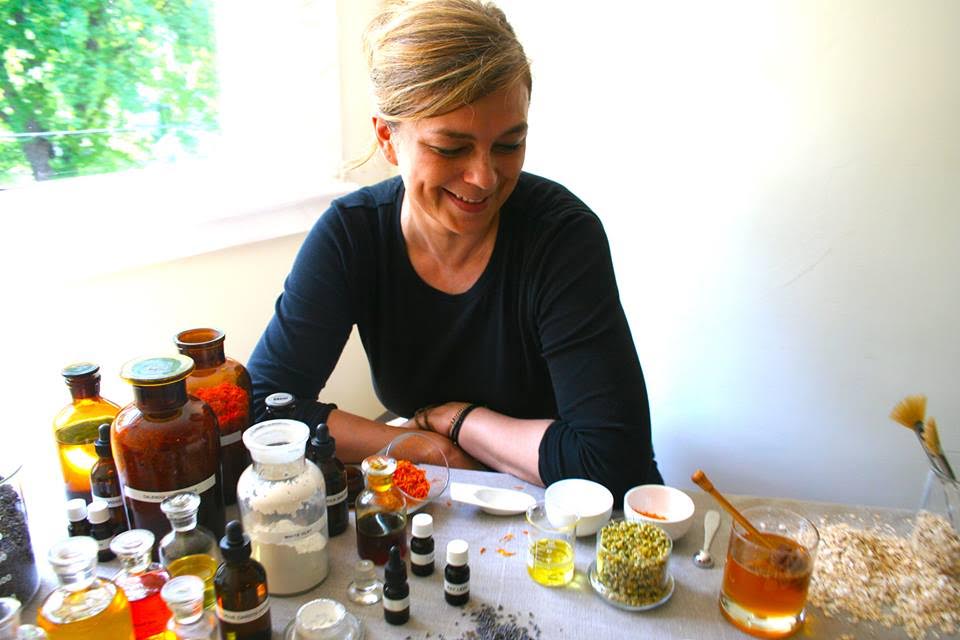
Although we haven't really experienced a true Ottawa winter yet, we all know it's coming. In anticipation of the icy cold days (and months!) ahead,  Magdalena Tomczak, owner of Woman Divine, one of my favourite local skincare studios, answered some of my questions about oils and how they can help protect our skin from the elements, particularly harsh Canadian winters.

When I first met Magdalena this summer, I was thoroughly impressed by her holistic approach. I also admired her depth of knowledge and passion for skincare.  She has created her own line of organic face balms, lip balms, and skin oils, and offers a range of skincare services at her beautiful studio on Churchill Avenue. Spending time with her, in her studio, is such a treat. It's a mini-escape that will provide instant stress relief for you... and your skin!

Magdalena is so knowledgeable and, in my short time knowing her, I've learned so much.  Naturally, I had to feature her on my blog. Below, she shares the basics of essential oils, which oils are best for which skin types, the protective properties of oils, how to store and source oils, and much much more.

Amy: I love that you make your own skincare products using essential oils. What drew you to essential oils in the first place? 
Magdalena: You can say essential oils were with me since I was a little girl. My mom used them to treat simple ailments like colds and stomach aches. At the time she did not know that using essential oils for health benefits had a fancy name ‘aromatherapy’. To her they were just simple home remedies. I guess as a result my natural instinct was to reach to essential oils for healing.

Professionally, I first used essential oils twenty some years ago in my massage therapy practice. However, I actually did not study aromatherapy until I came to Canada from Poland in 1987. By the time I had transitioned to holistic skincare I understood their incredible healing properties for skin. These days, I’m making my own products and using essential oils every day in my treatment room.

Amy: I’m a newbie when it comes to essential oils. Can you break it down for me?
Magdalena: In skin care, and in aromatherapy in general, we use these basic kinds of oils: essential oils, vegetable oils, herbal oil infusions and butters.

Essential oils are produced by the process of steam distillation from various parts of the plants: flowers, leaves, barks, and resins. They offer a wide range of therapeutic properties: antimicrobial, antiviral, antifungal, stimulants, cell regenerators, calming, balancing, astringent, expectorants, sedative, antispasmodic, anti-hematoma, improve the circulation… and the list goes on. 

Interestingly enough, essential oils are not oily at all. We buy them in tiny bottles because they are very concentrated and we need only a few drops at a time. They are rarely used pure on the skin. Most of the time they would be too strong and possibly cause irritation. Therefore they need to be diluted in the vegetable oil also known in aromatherapy as a “base” or “carrier oil”. A few examples of essential oils used in skin care are: true lavender, ylang ylang, rose, jasmine, vetiver and geranium.

Vegetable oils are produced from nuts and seeds. We are interested only in oils produced with integrity: cold pressed, non-processed, non-deodorized and organic. Vegetable oils are carrier oils for essential oils but on their own they are amazing therapeutic substances with astounding benefits for holistic skin care. They are nutritionally dense and are a good source of oil-soluble vitamins (A, D, E, and K), fatty acids including essential fatty acids, sterols, phospholipids, tocopherols…

The majority of organic vegetable oils offer excellent protective and emollient properties for the skin, and greatly reduce trans-epidermal water loss. Therefore they improve skin hydration. Vegetable oils are needed by the skin to maintain its barrier function, health, tone, moisture, and elasticity. Examples of vegetable oils used in skin care are: argan, rosehip, jojoba, sunflower and olive oil. 

Herbal oil infusions are simply vegetable oils infused with plant material. They are beautiful in marrying the therapeutic properties of vegetable oils and specific herbs. Commonly known herbal oil infusions are: calendula oil and arnica oil.

And then there are butters, which are produced from nuts and are solid at room temperature. These will provide deeper protection from the elements. They are wonderful emollients and soften the skin. A great example of butter is widely used shea butter.

Amy: Many of us experience dry skin or break out when the seasons are changing. Do you have any favourite oils to use during the fall/winter to help protect skin from the elements? 
Magdalena: Changing seasons reminds us of the ever-existing rhythms of nature. Rhythms which so profoundly affect our very own ebb and flow. We forget to pay attention but thankfully skin is a great storyteller. It gives us clues whenever we stray off the path or simply need a bit more loving care. Fall and winter definitely call for the use of oils. The combination of essential oils, vegetable/herbal oils and/or butters offers a perfect therapeutic partnership. I have many favourite oils but the application will always depend on an individual and their skin. The most important thing to do in treating your skin is to first understand your individual needs. We are all a little bit different.

These are some general guidelines for which oils to use:

Essential oils:
Dry skin – rosewood, lavender, carrot seed
Combo/sensitive skin – chamomile, ylang-ylang
Oily skin – rosemary, lavender

Vegetable oils:
Dry skin - argan, rosehip, sesame, shea butter
Combination skin – jojoba, sunflower, coconut, shea butter
Oily skin – grape seed,  jojoba

If your skin is dry or sensitive you will benefit from adding oils to your daily beauty care. Look for products that contain shea butter for extra protection from the elements.  Always apply your oils on slightly damp skin or use an organic rose hydrosol prior. Oils can be used as day or night moisturizers. Some people use them also as a cleanser. I often do.

How much to use? 10ml vegetable oil + 5 drops essential oil. 

The above oil suggestions will be a good start. Play with it! You may discover that there is a skin care formulator sleeping quietly within you. 

Amy: I know you are very diligent when sourcing your essential oils. How do you ensure that they are high quality?
Magdalena: Not all oils are created equal. We definitely have to be mindful when purchasing oils because there is a lot of very poor quality product on the market today. This goes for both essential and vegetable oils.

When we use oils for therapeutic purpose we want to be sure that the product we use actually offers therapeutic properties. Synthetic product is not only void of any healing, life enhancing molecules but it becomes a burden for our body, aging us quicker and presenting us with possible health risks. That is why purchasing pure, great quality oils is of utmost importance. 

To ensure the quality of my products and treatments I purchase mostly from people I know, small companies run by people with passion and love for the planet and life in general. I discovered a couple of distilleries that I love during my travels to France.  They are run by hard working families. You can feel the love when you visit. It’s amazing! I hope to travel more in the future to discover other producers like that.

Amy: Do you have any tips on how to store oils in order to keep them from degrading or to prolong their shelf life?
Magdalena: Yes, it is pretty simple. Oils do not like light or heat. Store them in dark glass bottles (never in plastic) and in a cool, dark place.

Amy: I love the Face Balm you developed. I’m guessing it would be the perfect thing for the colder months.  
Magdalena: Definitely. It is a protective blend of vegetable and essential oils with a good dose of shea butter. It is all organic — just oils and butters — not even a bit of undesirable stuff. It has developed quite a following in the last couple of years. My dry skin clients in particular love it. It's a great product for cold Ottawa weather for sure.

Amy: What's your go-to essential oil?
Magdalena: Oh Amy, this is such a difficult question… I have so many!

Ok, if I had to pick one for skin care purposes it would be Everlasting (Helichrysum italicum) simply because it has absolutely amazing skin healing properties. I do not care for its aromatic profile but I know it does wonders so it is #1.

As far as my own pleasure goes, I am a bit of an aromatic snob lately and indulge in rose and jasmine. So beautiful and feminine and sensuous…pure love. But ask me in a couple of months and it may be something simple like Eucalyptus radiata. I go with the flow. I guess, I hang out with the one which is calling me at the moment. 

Magdalena's studio, Woman Divine, is located at 363 Churchill Avenue (near Richmond Road) in Ottawa. You can follow her on Facebook, or visit her website for more information.

Chili Chocolate Truffles

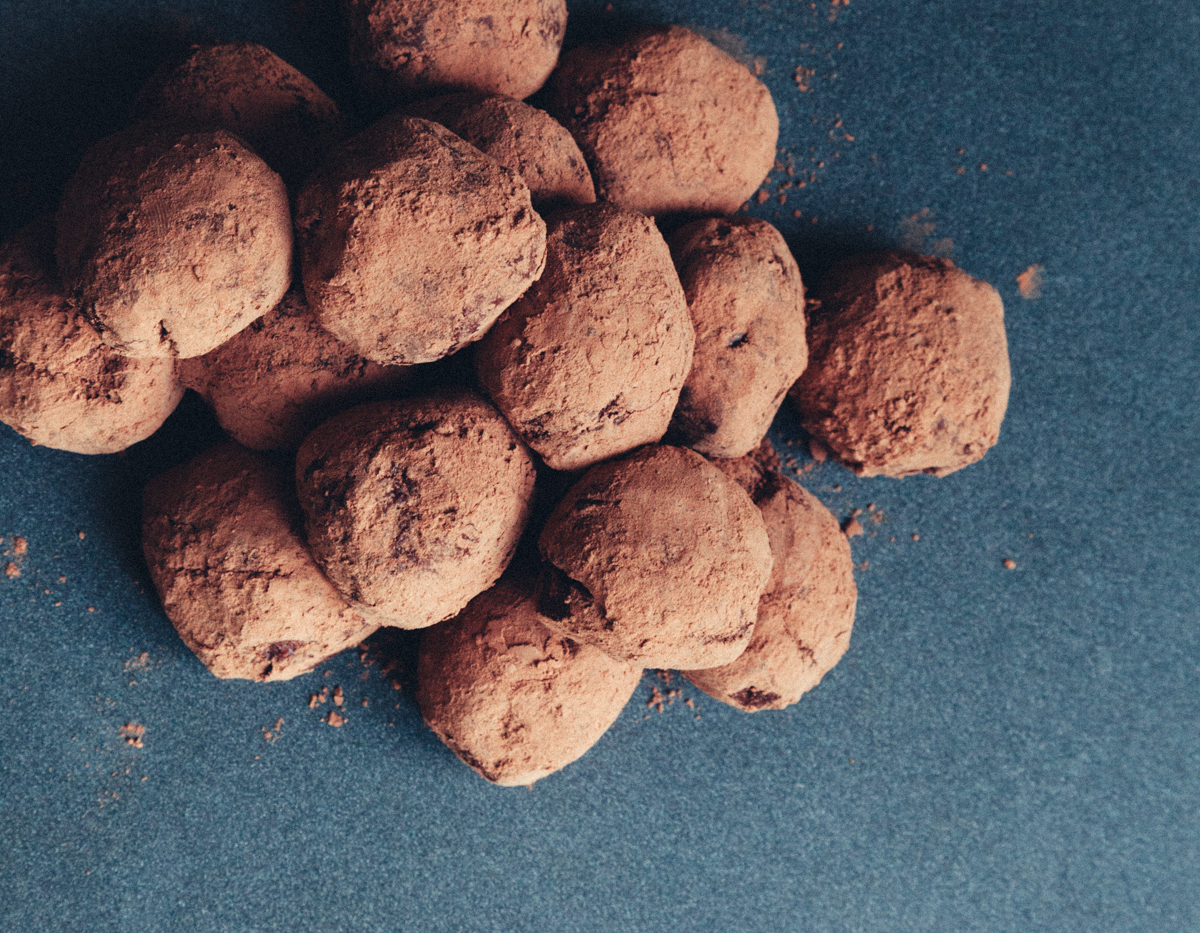
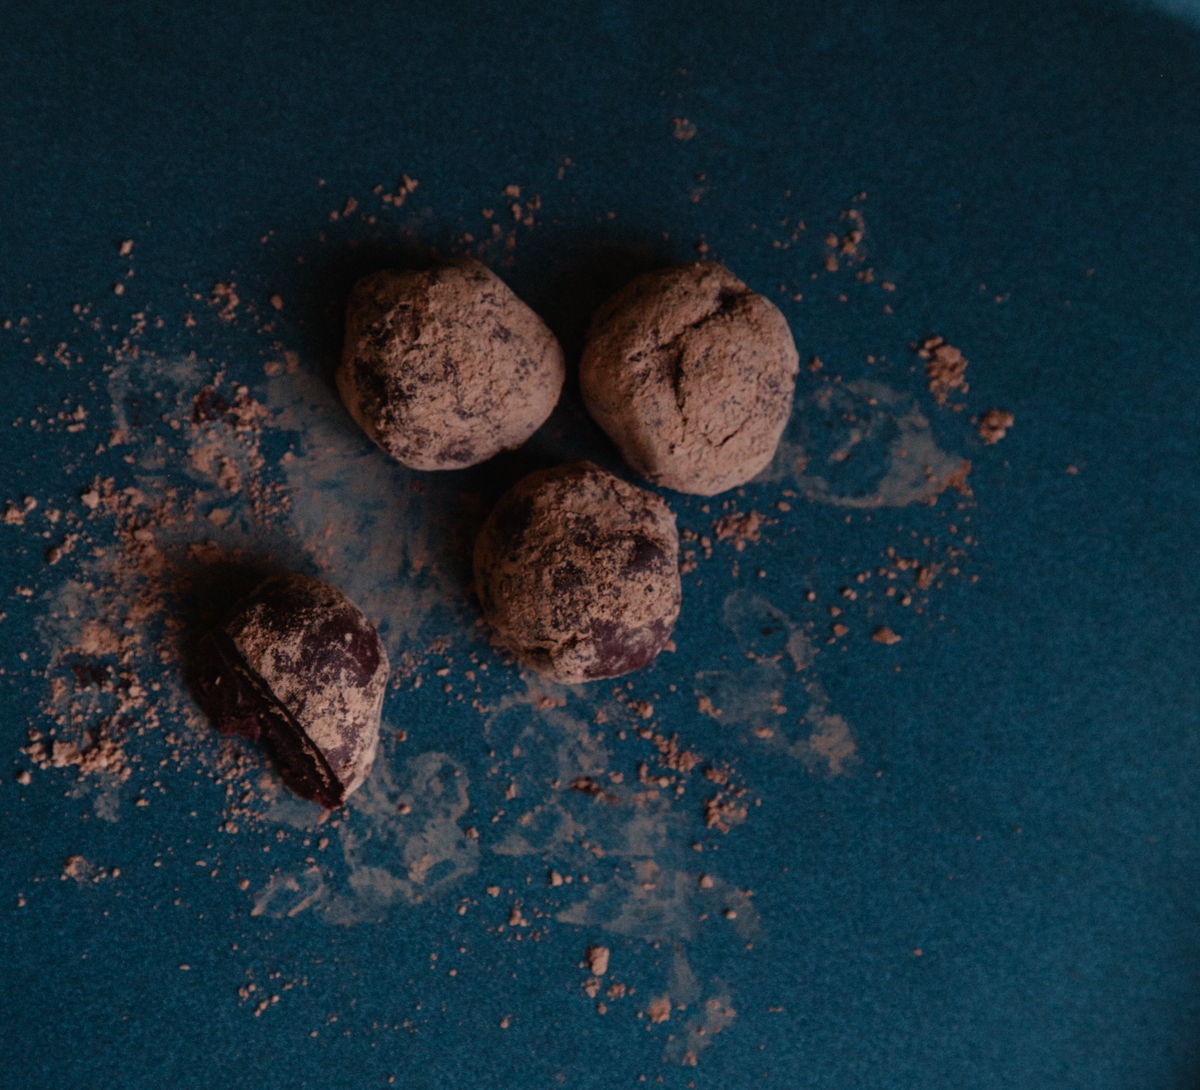
Since my last few recipe posts have been savoury soups, today I decided to switch things up by sharing something sweet. Although I don't have much of a sweet tooth myself, I really, really enjoy chocolate truffles. These truffles in particular are rich, creamy, and bitter (but not too bitter), with a pop of spice. I've made them on many occasions and they've always been very well received. They are dairy free, gluten free, and the perfect dessert for you upcoming holiday parties.

See below for a few beautiful photos (courtesy of my friend Caroline of CY-iwander) and the full recipe.

CHILI CHOCOLATE TRUFFLES

Vegan - Gluten Free - Makes about 20 - 25 truffles

Ingredients:

1/2 cup, full fat coconut milk
1 tablespoon, vanilla extract
1 cup, organic dairy-free semi-sweet chocolate chips (I like Camino brand)
2 - 3 tablespoons, cocoa powder
1 teaspoon, cinnamon
1/2 teaspoon, ground ginger
1/8 teaspoon, cayenne
A big pinch of sea salt

Directions:

In a saucepan combine coconut milk and vanilla extract and bring to a boil over medium heat. Reduce heat to a low. Simmer for about 5 minutes to allow the liquid to evaporate.

Remove the saucepan from the heat and add chocolate, spices and salt, stirring with a fork or whisking until the chocolate has melted and the mixture is evenly combined.

Transfer the mixture to a bowl and chill in the freezer for about 1 hour, or until the mixture is firm enough to shape into balls.  At this point, you'll want to add the cocoa powder to another bowl. Then scoop out about a tablespoon of the mixture and roll it into a truffle ball. Transfer the truffle in to the cocoa powder and roll it around to coat the exterior. Repeat this process until you have used up all of the mixture. Transfer the truffles to a baking sheet lined with parchment paper and refrigerate to set completely.

Storage: place the truffles in an airtight container in the refrigerator, where they will keep about 3 weeks, or in the freezer, where they will keep for about two months.

This recipe is inspired by Ottawa chef Caroline Ishii's trademark truffles from her restaurant Zen Kitchen, which is sadly now closed. 

Holiday Survival Guide: Q & A with Dr. Kathy

With the holiday parties and gatherings in full swing, I wanted to be sure that I was ready and well equipped to handle the hustle and bustle of the season. My first instinct was to reach out to my friend Dr. Kathy Van Zeyl.  Dr. Kathy is a naturopathic doctor (ND) with expertise in areas such as sports medicine, energy balance, detoxification, weight loss and adrenal support.   Dr. Kathy and I met last year when we both started working at EPIC Fitness + Lifestyle.  From the day I met her, I loved her holistic and realistic approach to dealing with clients and I've been continually amazed by her ability to help people overcome daunting health challenges.

In the last year, I've gotten to know her both professionally and personally.  I'm lucky to have her as my ally for helping clients and also my go-to friend for dog walks. Even our pups have become pals!

Dr. Kathy is truly a wealth of knowledge and I knew she'd have lots of great information to share with us.  Without further ado, please read on to learn her tried and true strategies for staying healthy during the holidays. She touches on topics such as managing stress, strengthening your immune system, tips for avoiding craving, and more!

Amy: The holidays are upon us! What are your tips for staying stress free?
Kathy: Busy or high stress periods often lead to elevated release of the stress hormone “cortisol” from your hardworking, non-relenting adrenal glands.  These glands are always by your side (quite literally, they’re on both sides hanging out on top of your kidneys!), and help your body to adapt to stress.  

Chronic high cortisol can lead to either over- or underactive adrenal function resulting in fatigue, anxiety, insomnia, weight gain and immune suppression amidst other issues.  We can’t always remove the stress, but we CAN change how your body responds to it!  Support your adrenal glands through stress with these tips to maximize stress resilience and keep these fantastic organs happy.

Sleep – get 7-9 hours of sleep per night, going to bed and waking at the same times consistently.  Both your melatonin and cortisol levels fluctuate on a circadian rhythm.  Consistency is key for regulating these two very important hormones so you can sleep when you need to, and stay awake and energized the rest of the time.

Eat for steady blood sugar – Include plenty of slowly-absorbing protein, healthy fats and nutrient-rich vegetables to stabilize blood glucose (your brain’s primary fuel source!) and decrease your body’s stress response from sugar levels that are either too high or too low.

Take 5… – As in 5 minutes before bed to do some deep breathing, stretching or meditation to relax the nervous system and calm your body’s stress response.  We can’t all fit an hour of yoga into our schedule, but 5 minutes a day is easier to find and can go a long way!

Move it! – One of my favourite prescriptions is EXERCISE (!!!) for all of the side-“benefits” that come along with it.  Pick something you enjoy whether it’s running (my favourite – yes, even in winter!!), hiking, skating, skiing, snow-shoeing, weight-lifting, yoga, Zumba, team sports, etc.  Pick something you really enjoy so you’ll be less likely to quit.  Movement can balance stress resilience, improve sleep and kickstart metabolism.  Even 20-30 minutes 3-5 times a week can give these benefits, so conquer the excuses and take some advice from Nike… JUST DO IT!!!

Amy: Once the hustle and bustle of the holidays are over, it's not uncommon to get sick.  Do you have any advice on how to prevent this from happening?  
Kathy: For prevention, the key is managing stress (see above!).  If you’re starting to feel a cold coming, these quick tips can help strengthen your system to beat those bacteria and viruses out of your system.

Oil of oregano – If you’ve ever tried it before, you’ll know exactly why those pesky pathogens tend to bite the dust after taking it.  Oil of oregano is one of nature’s most potent antibiotics and a very effective side-kick for your immune system.  Try taking 3-5 drops 3 times a day at the first signs of a cold to give some antimicrobial support.  Can’t stand the taste?  A teaspoon of honey can ease the strong flavour and provide additional germ-fighting support!

Vitamin C – Although Vitamin C doesn’t prevent a cold, it can reduce the intensity and duration of sickness once it hits.  They key is in the dose!  To maximize vitamin C absorption, take 1000mg every 2-4 hours until you reach what we naturopaths lovingly refer to as “bowel tolerance.”  This is when stools start to soften as your digestive tract has reached its maximum absorption for vitamin C.  Keep this level in mind and for maximum immune and vitamin C efficiency, take one less dose than what caused stool softening.  The more the merrier, but only if you can absorb it!    

Fluids – Include lots of water, soups and herbal teas such as ginger (especially for fevers), honey & lemon or licorice root.  A high fluid intake can decrease the thickness of mucous secretions so your hardworking immune system can trap and remove harmful germs from the body.  Sticking with fluids, low fibre, low fat and easily digestible foods (well-cooked proteins and vegetables!) also helps to minimize the work your body has to do to put these nutrients to good use.

Amy: Salty and sweet snacks are so readily available this time of year. Any suggestions to help curb the cravings? 
Kathy: Yes! The first step is recognizing where the craving comes from.  Here’s a quick breakdown of what these cravings may mean:

Sugar – These cravings often come with fluctuations in energy levels available in the bloodstream.  Low blood sugar from overconsumption of sugar and carbohydrates or underconsumption of other nutrients can trigger the brain to send ravenous hunger cues (ex. “feed me sugar now, I’m starving!!!”).   Instead, eat slow-absorbing nutrients (proteins, healthy fats, veggies and fibre) and try to do so every 4-5 hours.  Especially if you’re about to head out to a holiday party, eat something with protein or fibre first to reduce the hunger pangs and overindulging.  For a healthy substitute, try fresh fruit with almond butter, or chocolate avocado pudding made from avocadoes, cocoa powder and coconut milk to satisfy your sweet tooth.

Salt – Salt-seeking on the other hand is most commonly linked with elevated stress levels.  Over time from high stress and adrenal strain (see question # 1 above), blood pressure changes can take place and the adrenals will have a difficult time maintaining a consistent amount of pressure (adrenal glands release aldosterone to regulate blood pressure response).  As it’s often more common to see low blood pressure as a result of chronic stress, salt cravings are a natural way your body tries to readjust your blood pressure to normal.  Frequent salt cravers should pay attention to stress management and support their adrenals.  For a quick, healthy alternative, look for things like bean chips, guacamole, hummus or trail mix to satiate the cravings without overindulging in greasy snacks.

One more highly prevalent craving is chocolate.  Where does this come from?  Sometimes it’s the same link as with sugar cravings (low energy and brain fuel), but it may also be a sign of magnesium deficiency!  Cocoa powder is naturally high in magnesium, so chocolate cravings may be a way for your body to get the nutrients it’s lacking.  Refer back to the chocolate avocado pudding suggestion for a low sugar, high magnesium treat (as avocados also contain high magnesium levels!).

Amy: The holidays are synonymous with overindulgence. Despite best intentions, most of us fall victim to over eating or drinking a little bit too much.  Do you have any top secret naturopathic remedies you can share? 
Kathy: Perhaps…. Maybe… Ok the answer is YES, but just don’t tell anyone else because I want you to try your best to behave!  Obviously the first rule is try not to overindulge.  But when it’s too late these are my top go-to’s:

B vitamins – Used in just about all metabolic reactions, B vitamins can help to recover your energy and kickstart the metabolism and elimination of unwanted substances in the body.  These area best taken early in the day and don’t be surprised if your urine is bright yellow afterwards!  B vitamins naturally contain an orange or yellow pigment.

Lemon water – A great source of electrolytes and vitamin C, lemon water can help improve digestion, reduce acidity in the body, and rehydrate after excessive water loss due to alcohol.  Over the holidays try to start your day by squeezing out the juice from half a lemon and drink it with warm water on an empty stomach.  To save some time, pre-squeeze a bunch and keep it in a glass jar in the fridge!

Milk thistle – Your liver is the hardest working detoxification organ in your body, so give it some holiday loving if you’re going to load on the work!  Milk thistle extract (silymarin) helps to protect the liver against damage, regenerates damaged cells, and upregulates detoxification pathways.  Two key things to keep in mind any time you’re dealing with herbs are quality and safety – consult with a professional to make sure it doesn’t interact with any of your medications and source out a high quality herbal company you can trust.  We naturopaths are here for a reason!  Also I’ve got way too much information stored in my head, so come use some of it please!

Wishing you a happy, healthy, stress-free holiday and may the New Year bring along a new you!

For more information about Dr. Kathy, or to book an appointment with her, please visit her website. You can also find her on Facebook and Twitter


Hearty Leek, Lentil & Leafy Green Soup

If you follow my blog, you might have noticed my affinity for lentils. I really do love them! They are an excellent source of protein, fiber, and complex carbohydrates.  Lentils are incredibly nutrient dense. They contain iron, potassium, magnesium, zinc,  and B vitamins.  They are also a low-glycemic food, meaning lentils do not spike blood sugar. Plus, they're super inexpensive and can be easily adapted into soups, salads, stews, and can be blended into spreads or dips. If you haven't tried lentils yet, what are you waiting for? 

A few weeks ago, I posted a recipe for butternut squash and red lentil soup. This time around, my soup includes hearty and robust brown lentils, loads of leeks and leafy greens.  On cold days, this soup will warm you up, fill you up, and will make your belly very happy. 

Give it a try and let me know what you think. See below for the recipe. 

HEARTY LEEK, LENTIL & LEAFY GREEN SOUP

Ingredients:

  • 2 tablespoons, extra virgin olive oil

  • 3 leeks, ends trimmed (keeping the white and pale green parts), halved lengthwise, thinly sliced

  • 2 carrots, peeled, chopped into bite sized pieces

  • 2 ribs of celery, chopped

  • 3 cloves of garlic, minced

  • 1 tablespoon, cumin

  • 1 tablespoon, herbes de provence (or a spice mixture of your choice including herbs such as savoury, marjoram, rosemary, thyme, and oregano)

  • A pinch or two of red pepper flakes (or more if you want a spicier soup)

  • 3 medium sized potatoes (of your choice), roughly chopped to the size of a dice

  • 1 cup brown or green lentils, picked over and rinsed

  • 1 or 2 bay leaves

  • 6 cups, water

  • 1 28 oz (796 ml) can of diced tomatoes

  • 2 loosely packed cups, leafy greens (I used kale), stems removed, ripped into bite sized pieces

  • Sea salt & freshly ground black pepper

Directions: 

Warm the olive oil in a large pot over medium heat. Add the leeks, carrots and celery with a big pinch of salt.  Stir often, until the vegetables have softened, about 5 minutes. Add the garlic, cumin, herbs de provence and red pepper flakes. Stirring constantly, cook until fragrant, for about 30 seconds.

Add the potatoes, lentils, bay leaves and water. Raise the heat and bring the mixture to a boil, then partially cover the pot and reduce heat to maintain a gentle simmer. Cook for 30 minutes, or until the lentils are tender but still hold their shape. 

At this point, you can add the tomatoes and give the soup a stir. Add the kale, mix well, and cook for a few more minutes. Taste your soup for flavour and season with salt and pepper. Remove the bay leaves, then serve immediately.