Cocao Energy Bites

Last week, I joined Andrea Robertson of Body and Balance and lululemon for a fantastic community event that combined so many of my favourite things: great people, Gatineau Park, snowshoeing, yoga and food! The event, Snowshoe, Soulfood, & Savasana, was something that Andrea had been dreaming up for a while and she was finally able to bring it together with a little help from lululemon and some of my hearty, healthy cooking. 

About 30 of us met at the entrance to Gatineau Park in Old Chelsea just as the sun was setting. We strapped on our snowshoes and, as a group, we hiked about 4 km through the snowy paths to Heritage cabin. In the cabin, we warmed up by the fire and enjoyed a candlelit dinner of veggie chili with avocado, cashew & cilantro cream and cocao bites (made by me!). After dinner, I spoke to the group about food and immunity and shared some tips on how to maintain a strong immune system during the winter months. Andrea also led the group through a fantastic yoga class, which was much needed as we prepared to make the trek back to the parking lot. This was such a fun and memorable evening, I look forward to similar events in the near future. Stay tuned!

Since the cocoa bites were such a hit, I’ve decided to share the recipe. As you’ll see, this is a “choose your own adventure” style recipe. Play around with it to create your favourite version. Lately I’ve been using sunflower butter and omitting the chocolate chips altogether, sticking with cocao nibs for a lower sugar option and they taste fantastic. The full recipe is below.

COCAO ENERGY BITES

Makes approximately 40 balls.

Ingredients :

  • 3 cups nut butter (sunflower, cashew, smooth almond or peanut butter)

  • 2/3 cup maple syrup

  • ¼ cup cocao powder

  • 1 cup dried cranberries (Amy’s tip: choose juice sweetened cranberries for a healthier, lower sugar option)

  • 1 ½ cup desiccated unsweetened coconut

  • 1 cup mini dairy free chocolate chips (reduced sugar options: 1/2 cup cocao nibs & 1/2 cup chocolate chips OR 1 cup cocao nibs)

  • 2 tablespoons chia seeds

  • 1 teaspoon cinnamon

  • 1 or 2 big pinches of sea salt

Directions:

Stir together the nut butter and maple syrup. Once well combined,  mix the rest of the ingredients together (reserving ¾ cup coconut) until it is sticky and you can form balls. I use a heaping tablespoon of the nut butter mixture and roll it into balls in the reserved coconut to create a nice even coating (see the photo below). Place the balls in an airtight container and transfer to the refrigerator where they can be stored for up to 2 weeks.  You can also store the balls in the freezer for up to 2 months.  Enjoy!

Amy Approved 4-Layer Dip

When it comes to watching sports and rooting for teams, I'm usually a band wagon jumper.  I will forgo an entire season of [insert sport] only to watch the very last game. This is not to say that I'm not sporty or that I don't like sports (because I am and I do), but I'd much rather play a sport, then be a spectator. As for being a bandwagon jumper, I should probably clarify a bit. When it comes to watching the playoffs or Super Bowls or final whatevers, I generally don't pay much attention to the game, instead, I've always been much more interested in the food, the beer, and socializing with friends.  

Over the past decade my diet has changed a lot, and I have finally surrendered to food allergies. When I find myself at a party, I tend to pick over the spread for foods I can actually eat (which in certain cases can be limited to none).  There is really nothing that breaks my heart more than being left out when it comes to food. To avoid disappointment, I always try to show up with foods that I can enjoy, but I go the extra mile to show my fellow party goers that game-time grub needn't contain chemicals, artificial flavours, ridiculous amounts of sodium, mystery meats,  and all that other horrible stuff that tastes good, but feels really bad after the fact. I love to show people that spectator snacks can be really, really delicious without any of the adverse side effects. 

This past weekend, I brought my 4-layer dip and a bag of organic corn chips to a friend's party. After trying a few bites and loving it, one of the guys said it tasted like a "burrito on a chip".  Little did he know that this "burrito on a chip" was loaded with healthy proteins and fats, fiber and chock full of nutrients. A healthy, delicious layered dip that tastes like a bite-sized burrito? Yep. Dreams do come true!

The full recipe for the dip is below. You'll want to allot about an hour or so to make and assemble since there's a bit of chopping, mixing and blending involved. I promise you, it'll be worth it.

"BURRITO ON A CHIP" 4-LAYER DIP

Vegan - Gluten Free

Refried Beans

Ingredients:

1 Tablespoon, olive oil
1/2 red onion, diced
3 cloves, garlic, minced
2 hot peppers (jalapeño or serrano), seeded & minced
1 teaspoon, ground cumin
1/2 teaspoon, dried oregano
1/2 teaspoon, chili powder
3 cups, cooked/canned beans of your choice (I like pinto beans) 
1 bay leaf
1 cup, water
1 teaspoon, sea salt
Freshly ground black pepper to taste

Directions: 

On your stove top, warm the oil in a saucepan or skillet on medium heat.  Add the onion and a big pinch of sea salt. Give it a stir and allow the onions to cook for a minute or two.  Add garlic and hot pepper. Cook for about 7 to 10 minutes to sweat the onions.  Sprinkle in the spices and cook for another 30 seconds. 

Stir in the beans, bay leaf and water and bring the mixture up to a boil.  Reduce heat and simmer for 15 to 20 minutes, or until at least half of the water has been absorbed. 

Remove and discard the bay leaf.  Using a potato masher or hand blender,  mash and the blend beans until they become a thick paste consistency.  If the mixture is very dry, add some water, a few tablespoons at a time, until desired consistency is reached.  Set aside to cool. 

Cashew Cream Sauce

Ingredients:

2 cups, raw cashews, soaked for a few hours and rinsed
1/4 to 1/2 cups, water
2 Tablespoons, lemon juice
2 Tablespoons, nutritional yeast
1 Tablespoon, onion powder
1/2 teaspoon,  sea salt

Directions: 

Starting with 1/4 water and the remaining ingredients, blend everything in a high powered blender, stopping from time to time to scrape down the sides with a spatula, until smooth.  If the consistency is too thick, slowly add more water to loosen.  

Guacamole

Ingredients:

3 - 4 ripe avocados, peeled and chopped
1 - 2 limes (1/2 lemon), juiced
1/4 bunch, cilantro, roughly chopped
A few big pinches of sea salt & freshly ground black pepper to taste

Directions:

Combine all ingredients and mix well.

Pico de Gallo (Salsa)

Ingredients:

1 pint, cherry or grape tomatoes, quartered
2-3 limes (or 1 lemon), juiced
1/2 red onion, small dice
3/4 bunch, cilantro, roughly chopped
1 jalapeño, seeded & minced
1 bunch, green onions, roughly chopped
1 -2 cloves, garlic, minced
A few pinches of sea salt & freshly ground black pepper to taste

Directions: 

Combine all ingredients and mix well.

To Assemble the Layered Dip

Once the refried beans have cooled off a bit, spread them evenly at the bottom of an 8 x 8 casserole dish.  Then spread an even layer of the cashew cream sauce on top. Next up, add the guacamole in an even layer, and last but not least, add the pico de gallo over top. If you don't have a large casserole dish, simply portion out the layers in to several smaller dishes or jars. Enjoy immediately with organic corn chips, cut up veggies, pita chips, or by the spoonful!

If you have leftovers of the individual components, you can re-purpose them into a healthy salad by adding some leafy greens, or make wraps using fresh collard leaves or whole grain tortillas.  The ingredients can be stored in the fridge for up to 1 week. 

Beautiful, colourful whole foods. Nothin' better than this.

Beautiful, colourful whole foods. Nothin' better than this.

Simple, Sustainable Resolutions For 2016

The new year is a great time to start anew.  It’s an opportunity to drop habits that don’t promote optimal health, and replace them with with those that do.  In my nutrition practice, I don’t usually encourage my clients to make drastic changes. Instead, I support the notion of adopting small dietary and lifestyle changes over time. I’ve found that this method tends to be the most successful and increases the likelihood that these changes will be long-lasting, and will ultimately lead to a healthier lifestyle. 

Even tiny adjustments can have huge impacts on our health. Big change doesn’t happen over night. It’s the result of many little changes practiced daily, again and again, until they become habits. Below, I’ll share a few surprisingly simple nutrition tips that will have a profound impact on your health and well-being in the year ahead. Whether or not you subscribe to new year's resolutions, there's no time like the present to do something good for yourself.  Here are 3 simple, sustainable tips that will keep you on track for a healthy, happy 2016.

Stay Hydrated.  Water is vital to our health. We literally cannot live without it. It supports good digestion, absorption, and elimination. However, despite being a necessity, the simple act of drinking water throughout the day is often overlooked.  It is recommends that men consume roughly 13 cups (3 litres) of water per day, and that women consume approximately 9 cups (2.2 litres) per day. A good way to reach this goal is to start your day with a big glass of water. Have the water ready and waiting on your bed-side table so that it’s the first thing you see when you wake up. I suggest you also take a water bottle with you everywhere you go (stash it in your purse, briefcase, or backpack) and, if you have trouble remembering to drink water, you may also want to set a timer on your phone to remind you.

Eat More Vegetables.  Vegetables provide dietary fiber, vitamins, and minerals. They also add colour, variety, texture, and taste to meals. Like drinking water, eating vegetables should be a priority, but without proper planning it can be easily overlooked.  Allotting a few hours, one or two days per week, to meal prep can play a big role in upping your vegetable intake. An easy first step would be to chop and store vegetables in your fridge for easy access. Get in the habit of cutting up carrots, celery, cucumber, radishes, and broccoli (or whichever veggies you prefer!) to have with hummus or use later on in cooked dishes.  You should also have pre-washed (DIY or store bought) greens, like spinach, kale, or arugula, in your fridge to add into smoothies, salads, stews, soups, wraps, sandwiches, or stir fry. If you aren’t already in the habit of making vegetable rich meals, challenge yourself to try one new vegetarian dish each week with the goal of expanding your culinary skills as well as your palate.

Chew-Chew-Chew Your Food. It may sound silly, but your mother was right when she cautioned you to “chew your food”. Chewing is a fundamental part of eating, and it is also crucially important in terms of nutrition. Our saliva contains digestive enzymes that help breakdown and absorb the foods we eat. Thoroughly chewing your food will allow these enzymes to do their job and will also lessen the burden on your stomach and small intestine, leading to greater nutrient absorption. As an added bonus, research shows that eating slowly can help you to eat less and, ultimately, prevents weight gain and may even contribute to weight loss.  When you sit down for your next meal, start by taking small bites, chew slowly, be patient, focus on your food, and enjoy what you are eating. Keep chewing until your food has lost its texture and is mostly liquefied. Make sure to completely finish chewing and swallowing before taking another bite of food.  This may sound tedious or trivial, but give it a try! Your body will thank you.

The Essentials For Winter Skincare : Q & A with Magdalena Tomczak of Woman Divine

Although we haven't really experienced a true Ottawa winter yet, we all know it's coming. In anticipation of the icy cold days (and months!) ahead,  Magdalena Tomczak, owner of Woman Divine, one of my favourite local skincare studios, answered some of my questions about oils and how they can help protect our skin from the elements, particularly harsh Canadian winters.

When I first met Magdalena this summer, I was thoroughly impressed by her holistic approach. I also admired her depth of knowledge and passion for skincare.  She has created her own line of organic face balms, lip balms, and skin oils, and offers a range of skincare services at her beautiful studio on Churchill Avenue. Spending time with her, in her studio, is such a treat. It's a mini-escape that will provide instant stress relief for you... and your skin!

Magdalena is so knowledgeable and, in my short time knowing her, I've learned so much.  Naturally, I had to feature her on my blog. Below, she shares the basics of essential oils, which oils are best for which skin types, the protective properties of oils, how to store and source oils, and much much more.

Amy: I love that you make your own skincare products using essential oils. What drew you to essential oils in the first place? 
Magdalena: You can say essential oils were with me since I was a little girl. My mom used them to treat simple ailments like colds and stomach aches. At the time she did not know that using essential oils for health benefits had a fancy name ‘aromatherapy’. To her they were just simple home remedies. I guess as a result my natural instinct was to reach to essential oils for healing.

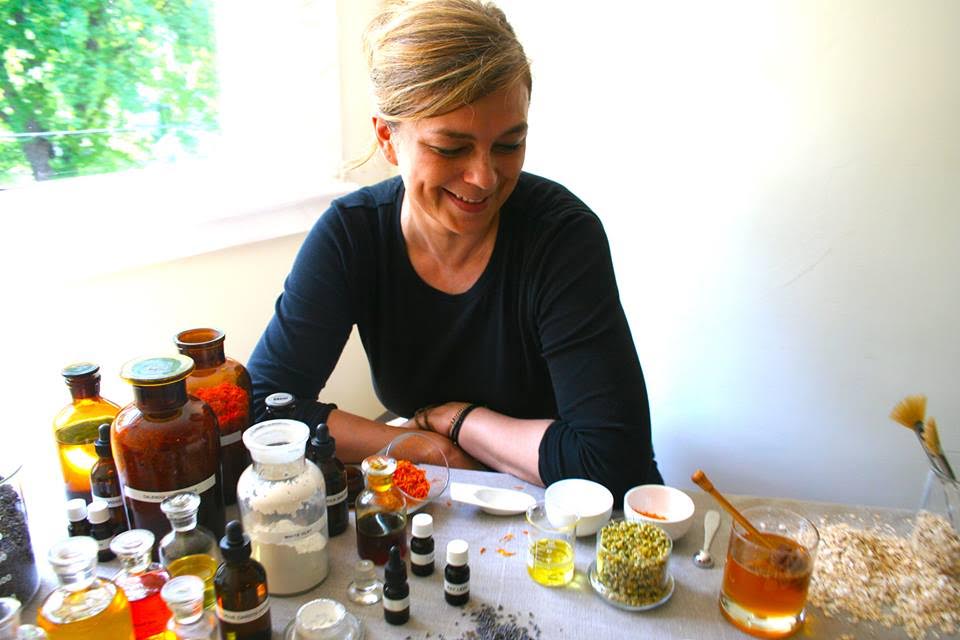
Professionally, I first used essential oils twenty some years ago in my massage therapy practice. However, I actually did not study aromatherapy until I came to Canada from Poland in 1987. By the time I had transitioned to holistic skincare I understood their incredible healing properties for skin. These days, I’m making my own products and using essential oils every day in my treatment room.

Amy: I’m a newbie when it comes to essential oils. Can you break it down for me?
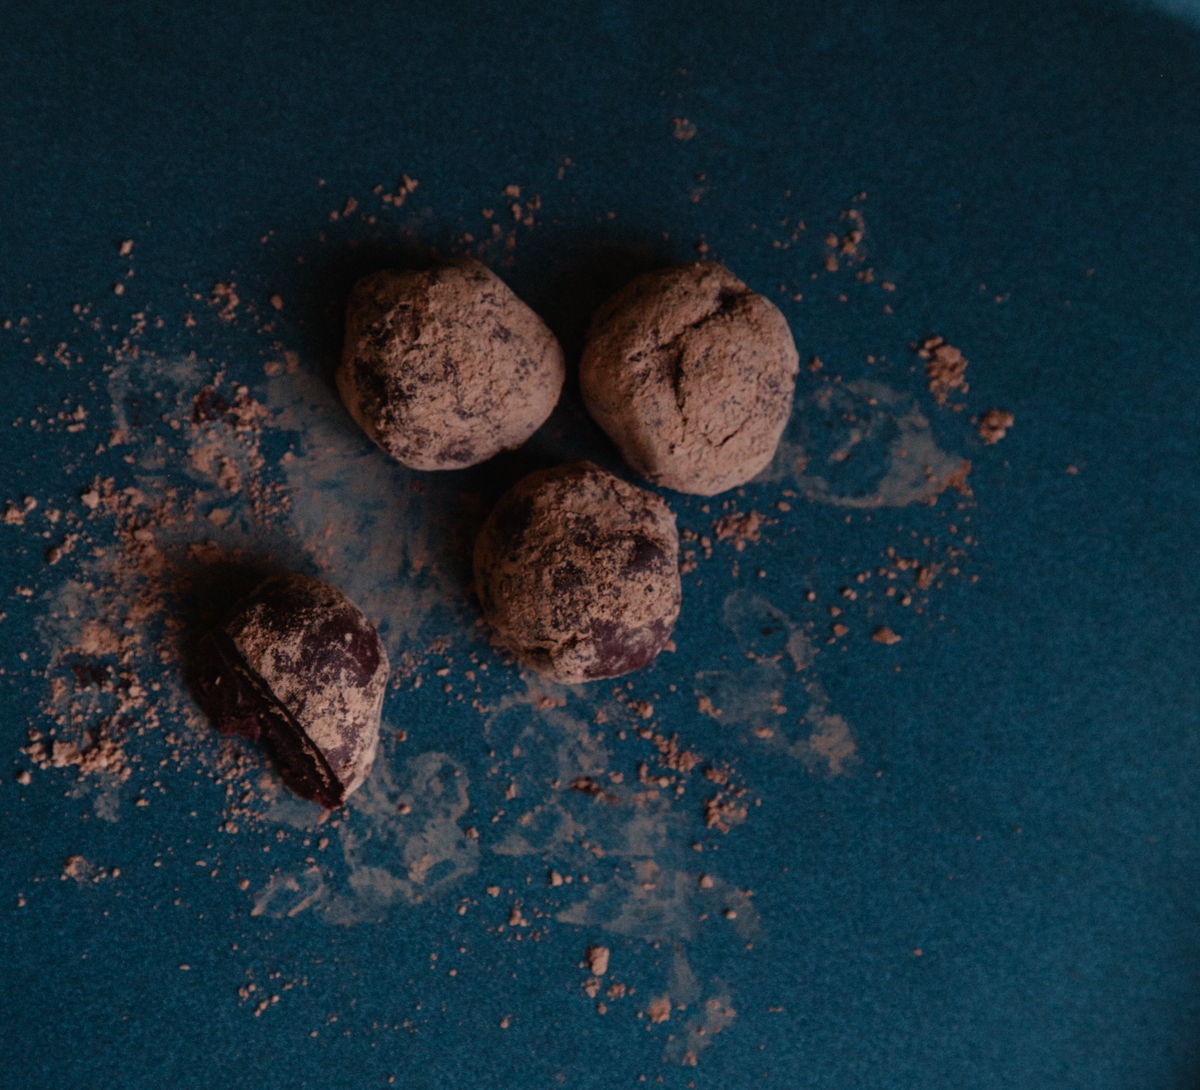
Magdalena: In skin care, and in aromatherapy in general, we use these basic kinds of oils: essential oils, vegetable oils, herbal oil infusions and butters.

Essential oils are produced by the process of steam distillation from various parts of the plants: flowers, leaves, barks, and resins. They offer a wide range of therapeutic properties: antimicrobial, antiviral, antifungal, stimulants, cell regenerators, calming, balancing, astringent, expectorants, sedative, antispasmodic, anti-hematoma, improve the circulation… and the list goes on. 

Interestingly enough, essential oils are not oily at all. We buy them in tiny bottles because they are very concentrated and we need only a few drops at a time. They are rarely used pure on the skin. Most of the time they would be too strong and possibly cause irritation. Therefore they need to be diluted in the vegetable oil also known in aromatherapy as a “base” or “carrier oil”. A few examples of essential oils used in skin care are: true lavender, ylang ylang, rose, jasmine, vetiver and geranium.

Vegetable oils are produced from nuts and seeds. We are interested only in oils produced with integrity: cold pressed, non-processed, non-deodorized and organic. Vegetable oils are carrier oils for essential oils but on their own they are amazing therapeutic substances with astounding benefits for holistic skin care. They are nutritionally dense and are a good source of oil-soluble vitamins (A, D, E, and K), fatty acids including essential fatty acids, sterols, phospholipids, tocopherols…

The majority of organic vegetable oils offer excellent protective and emollient properties for the skin, and greatly reduce trans-epidermal water loss. Therefore they improve skin hydration. Vegetable oils are needed by the skin to maintain its barrier function, health, tone, moisture, and elasticity. Examples of vegetable oils used in skin care are: argan, rosehip, jojoba, sunflower and olive oil. 

Herbal oil infusions are simply vegetable oils infused with plant material. They are beautiful in marrying the therapeutic properties of vegetable oils and specific herbs. Commonly known herbal oil infusions are: calendula oil and arnica oil.

And then there are butters, which are produced from nuts and are solid at room temperature. These will provide deeper protection from the elements. They are wonderful emollients and soften the skin. A great example of butter is widely used shea butter.

Amy: Many of us experience dry skin or break out when the seasons are changing. Do you have any favourite oils to use during the fall/winter to help protect skin from the elements? 
Magdalena: Changing seasons reminds us of the ever-existing rhythms of nature. Rhythms which so profoundly affect our very own ebb and flow. We forget to pay attention but thankfully skin is a great storyteller. It gives us clues whenever we stray off the path or simply need a bit more loving care. Fall and winter definitely call for the use of oils. The combination of essential oils, vegetable/herbal oils and/or butters offers a perfect therapeutic partnership. I have many favourite oils but the application will always depend on an individual and their skin. The most important thing to do in treating your skin is to first understand your individual needs. We are all a little bit different.

These are some general guidelines for which oils to use:

Essential oils:
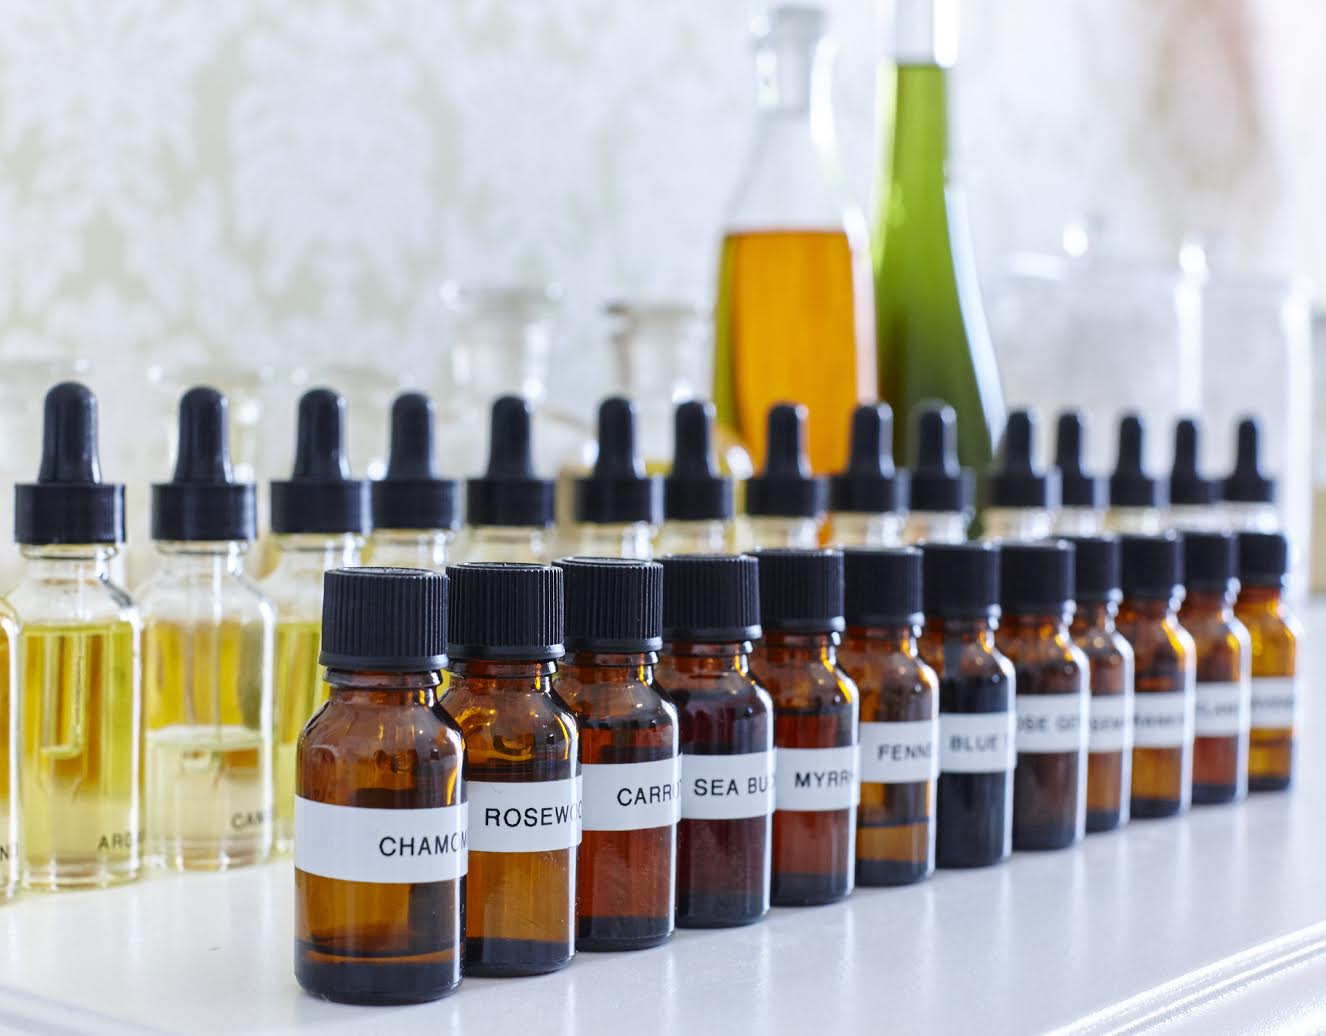
Dry skin – rosewood, lavender, carrot seed
Combo/sensitive skin – chamomile, ylang-ylang
Oily skin – rosemary, lavender

Vegetable oils:
Dry skin - argan, rosehip, sesame, shea butter
Combination skin – jojoba, sunflower, coconut, shea butter
Oily skin – grape seed,  jojoba

If your skin is dry or sensitive you will benefit from adding oils to your daily beauty care. Look for products that contain shea butter for extra protection from the elements.  Always apply your oils on slightly damp skin or use an organic rose hydrosol prior. Oils can be used as day or night moisturizers. Some people use them also as a cleanser. I often do.

How much to use? 10ml vegetable oil + 5 drops essential oil. 

The above oil suggestions will be a good start. Play with it! You may discover that there is a skin care formulator sleeping quietly within you. 

Amy: I know you are very diligent when sourcing your essential oils. How do you ensure that they are high quality?
Magdalena: Not all oils are created equal. We definitely have to be mindful when purchasing oils because there is a lot of very poor quality product on the market today. This goes for both essential and vegetable oils.

When we use oils for therapeutic purpose we want to be sure that the product we use actually offers therapeutic properties. Synthetic product is not only void of any healing, life enhancing molecules but it becomes a burden for our body, aging us quicker and presenting us with possible health risks. That is why purchasing pure, great quality oils is of utmost importance. 

To ensure the quality of my products and treatments I purchase mostly from people I know, small companies run by people with passion and love for the planet and life in general. I discovered a couple of distilleries that I love during my travels to France.  They are run by hard working families. You can feel the love when you visit. It’s amazing! I hope to travel more in the future to discover other producers like that.

Amy: Do you have any tips on how to store oils in order to keep them from degrading or to prolong their shelf life?
Magdalena: Yes, it is pretty simple. Oils do not like light or heat. Store them in dark glass bottles (never in plastic) and in a cool, dark place.

Amy: I love the Face Balm you developed. I’m guessing it would be the perfect thing for the colder months.  
Magdalena: Definitely. It is a protective blend of vegetable and essential oils with a good dose of shea butter. It is all organic — just oils and butters — not even a bit of undesirable stuff. It has developed quite a following in the last couple of years. My dry skin clients in particular love it. It's a great product for cold Ottawa weather for sure.

Amy: What's your go-to essential oil?
Magdalena: Oh Amy, this is such a difficult question… I have so many!

Ok, if I had to pick one for skin care purposes it would be Everlasting (Helichrysum italicum) simply because it has absolutely amazing skin healing properties. I do not care for its aromatic profile but I know it does wonders so it is #1.

As far as my own pleasure goes, I am a bit of an aromatic snob lately and indulge in rose and jasmine. So beautiful and feminine and sensuous…pure love. But ask me in a couple of months and it may be something simple like Eucalyptus radiata. I go with the flow. I guess, I hang out with the one which is calling me at the moment. 

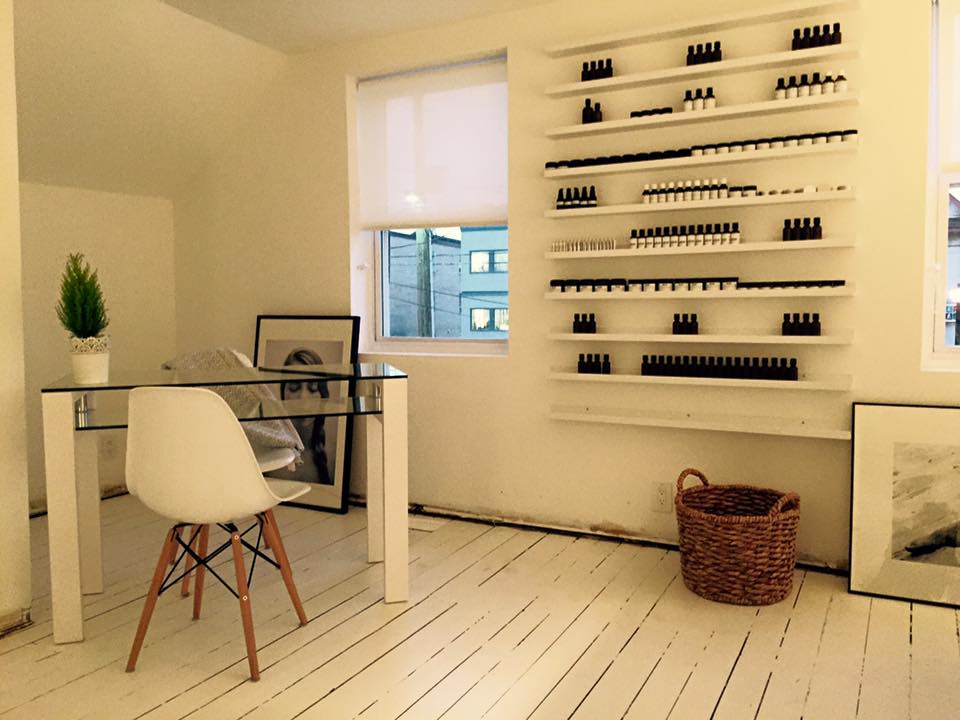
Magdalena's studio, Woman Divine, is located at 363 Churchill Avenue (near Richmond Road) in Ottawa. You can follow her on Facebook, or visit her website for more information.

Chili Chocolate Truffles

Since my last few recipe posts have been savoury soups, today I decided to switch things up by sharing something sweet. Although I don't have much of a sweet tooth myself, I really, really enjoy chocolate truffles. These truffles in particular are rich, creamy, and bitter (but not too bitter), with a pop of spice. I've made them on many occasions and they've always been very well received. They are dairy free, gluten free, and the perfect dessert for you upcoming holiday parties.

See below for a few beautiful photos (courtesy of my friend Caroline of CY-iwander) and the full recipe.

CHILI CHOCOLATE TRUFFLES

Vegan - Gluten Free - Makes about 20 - 25 truffles

Ingredients:

1/2 cup, full fat coconut milk
1 tablespoon, vanilla extract
1 cup, organic dairy-free semi-sweet chocolate chips (I like Camino brand)
2 - 3 tablespoons, cocoa powder
1 teaspoon, cinnamon
1/2 teaspoon, ground ginger
1/8 teaspoon, cayenne
A big pinch of sea salt

Directions:

In a saucepan combine coconut milk and vanilla extract and bring to a boil over medium heat. Reduce heat to a low. Simmer for about 5 minutes to allow the liquid to evaporate.

Remove the saucepan from the heat and add chocolate, spices and salt, stirring with a fork or whisking until the chocolate has melted and the mixture is evenly combined.

Transfer the mixture to a bowl and chill in the freezer for about 1 hour, or until the mixture is firm enough to shape into balls.  At this point, you'll want to add the cocoa powder to another bowl. Then scoop out about a tablespoon of the mixture and roll it into a truffle ball. Transfer the truffle in to the cocoa powder and roll it around to coat the exterior. Repeat this process until you have used up all of the mixture. Transfer the truffles to a baking sheet lined with parchment paper and refrigerate to set completely.

Storage: place the truffles in an airtight container in the refrigerator, where they will keep about 3 weeks, or in the freezer, where they will keep for about two months.

This recipe is inspired by Ottawa chef Caroline Ishii's trademark truffles from her restaurant Zen Kitchen, which is sadly now closed. 

Holiday Survival Guide: Q & A with Dr. Kathy

With the holiday parties and gatherings in full swing, I wanted to be sure that I was ready and well equipped to handle the hustle and bustle of the season. My first instinct was to reach out to my friend Dr. Kathy Van Zeyl.  Dr. Kathy is a naturopathic doctor (ND) with expertise in areas such as sports medicine, energy balance, detoxification, weight loss and adrenal support.   Dr. Kathy and I met last year when we both started working at EPIC Fitness + Lifestyle.  From the day I met her, I loved her holistic and realistic approach to dealing with clients and I've been continually amazed by her ability to help people overcome daunting health challenges.

In the last year, I've gotten to know her both professionally and personally.  I'm lucky to have her as my ally for helping clients and also my go-to friend for dog walks. Even our pups have become pals!

Dr. Kathy is truly a wealth of knowledge and I knew she'd have lots of great information to share with us.  Without further ado, please read on to learn her tried and true strategies for staying healthy during the holidays. She touches on topics such as managing stress, strengthening your immune system, tips for avoiding craving, and more!

Amy: The holidays are upon us! What are your tips for staying stress free?
Kathy: Busy or high stress periods often lead to elevated release of the stress hormone “cortisol” from your hardworking, non-relenting adrenal glands.  These glands are always by your side (quite literally, they’re on both sides hanging out on top of your kidneys!), and help your body to adapt to stress.  

Chronic high cortisol can lead to either over- or underactive adrenal function resulting in fatigue, anxiety, insomnia, weight gain and immune suppression amidst other issues.  We can’t always remove the stress, but we CAN change how your body responds to it!  Support your adrenal glands through stress with these tips to maximize stress resilience and keep these fantastic organs happy.

Sleep – get 7-9 hours of sleep per night, going to bed and waking at the same times consistently.  Both your melatonin and cortisol levels fluctuate on a circadian rhythm.  Consistency is key for regulating these two very important hormones so you can sleep when you need to, and stay awake and energized the rest of the time.

Eat for steady blood sugar – Include plenty of slowly-absorbing protein, healthy fats and nutrient-rich vegetables to stabilize blood glucose (your brain’s primary fuel source!) and decrease your body’s stress response from sugar levels that are either too high or too low.

Take 5… – As in 5 minutes before bed to do some deep breathing, stretching or meditation to relax the nervous system and calm your body’s stress response.  We can’t all fit an hour of yoga into our schedule, but 5 minutes a day is easier to find and can go a long way!

Move it! – One of my favourite prescriptions is EXERCISE (!!!) for all of the side-“benefits” that come along with it.  Pick something you enjoy whether it’s running (my favourite – yes, even in winter!!), hiking, skating, skiing, snow-shoeing, weight-lifting, yoga, Zumba, team sports, etc.  Pick something you really enjoy so you’ll be less likely to quit.  Movement can balance stress resilience, improve sleep and kickstart metabolism.  Even 20-30 minutes 3-5 times a week can give these benefits, so conquer the excuses and take some advice from Nike… JUST DO IT!!!

Amy: Once the hustle and bustle of the holidays are over, it's not uncommon to get sick.  Do you have any advice on how to prevent this from happening?  
Kathy: For prevention, the key is managing stress (see above!).  If you’re starting to feel a cold coming, these quick tips can help strengthen your system to beat those bacteria and viruses out of your system.

Oil of oregano – If you’ve ever tried it before, you’ll know exactly why those pesky pathogens tend to bite the dust after taking it.  Oil of oregano is one of nature’s most potent antibiotics and a very effective side-kick for your immune system.  Try taking 3-5 drops 3 times a day at the first signs of a cold to give some antimicrobial support.  Can’t stand the taste?  A teaspoon of honey can ease the strong flavour and provide additional germ-fighting support!

Vitamin C – Although Vitamin C doesn’t prevent a cold, it can reduce the intensity and duration of sickness once it hits.  They key is in the dose!  To maximize vitamin C absorption, take 1000mg every 2-4 hours until you reach what we naturopaths lovingly refer to as “bowel tolerance.”  This is when stools start to soften as your digestive tract has reached its maximum absorption for vitamin C.  Keep this level in mind and for maximum immune and vitamin C efficiency, take one less dose than what caused stool softening.  The more the merrier, but only if you can absorb it!    

Fluids – Include lots of water, soups and herbal teas such as ginger (especially for fevers), honey & lemon or licorice root.  A high fluid intake can decrease the thickness of mucous secretions so your hardworking immune system can trap and remove harmful germs from the body.  Sticking with fluids, low fibre, low fat and easily digestible foods (well-cooked proteins and vegetables!) also helps to minimize the work your body has to do to put these nutrients to good use.

Amy: Salty and sweet snacks are so readily available this time of year. Any suggestions to help curb the cravings? 
Kathy: Yes! The first step is recognizing where the craving comes from.  Here’s a quick breakdown of what these cravings may mean:

Sugar – These cravings often come with fluctuations in energy levels available in the bloodstream.  Low blood sugar from overconsumption of sugar and carbohydrates or underconsumption of other nutrients can trigger the brain to send ravenous hunger cues (ex. “feed me sugar now, I’m starving!!!”).   Instead, eat slow-absorbing nutrients (proteins, healthy fats, veggies and fibre) and try to do so every 4-5 hours.  Especially if you’re about to head out to a holiday party, eat something with protein or fibre first to reduce the hunger pangs and overindulging.  For a healthy substitute, try fresh fruit with almond butter, or chocolate avocado pudding made from avocadoes, cocoa powder and coconut milk to satisfy your sweet tooth.

Salt – Salt-seeking on the other hand is most commonly linked with elevated stress levels.  Over time from high stress and adrenal strain (see question # 1 above), blood pressure changes can take place and the adrenals will have a difficult time maintaining a consistent amount of pressure (adrenal glands release aldosterone to regulate blood pressure response).  As it’s often more common to see low blood pressure as a result of chronic stress, salt cravings are a natural way your body tries to readjust your blood pressure to normal.  Frequent salt cravers should pay attention to stress management and support their adrenals.  For a quick, healthy alternative, look for things like bean chips, guacamole, hummus or trail mix to satiate the cravings without overindulging in greasy snacks.

One more highly prevalent craving is chocolate.  Where does this come from?  Sometimes it’s the same link as with sugar cravings (low energy and brain fuel), but it may also be a sign of magnesium deficiency!  Cocoa powder is naturally high in magnesium, so chocolate cravings may be a way for your body to get the nutrients it’s lacking.  Refer back to the chocolate avocado pudding suggestion for a low sugar, high magnesium treat (as avocados also contain high magnesium levels!).

Amy: The holidays are synonymous with overindulgence. Despite best intentions, most of us fall victim to over eating or drinking a little bit too much.  Do you have any top secret naturopathic remedies you can share? 
Kathy: Perhaps…. Maybe… Ok the answer is YES, but just don’t tell anyone else because I want you to try your best to behave!  Obviously the first rule is try not to overindulge.  But when it’s too late these are my top go-to’s:

B vitamins – Used in just about all metabolic reactions, B vitamins can help to recover your energy and kickstart the metabolism and elimination of unwanted substances in the body.  These area best taken early in the day and don’t be surprised if your urine is bright yellow afterwards!  B vitamins naturally contain an orange or yellow pigment.

Lemon water – A great source of electrolytes and vitamin C, lemon water can help improve digestion, reduce acidity in the body, and rehydrate after excessive water loss due to alcohol.  Over the holidays try to start your day by squeezing out the juice from half a lemon and drink it with warm water on an empty stomach.  To save some time, pre-squeeze a bunch and keep it in a glass jar in the fridge!

Milk thistle – Your liver is the hardest working detoxification organ in your body, so give it some holiday loving if you’re going to load on the work!  Milk thistle extract (silymarin) helps to protect the liver against damage, regenerates damaged cells, and upregulates detoxification pathways.  Two key things to keep in mind any time you’re dealing with herbs are quality and safety – consult with a professional to make sure it doesn’t interact with any of your medications and source out a high quality herbal company you can trust.  We naturopaths are here for a reason!  Also I’ve got way too much information stored in my head, so come use some of it please!

Wishing you a happy, healthy, stress-free holiday and may the New Year bring along a new you!

For more information about Dr. Kathy, or to book an appointment with her, please visit her website. You can also find her on Facebook and Twitter


Hearty Leek, Lentil & Leafy Green Soup

If you follow my blog, you might have noticed my affinity for lentils. I really do love them! They are an excellent source of protein, fiber, and complex carbohydrates.  Lentils are incredibly nutrient dense. They contain iron, potassium, magnesium, zinc,  and B vitamins.  They are also a low-glycemic food, meaning lentils do not spike blood sugar. Plus, they're super inexpensive and can be easily adapted into soups, salads, stews, and can be blended into spreads or dips. If you haven't tried lentils yet, what are you waiting for? 

A few weeks ago, I posted a recipe for butternut squash and red lentil soup. This time around, my soup includes hearty and robust brown lentils, loads of leeks and leafy greens.  On cold days, this soup will warm you up, fill you up, and will make your belly very happy. 

Give it a try and let me know what you think. See below for the recipe. 

HEARTY LEEK, LENTIL & LEAFY GREEN SOUP

Ingredients:

  • 2 tablespoons, extra virgin olive oil

  • 3 leeks, ends trimmed (keeping the white and pale green parts), halved lengthwise, thinly sliced

  • 2 carrots, peeled, chopped into bite sized pieces

  • 2 ribs of celery, chopped

  • 3 cloves of garlic, minced

  • 1 tablespoon, cumin

  • 1 tablespoon, herbes de provence (or a spice mixture of your choice including herbs such as savoury, marjoram, rosemary, thyme, and oregano)

  • A pinch or two of red pepper flakes (or more if you want a spicier soup)

  • 3 medium sized potatoes (of your choice), roughly chopped to the size of a dice

  • 1 cup brown or green lentils, picked over and rinsed

  • 1 or 2 bay leaves

  • 6 cups, water

  • 1 28 oz (796 ml) can of diced tomatoes

  • 2 loosely packed cups, leafy greens (I used kale), stems removed, ripped into bite sized pieces

  • Sea salt & freshly ground black pepper

Directions: 

Warm the olive oil in a large pot over medium heat. Add the leeks, carrots and celery with a big pinch of salt.  Stir often, until the vegetables have softened, about 5 minutes. Add the garlic, cumin, herbs de provence and red pepper flakes. Stirring constantly, cook until fragrant, for about 30 seconds.

Add the potatoes, lentils, bay leaves and water. Raise the heat and bring the mixture to a boil, then partially cover the pot and reduce heat to maintain a gentle simmer. Cook for 30 minutes, or until the lentils are tender but still hold their shape. 

At this point, you can add the tomatoes and give the soup a stir. Add the kale, mix well, and cook for a few more minutes. Taste your soup for flavour and season with salt and pepper. Remove the bay leaves, then serve immediately. 

Get Cultured: Sauerkraut 101

If you've been following the latest health and foodie trends, or if you have an affinity for German food, you've likely heard about sauerkraut. It's raw, sour cabbage and is made through the process of lacto-fermentation. Sauerkraut is known as a live-culture food because the fermentation creates an inviting environment for health-supportive microscopic bacteria to live and thrive.  

The name sauerkraut is German, but there is strong evidence that the practice of fermenting cabbage originated in China and ultimately landed in Europe thanks to nomadic people from Asia.  These days, eating and making sauerkraut is growing in popularity here in North America. As a result, it's now widely available and can be found at health food stores, grocery stores, farmers' markets and even on the menu at some restaurants. 

My first jar of sauerkraut, circa Spring 2012. Sometimes you need to get creative!

My first jar of sauerkraut, circa Spring 2012. Sometimes you need to get creative!

Even before undergoing the fermentation process, cabbage is a true super food. It's high in fibre, vitamins, and minerals. It's also antioxidant rich and anti-inflammatory. Simply put, eating cabbage can improve digestion, support the immune systems, contribute to heart health, and help fight cancer growth. 

Turning cabbage into sauerkraut is fairly simple. All you need is cabbage, salt and a glass jar or ceramic crock. Firstly, the cabbage is finely sliced or shredded with a knife or in a food processor, then salt is added. This causes the cabbage to release water (known as brine). In a jar or crock, the cabbage should be submerged by its brine (creating an anaerobic environment), weighted down using a rock, bottle, jar or a bag filled with water, and fermented for several days or months. This style of fermentation creates the ideal condition for beneficial micro-organisms to proliferate.  Once eaten, sauerkraut provides our digestive tract with colonies of bacteria that are essential in breaking down and absorbing nutrients from food. Scientists are starting to investigate this bacteria and the important role it plays in supporting our immune system.  

Fermentation also gives us the ability to preserve food. As we know, vegetables spoil easily and because of this our ancestors devised ways to improve shelf life. With that in mind, the fall is a great time to start planning ahead.  By starting a few batches of sauerkraut now you'll have raw, living food to consume during the winter months when fresh produce is scant. 

Another major benefit of sauerkraut is that it's an incredibly versatile food that can be easily incorporated into your diet.  It's delicious and tangy and pairs nicely with potato or rice dishes. It can be topped on stew, stir fry, or chili. It may also be added to sandwiches or salads, eaten alone or as a side dish. Eating sauerkraut is also an easy way to increase your vegetable intake. 

If you'd like to lean more about sauerkraut or other cultured foods and drinks, pick up a copy of Sandor Ellix Katz's book, Wild Fermentation. It's a fascinating and informative read, which includes recipes and tutorials on a variety of ferments ranging from sauerkraut, to sourdough, to hooch and beyond! 

This article was written for The Millstone, a community newspaper for Mississippi Mills. To view the original article, click HERE

Butternut Squash & Red Lentil Soup

Despite the drastic fluctuations in Ottawa weather and temperatures, it is indeed fall. In my last blog post,  I shared a recipe for hemp and oat pumpkin spice muffins that I made recently while cooking for Jackie Beaudoin's yoga retreat in Lac Pemichangan. These muffins were perfect for the yogis and also very seasonal. Another recipe that everybody really loved was my butternut squash and red lentil soup. This is soup is warming and satiating, thanks to a robust mix of spices and a healthy balance of protein, carbohydrates and fat. 

Butternut squash is readily available this time of year. It's a variety of winter squash and grown is locally here in Ottawa (and throughout the Western hemisphere). It's touted as an antioxidant super star, thanks to its uniquely high percentage of certain carotenoids. Although butternut squash is not a fatty food, it's interesting to note that it contain omega-3 fats in the form of anti-inflammatory alpha-linolenic acid (ALA). Simply put, butternut squash is an incredibly health supportive food, that offers cancer protective properties. Health benefits aside,  it's also delicious and versatile. You can try incorporating butternut squash into stews, soups, spreads, lasagnas, chili, salads, and it can even be added to cakes, brownies and pies.  The seeds are edible too and can be roasted in the same way you would roast pumpkin seeds.

This recipe also includes red lentils, one of my favourite fibrous foods. As you may know, fibre helps with weight management, the body's natural detoxification, gut health and protects against colon cancer. One of the main reasons I love red lentils is that they blend, dissolve and even disappear,  when added to soups and stews. I like to call them "sneaky lentils" because they can be added to cooked dishes and go unnoticed, even by the pickiest eaters. 

Without further ado, please find the recipe below. If you make it, I'd love to hear your feedback. This is one of my favourites, and I'm pretty sure it'll become one of yours too. 

BUTTERNUT SQASH SOUP & RED LENTIL SOUP

Vegan ~ Gluten Free ~ Makes 4 servings

Ingredients: 

1 Tablespoon, coconut oil
1 onion, diced
1 rib of celery, small diced
1 carrot, small diced
1 clove of garlic, minced
1” piece of ginger, peeled and minced
1 cup, red lentils
1 can, coconut milk
4 cups, vegetable stock or water
1 Tablespoon, ground cumin
1 Tablespoon, ground coriander
1 teaspoon, allspice
1 small butternut squash, peeled and diced
1 bunch cilantro stems and leaves, roughly chopped
2 limes, zest and juice
Sea salt & pepper
Chilli flakes or hot sauce, to taste 

Directions: 

In a heavy bottomed pot, melt the coconut oil and add the onion, celery, and carrot and a big pinch of sea salt. Cook for a few minutes until the onions start to become translucent and then add ginger and garlic. Cook for 2-3 minutes. Add the lentils and cook for a minute. Add all the spices and stir for another minute.

Add the stock or water, squash, and half of the chopped cilantro. Simmer over medium heat until the squash is soft and the lentils are cooked. Stir in coconut milk.

Add the lime zest and juice and add the remainder of the cilantro. Season with salt and pepper. Enjoy with a sprinkle of chilli flakes or good dousing of hot sauce and a hearty slice bread. 

Pumpkin Spice Muffins

Last week, I was working as the chef at Jackie Beaudoin's cottage yoga retreat. I love these kind of cooking gigs. They are a great opportunity for me to showcase some of my favourite healthy foods to very receptive and open-minded groups of people. Typically everything I make is vegan, gluten free, super healthy, but also loaded with flavour. I also make a concerted effort to feature as many seasonal and local vegetables as possible.  During the weekend, we ate lots of  root vegetables and squash. I also conjured up a great new recipe featuring one of my fall favourites: pumpkin!

Below, you'll find the recipe for my oat & hemp pumpkin spice muffins. The base for these is oat flour.  Lately, it's been my go-to for baking. I like that it has a bit more fibre than most flours and that I can easily make it myself. If you have a high powered blender or a good food processor at home, you can too!  Simply place rolled oats in a blender or food processor and process until they are finely ground (flour consistency).  I'm also a big fan of hemp hearts. Most people don't realize this, but hemp hearts are grown exclusively in Canada. They are also great source of protein, vitamins, minerals and fibre. They add a nice nutty flavour to the muffins. 

As for the pumpkin purée,  the canned version works, but it's very easy to make your own. Use one small pie pumpkin, cut it in half and remove the seeds (put them aside and you can roast them later for a healthy snack). Rub a little bit of oil on to the inner pieces before placing the halves (skin side up) on a parchment-lined cookie sheet, then bake for 30 minutes at 400 F. Honestly, there's nothing quite like the taste of roasted pumpkin. It's so good! If you have the time, and a pie pumpkin, I recommend this method.

Given that it's Halloween weekend, this recipe is very timely. If you're trying to stay away from candy, but still hoping to satisfy your sweet tooth, I've got you covered! 

OAT & HEMP PUMPKIN SPICE MUFFINS

Vegan ~ Gluten Free ~ Makes 12 large muffins

Ingredients: 

2 1/2 cups oat flour or spelt flour
2/3 – 3/4 cup hemp hearts
2 teaspoon baking powder
1⁄4 teaspoon, sea salt
1 tablespoon pumpkin spice
1 cup pumpkin purée (canned or homemade)
1⁄2 cup, pure maple syrup
3⁄4 cup unsweetened plant-based milk
1 1/2 teaspoon pure vanilla extract
1/3 cup medjool or cooking dates, chopped into small pieces, optional
1/4 cup raw pumpkin seeds or hemp hearts for topping

Directions: 

Preheat oven to 350°F. In a large bowl, combine the dry ingredients, sifting or whisking in the baking powder. Stir through until well combined.

In another bowl, combine pumpkin purée, maple syrup, milk, vanilla, and dates and mix together. Add the wet mixture to the dry mixture, and gently fold and mix through, until well combined (but do not overmix).

Spoon the mixture into a muffin pan lined with cupcake liners (this will fill 12 muffins quite full).  Top with pumpkin seeds. Bake for 21-23 minutes, or until a toothpick inserted in the center comes out clean. Allow them cool completely before trying to remove them from the muffin tray, or they may fall apart.  

Store in an airtight container for up to a week. 

Pumpkin Spice Chia Pudding

Happy Thanksgiving! Like most Canadians, I typically spend this weekend eating lots of foods among family or friends (for me the terms are a pretty much synonymous).  Generally, our plates are full of roasted or steamed root vegetables, peas, sauerkraut (growing up in Nova Scotia it was always Tankcook), mashed potatoes, and turkey (nowadays I swap out the turkey for homemade chickpea patties or a bean-based casserole).  Of course, there always has to be pumpkin, usually a pumpkin pie.  Keeping with the theme of friends, family and pumpkins, I invited my long time friend Heather to contribute one of her fantastic fall recipes. And yes, it includes pumpkin. 

Although Heather's been working in the financial industry for most of her career, she's one of the best home chefs I've had the pleasure of knowing. Her meals are always beautifully plated and full of flavour. Not only is she a great chef, but she's a foodie and is always in the know of food trends. Her trend spotting ability also applies to health products and health foods.  Naturally, we always have lots to talk about. 

As you may remember, I've written about chia in the past, and just to give credit where credit is due, it was actually Heather who first told me about these nutrient dense seeds. Years ago, I remember her talking about chia puddings and to this day, she's still making these puddings and coming up with new and creative recipes. In her post below, Heather shares her recipe for Pumpkin Spice Chia Pudding.  Read on and enjoy!

Guest blogger, Heather

Photo courtesy of Katia Pershin.

Photo courtesy of Katia Pershin.

‘Tis the season: pumpkin spice muffins, pumpkin spice lattes, pumpkin spice everything. For some reason in the fall, I have a tendency to rebel against the pumpkin for a few weeks, but inevitably give in by Thanksgiving weekend. 

I’m a bit of a creature of habit. I actually don’t get bored by eating the same things over and over (and over) again. Lunches and dinners are varied, but my morning always begins with a smoothie, and rarely a day goes by where I don’t have hummus and celery sticks or Mary’s crackers for an afternoon snack. 

One of my habitual morning treats is chia pudding. I tend to make it year round, and I change up the flavours depending on the season. Last week, for the first time, I tried a seasonal autumn version by adding some pumpkin and spice. 

Chia seeds are a superfood that supplies a lot of bang for your buck. They are high in fibre, omega-3 fatty acids, magnesium, and protein. They’re also loaded with antioxidants, and very easy to add to your diet! Pumpkins aren’t so shabby either, with one cup providing well over your recommended daily intake of vitamin A, and like other bright orange vegetables, are full of beta-carotene. Their fibre content keeps you feeling full longer, and they’re high in vitamin C. Don’t throw away the seeds, either—those delicious, snackable pepitas are full of tryptophan, an animo acid that produces serotonin, a mood booster. 

Just one warning about the Pumpkin Spice Chia Pudding: it ain’t pretty. 

unnamed-1.jpg

PUMPKIN SPICE CHIA PUDDING

Makes approximately 6  to 8 servings.  

Ingredients:

3 cups of pumpkin purée
1/3 cup of chia seeds
2 1/2 cups of unsweetened almond milk
1/4 cup pure maple syrup
1 1/2 tablespoons pumpkin pie spice
1 to 2 tablespoons cinnamon

There are two different methods of making this, depending on where your pumpkin purée comes from. I’ve tried it with both canned and roasted pumpkin. 

Roasting your own pumpkin version: 

Use one small pie pumpkin, cut it in half and remove the seeds. Rub a little bit of coconut oil on to the inner pieces before placing the halves (skin side up) on a parchment-lined cookie sheet, then bake for 30 minutes at 400°. 

Once the pumpkin is cooked and cooled, the skin should come off easily. Then place the pumpkin flesh in to a blender or food processor with one cup of the almond milk and blend until smooth. 

In a mason jar or BPA-free plastic container, mix the chia seeds with the remaining almond milk and maple syrup. Then add the purée a cup at a time, and mix well with a wooden spoon, and continue with the recipe below. (This version, in my opinion, is much better tasting than the canned pumpkin version. Don’t forget to reserve the pumpkin seeds for roasting!) 

Canned pumpkin version: 

In a container with a tight-fitting lid, like a mason jar or BPA-free plastic container, mix the chia seeds, almond milk, and maple syrup, and shake until combined. Add the purée a cup at a time, and mix well with a wooden spoon.  (It will be very liquidy, but once the chia seeds start to absorb the almond milk, it will become much thicker.) 

Now that you've combined your purée, chia seeds, almond milk, and maple syrup, add the spices and mix well again. 

Put the jar or plastic container in the fridge overnight. By morning you will have a thick, slightly lumpy, superfood pudding, ready to eat for a healthy breakfast or snack. The seeds don’t break down, but rather expand with liquid, so the texture is reminiscent of tapioca. And like I mentioned above, this recipe would never make the cover of a food magazine; she’s no supermodel. Just remember, it’s what on the inside that counts! 

Healing Turmeric Elixir

It's been a while since I've had the chance to sit down and write a proper blog post. August was a crazy month, but crazy in a good way. I was really busy with HappinessHabits613, working with nutrition clients, teaching cooking lessons at the CAG kid's summer camps, helping plan EPIC Fitness' 3 year anniversary party, and also preparing and menu planning for the Body and Balance yoga retreat in Ireland. 

I'm now back in Ottawa, I arrived on Monday night, and I'm just starting to get back in to the swing of things after a few busy weeks in West Cork. Even though I came home absolutely spent, I'm so thankful that Andrea, the owner of Body and Balance, asked me to be part of this experience again this year. Since it was the second time around, I was ready for the hard work and planning, as well as the physical and mental stamina required to cook for a week strait in a very remote location. I'll admit that I was sleep deprived, on my feet for many hours a day, and often preoccupied with the next meal -- but I had such a fantastic time!  The hard work paid off and all of the dishes turned out well. Everybody was happy with the food and I love that I was able to introduce people to an extremely healthy way of eating, without compromising taste.  

Despite the busyness, I was much more relaxed this year.  It was less stressful since I was more prepared. I also had a lot of help from my two amazing sous chefs, Aoife and Kristen. They were so helpful in the kitchen and, with our combined efforts, I was able to participate in some of the yoga and all of the outings with the participants. 

The retreat HQ was the beautiful Linden House in Glengarrif. However, we spent many days exploring picturesque West Cork by coach, foot and by bike. Our exploits included a 20 km bike ride along the coast to Sheep's Head Way with a blustery trek to the lighthouse at tip of the peninsula; a hike to the historic Three Castles; a warm and sunny beach day at Barleycove;  a quick stop at the Mizen Head signal station; a visit to the Dzogchen Beara Tibetan Buddhist Centre, at which we discovered a donkey sanctuary (definitely a personal highlight); and day trips to Glengarriff Village and Bantry, both of which are lovely costal villages with quaint shops and pubs.  In fact, Bantry is home to one of my favourite shops of all time, Organico. It's a health food store, plus cafe, bakery and eatery, with really awesome (mostly) vegetarian and vegan fare.  If you're ever in the area, please do yourself a favour and try their seaweed salad. It's amazing! 

Before and after the retreat, I also spent time in Cork City. I stayed with Aoife and really enjoyed exploring the city, checking out the pubs, coffee shops, and all of the farmers' markets and health food shops. Rather than elaborate too much, I'll spare you the 1000 words, and share some photos. See below.  

Now that you've had a glimpse into my Ireland adventure, let's talk about the turmeric elixir I alluded to in the blog title. As I mentioned above, I was very busy when I was away. I was run down and I wasn't taking great care of myself. That said, I drank a turmeric elixir almost every day and so did all the participants, and none of us got sick.

Every single ingredient in the turmeric elixir comes with one or many health benefits. If you're curious to know more, just ask google. This drink is basically a glowing yellow mug of healthy goodness, and even with all its healing powers, it's actually very palatable. In fact, all of the participants really looked forward to their daily turmeric drink.  See below for the recipe and prepare yourself for a taste explosion! Try it out and let me know what you think.

IMG_6259.jpg

HEALING TURMERIC ELIXIR

Makes approximate two large mugs of zingy goodness

Ingredients: 

3 cups, water
1/4 teaspoon, turmeric powder or 1 inch fresh turmeric, chopped
1 inch piece fresh ginger, peeled and chopped
1/2 lemon, skin removed, and roughly chopped (no need to remove pith or seeds)
1/2 clove of garlic, peeled, optional
1/2 cup, raw apple cider vinegar
1 heaping tablespoon, raw local honey or maple syrup
2 big pinches of cinnamon
A pinch of black pepper

Directions: 

In a kettle or pot, bring water to a boil. Remove pot or kettle from heat and prepare the remaining ingredients. Add all of the ingredients to a blender (including the hot water) and blend until a smooth consistency is reached (approximately 1 to 2 minutes). Be sure to hold the top of your blender with a dry dish cloth to protect your hand from the steam.  Carefully pour the liquid through a fine metal strainer in to your mug(s). Enjoy immediately and brace yourself for the zing! Option to add a bit more honey or maple syrup, if desired.

Notes from the kitchen: the turmeric will stain your blender. The best way to remove the yellow stain is to give your blender a quick scrub, then leave it sitting out in the sunlight for a few hours. I usually leave mine on the windowsill and the stain is gone by the end of the day. I don't know why or how this work, but in my experience sunlight is the only tried, tested and true method for removing turmeric stains. 

Food & Mood: Be Happy, Not Hangry

In the last month or so, I've been having a lot of fun planning, organizing and participating in #HappinessHabits613.  Since food and nutrition are a big part of my life, it was important to me to write about how our food choices can affect the way we feel. Happiness, or lack thereof, is generally associated with lifestyle factors such as stress, social relationship, lack of sleep, finances, and so on, but the link between food and mood is often overlooked.  If you're looking for some basics on how to improve your food choices, and ultimately your mood, please read on. 

Photo via www.pintrest.com 

Photo via www.pintrest.com 

In my experience, one of the most effective ways to keep your mood in check is to make sure that your blood sugar is balanced. If you're not exactly sure what I mean by this, let me give you an example. Have you ever noticed that you start to feel hangry if you wait too long to eat or skip a meal? In this state, you might feel short tempered, irritable, anxious, shaky, snappy, or quick to lash out? These are classic and primordial symptoms of body's response to low blood sugar. If you've experienced this, you'll know that it's not enjoyable for you or for those around you.
So, let's look at ways that you can keep the hangre at bay! 

First and foremost,  you'll want to focus on eating real foods. As we know, all food is not created equal.  In fact, some foods are created almost entirely in a factory.  Whereas others are plucked from the earth, a tree, or bush, and transferred (with very little processing) from the farm to the farmers' market or grocery store, then to your table.  You'll want to focus on the latter. Try to build your diet around foods that are fresh and whole (extra points if they are organic, local and seasonal too).  You'll also want to amp up your meals with fresh produce, whole grains, legumes, nuts, seeds, and good quality oils (like extra virgin olive oil and unrefined coconut oil).  Why? Because these foods will nourish and satiate you by providing a balanced mix of vital nutrients, healthy proteins, carbohydrates (fibre!) and fats. Because of this, you'll feel full longer and you won't be plagued by the dreaded blood sugar highs and lows. This means you'll have balanced energy levels, be more clear headed, productive, and you'll feel happier!

Our brains require glucose to function properly. When blood sugar (blood glucose) drops too low you'll notice changes in cognition and mood. You may experience impaired memory, irritability, slowed thinking, or even feelings of depression. To prevent this from happening, I want you to eat snacks. I know I just told you that eating real foods will keep you full longer, and they will, but snacks provide that little top up of glucose your brain needs to continue functioning at full capacity until your next meal.  And on this note, your snacks should also fall into the "real food" category.  If you start to feel a lull in energy, have a handful of trail mix, an apple, rice cakes with almond or peanut butter, granola and yogurt, or my all time favourite, hummus with veggies and Mary's crackers.  

Limit sugar, caffeine, alcohol, and processed foods.  In moderation, most of these things are okay, but be aware that they can trigger blood sugar irregularities.  For example, if you consume a lot sugary foods your blood sugar levels will undoubtedly spike. When this happens, your pancreas will pump out insulin to help regulate and store any excess glucose found in your blood. In this situation, the body often produces more insulin than needed and, in one fell swoop, you've gone from very high blood sugar to very low blood sugar. What happens next? Lethargy, fatigue and cravings for sugary, sweet foods. Then you end up eating that brownie and drinking that double mocha frappuccino you were so desperately craving — and the cycle continues. Spare yourself from the emotional, psychological, and physiological roller coaster by focussing your diet on healthy, whole proteins, carbohydrates, and fats.  

You should also strive to diversify your diet.  When shopping at the grocery store or farmers' market, fill your basket or tote bag with a colourful collection of foods.  The greater variety of whole foods you consume the more mood-boosting nutrients your diet will contain. If you tend to eat spinach or kale all the time, try adding collard greens or swiss chard into your diet.  If chickpeas are high in the rotation, maybe you could switch things up by trying a recipe that calls for black-eye peas or navy beans? After reading this post, I challenge you to try at least one new thing this week, the next week, and the week after that. Overtime, you'll have introduced an array of new foods to your repertoire and adding variety will become a habit. Plus, you'll be healthier and happier as a result. 

"I have chosen to be happy because it is good for my health." - Voltaire. Be happy, be healthy.  Thanks to Heather G. for the photo.

"I have chosen to be happy because it is good for my health." - Voltaire. Be happy, be healthy.  Thanks to Heather G. for the photo.

#HappinessHabits613: Cultivating Happiness & Building Community

Less than a month ago, Manal NemrKate Durie and I, came together and vaguely developed and conceptualized an initiative designed to cultivate happiness and build community in Ottawa (and beyond).  With very little idea of the what, whys, whens, wheres or hows, we gave it a name. We called it #HappinessHabits613. 

We weren’t exactly sure what this initiative would entail, but realizing that it takes 21 days to make a habit, we started with that. We also wanted to offer free events to participants focused on several keystone habits of happiness such as gratitude, mindfulness, meditation, movement, spending time in nature, social connections, and so on. In this spirit, we devised and planned several activities, including a launch party where we’d gather friends (old and new) to give out gratitude journals and talk about happiness, a yoga/mindfulness/meditation seminar, a picnic at Vincent Massey Park, a night of art and live music and much more.

Just a few weeks after our initial meeting, we launched #HappinessHabits613 on Facebook. By that point, the ideas were flowing and our vision and support network had grown significantly. We’d tapped into something and it felt good; to us and to others. Somehow, within a few short weeks and with our busy, scattered schedules, we brought this little dream to life. 

This past weekend, on Saturday, August 1, we launched #HappinessHabits613 at the Hub. With over 80 people in attendance, we mingled, laughed, snacked on healthy food, sipped on tea and cold pressed juices (thank you, Urban Juice Press), decorated our journals, and enjoyed an afternoon among like-minded people.  

Just as exercise, proper sleep, good nutrition and staying hydrated are important components of overall health, so is being happy. At the launch, we encouraged participants to use their journals to track gratitude and meaningful experiences. By taking note of these things, we become aware of what brings us joy, our accomplishments and purpose,  and that's how we begin to intentionally cultivate happiness.  We also shared our 9 Foundational Principals of Happiness Habits (which you can read HERE).  We stressed the importance of making these things part of a daily practice, and to try it for at least 21 days, because over time and with repetition, habits are formed. 

If you'd like to join in on the fun from Ottawa, or from afar, here's what you need to do: 

First, sign up for a free account on TOVIFIT (the special code is HH613). The site has activities, resources, articles, videos, and tips as well as a calendar of events that lists all of the activities we have planned for the month of August. 

Second, learn about and practice our foundational principles of happiness habits. Again, click HERE for our handy dandy guideline.

Finally, you can share your meaningful experiences with us by using #HappinessHabits613 on Facebook, Twitter and Instagram. 

Thank you to everybody who came out to the launch party and those who are already participating virtually! I'd also like to extend immense gratitude to our many, many sponsors and to CY-IWANDER and Sarah Marotta for the beautiful photos below. 

You can join and follow HappinessHabits613 on Facebook , Twitter, and Instagram and share your adventures in happiness by using #HappinessHabit613. 

Zucchini Garlic Soup

Yesterday morning, I was on Daytime Ottawa to make zucchini garlic soup with hosts Derick Fage and Julie Beun. I love showcasing foods that are both seasonal and local, and this soup definitely fit the bill. Plus, it's very easy to make, requires very few ingredients and very little kitchen equipment. 

On the show, I spoke with Derick and Julie about the my role as holistic nutritionist, about teaching cooking lessons to kids, and working as a chef for yoga retreats. We also spoke at length about the many health benefits associated with both zucchini and garlic. 

First and foremost, did you know that zucchini is actually a fruit? In the culinary world, it's generally treated as a vegetable, but from a botanical standpoint, it's considered a fruit.  Also, were you aware that, like carrots, zucchini can be beneficial for eyesight?  Thanks to high contents of the carotenoids lutein and zeaxanthin, zucchini may help protect against age-related macular degeneration (in the retina) and cataracts.  Zucchini contains a nice compliment of B-complex vitamins, including folate, B6, B1, B2, B3, and choline, which helps support blood sugar regulation. It also offers vitamin C, magnesium, and Omega-3 fatty acids (found in the seeds) making zucchini a great anti-oxidant and anti-inflammatory food.   

Garlic has been highly researched and its health properties are well documented. Garlic is great for heart health, may support iron metabolism and it's also antibacterial and antiviral. Garlic is also incredibly anti-inflammatory and may help protect against cancer.  Besides being a true super food, garlic also adds taste, aroma, and complexity of flavour to whatever you're making. 

Being on Daytime Ottawa was a really good learning experience for me and it definitely took me out of my comfort zone. I've done many cooking lessons and demonstrations in the past, but never on live television.  Even though I had a bit of stage fright, I felt at ease quickly and I really enjoyed chatting with Derick and Julie.  In fact, we got so carried away talking, that we weren't even able to finish cooking. Luckily, I came prepared with a batch of readymade soup and both hosts were able to give it a try. They were impressed by how rich, creamy and flavourful it was.  

You can find the full recipe below.  If you plan on making this soup, please don't peel your zucchini as most of the anti-oxidant properties are found in the skin. I hope you'll give it a try and let me know what you think.  

ZUCCHINI GARLIC SOUP

Even without dairy, this soup is incredibly rich and creamy.

Even without dairy, this soup is incredibly rich and creamy.

Makes 8 to 10 servings. 

Ingredients:

4 tablespoons, extra virgin olive oil 
1 yellow onion, sliced
8 to 9, large cloves garlic, sliced thinly
1 tablespoon, fresh ginger, finely minced or grated
4 medium zucchini, chopped into small pieces
4 cups, organic vegetable broth
Sea salt and freshly ground pepper
Handful of chives, chopped, for garnish

Directions:

Warm the olive olive in a large pot over medium heat. Add the onions and garlic, with a big pinch of sea salt, and cook on medium-low heat for about 10 minutes. Keep the heat low as you want to sweat, not brown or caramelize, the onions and garlic.

Once the onions have softened and become translucent, add the zucchini and ginger. Increase the heat just a bit, cook with the lid on but slightly ajar, stirring every few minutes. After about 10 minutes or once the zucchinis have softened and released a lot of liquid, add the broth and bring to a simmer. Simmer at a low heat for about 45 minutes to bring out the flavours.

Either blend your soup with an immersion blender until it’s smooth and creamy, or transfer to a high powered blender. If you’re using a blender, you may want to transfer in batches. Fill the blender half full, and hold the lid down tightly with a towel, and blend until you’ve reached a smooth consistency.

Taste and season your soup with salt and pepper. Serve immediately and garnish with chives. 

This soup was inspired by Faith Durand’s recipe featured on The Kitchn

Daytime Ottawa hosts, Derick and Julie, and I showing off a colourful array of zucchinis from Roots Down Organic Farm.

Daytime Ottawa hosts, Derick and Julie, and I showing off a colourful array of zucchinis from Roots Down Organic Farm.

What The Heck Is Kombucha Anyway? Ottawa Based Brewer Wentsi Yeung Explains.

If you follow me on Instagram, you'd know I'm a kombucha drinker and home brewer. I've been brewing it for a while and I'm excited to see that it's become more widely available in Ottawa. If you've heard of kombucha but you aren't exactly sure what it is — or maybe you have no idea what I'm going on about — keep reading, because I've enlisted the help of an expert. 

A few months ago, I met Wentsi Yeung at the Live The Smart Way Expo. We got to talking and soon enough I discovered that Wentsi is the one woman show behind, Culture Kombucha, Ottawa's first kombucha company. She is young, industrious, super hard working and she shares my love of kombucha. So naturally, I had to feature her on my blog. 

Between her full time day job and running her kombucha business, Wentsi is one of the busiest people I know. That said, she happily took the time to enlighten us about kombucha, how she started her business and what's in store for Culture Kombucha.   

A local gem. Culture Kombucha is brewed and bottled in Ottawa. 

A local gem. Culture Kombucha is brewed and bottled in Ottawa. 

Amy: Kombucha has become quite popular these days, but it's still sort of a mystery to many people. Can you enlighten us?
Wentsi: Sure! Kombucha is a fermented tea. It's bubbly with a vinegary undertone which makes it refreshing and tasty! The recipe originates from ancient China/Russia and has passed through Europe as a health tonic. It is essentially tea that has gone through a 1 to 3 week fermentation period. Flavours are created during the brewing, fermentation, and bottling process with different teas, herbs & spices, and fruits! 

Amy: What are the health benefits of drinking kombucha? 
Wentsi: Kombucha is loaded with probiotics  which makes it really good for your gut and digestive health. It is also high in anti-oxidants, enzymes, and B vitamins!

Amy: How did Culture Kombucha get started?
Wentsi: Starting Culture Kombucha has been so many things coming together over the past few years. My first time trying kombucha was while I was working at a non-profit in the organic sector and after my first sip I fell in love and knew I wanted to start a local kombucha brewery. I've always wanted to own my own business and I've always been interested in food, nutrition, and sustainable agriculture (I also majored in biology which is very helpful for the fermentation process) so in the summer of 2014, I registered the company and since then it has been this crazy and amazing adventure building the business! It's putting in another 7-9 hours after my day job and a full weekend which can be exhausting and stressful but it's a labour of love and the most rewarding feeling ever.

Amy: What's on the horizon for Culture Kombucha? 
Wentsi: I have so many ideas and lots of projects on the go but the main one is that Culture Kombucha will soon be available on tap!

Amy: Where are you selling your products? 
Wentsi: We sell to restaurants, natural health & fine food stores in Ottawa and have plans to expand just a little outside of the Ottawa region!

Amy: Do you have any favourite flavour combinations?
Wentsi: Hmm, I definitely like flavours that are more tart or floral nothing too sweet. I love the ginger and the raspberry mint — I couldn't make a flavour and try to sell something I didn't like!  

You can find Culture Kombucha on Facebook and Instagram. The website is currently under construction, but be sure check back to www.culturekombucha.ca in the near future. 

My "Acting" Debut

Not too long ago, I featured a company called SAABOON on my blog. SAABOON is a growing, Ottawa-based skincare line with a wide range of products including deodorant, soaps, face oil and lip balm.  The owner, Joulian Tavalloli, has an obvious knack for developing beautiful artisanal skincare products. He also has a full-fledged career in film editing. To combine his two skills, Joulian began filming commercials about his products to be featured on his website. His commercials all have a sincere and authentic quality. The people in the videos are not actors. Joulian wanted to feature regular people that actually use and love his products. When he asked me if I'd be in a commercial for his new deodorant UTILITY, I was flattered and, despite being a bit camera shy, I couldn't say no. 

We filmed the commercial in a park by Robinson Field along the Ottawa River. It's a beautiful area, with tons of trees, water fowl and squirrels (listen closely and you'll hear the squirrels at the beginning of the clip). I had a great time working with Joulian and I was glad he let me share the spotlight with my sidekick and unofficial mascot, Gimley. Despite the natural distractions (read: squirrels), no script, and zero acting experience, we managed to pull this off in the very first take.

If you live in Ottawa, you can find SAABOON products at terra20Market OrganicsRainbow Foods, blumenstudio, Whole Foods Market, and Herb & Spice Shop. If you live outside of Ottawa, you can order any of the products online as SAABOON ships to Canada and the US. 

Remember, folks, sweating is okay... but smelling is not.  

Simple Strawberry Basil Granita

I'm a complete urbanite. I love living downtown and I love being in the heart of the city. That said, in the summer, there's nothing I enjoy more than retreating from the city and spending the weekend in the country. Like the good Canadian that I am, I can't resist a few days in nature, close to a body of water, surrounded by trees and wildlife.  Luckily, I'm able to spend lots of time at my boyfriend's family home on Upper Rideau Lake, near Westport, when I need a little getaway from city life. 

This weekend, en route to the Lake, I picked up a pint of strawberries at a roadside stand in Smith Falls with hopes of making one of my favourite cold summer desserts. As you may have seen in my last blog post, I shared a recipe featuring Ontario strawberries. Because they are so plentiful these days, I've decided to feature them yet again.  Yes, strawberries are delicious, but they also offer an array of health benefits. They are an excellent source of vitamin C and antioxidants. They are also anti-inflammatory and may help regulate blood sugar. 

Below, you'll find the recipe for my strawberry basil granita. It's sweet (but not too sweet), refreshing, and the perfect way to use up your extra strawberries and basil, both of which are incredibly bountiful this time of year. This popular Italian dessert is normally sweetened with sugar, but I swapped in a couple tablespoons of maple syrup to reduce the sweetness and to give it a Canadian touch.  It's a great dairy free alternative to ice cream, plus it's really easy to make and will impress even the pickiest eater! 

STRAWBERRY BASIL GRANITA 

unnamed-4.jpg

Makes approximately 4 servings. 

Ingredients: 

1 pints strawberries, washed, hulled and halved 
1/4 cup, fresh basil, roughly chopped  
2 tablespoons, fresh lemon juice 
2 tablespoons, maple syrup


Directions:  

Place strawberries in a food processor and process until nearly smooth. Add the basil, lemon juice and maple syrup. Pulse until evenly mixed. 

Transfer the mixture to an 8x8 baking dishes and freeze until it becomes icy around the edges, about 30 minutes. Use a fork to scrape the icy portion into the middle of the pan. 

Freeze for 1 ½ to 2 hours more, scraping the frozen edges towards the centre every 30 minutes, until the mixture is no longer liquid and has the consistency of flaky crystals.

Serve immediately in bowls or parfait glasses. The granita can keep for a few days in the freezer and will stay scoopable if frozen. You may have to defrost it for a bit, before serving, if it's been in the fridge for several hours. 

Strawberry Rhubarb Chia Seed Jam

Have you tried chia seeds yet? I love love love them. In my nutrition practice I almost always encourage my clients to incorporate chia seeds into their diets.  Although they are tiny, chia seeds offer a huge punch of nutritional density. They are a highly concentrated source of the anti-inflammatory omega-3 fatty acid, alpha-linolenic acid (ALA). Chia seeds are also an outstanding source of dietary fibre and contain calcium, magnesium, iron, and zinc. Eating chia seeds regularly is great way to manage weight and may even help reduce your risk of cardiovascular disease and stroke.

Recently, one of my clients asked for ideas on how he could use chia seeds. I  gave him a bunch of suggestions, such as chocolate chia pudding (google it, make it, you'll love it), adding a tablespoon of chia seeds to his morning smoothies, and I also mentioned that I had been interested in making a strawberry chia jam. We googled a few recipes and came across one that he could easily make at home.  Flash forward three weeks, he shows up at my office for our next appointment and tells me that he made chia seed jam. However, he modified the recipe slightly. Because he had so much rhubarb growing in his garden he decided to incorporate some into his jam. He said the results were phenomenal and that his entire family really enjoyed it. At that moment,  I made a mental note: "must try chia jam". 

This week, the stars aligned and I was given a bunch local strawberries and rhubarb. I did a quick google search for "strawberry rhubarb chia seed jam" and, lo and behold, one of the top search results was Ottawa local Kathy Smart's recipe. For those of you who don't know her, Kathy is the gluten free guru. She's also a nutritionist and cookbook author. From meeting her in person, and following her adventures on social media, I know that she is all about health education, healthy living, and she's extremely well versed at "healthifying" recipes. I knew she wouldn't let me down. 

So, I made the jam, and it's pretty darn tasty.  Plus, it's a great use of strawberries and rhubarb, both of which are currently in season here in Ontario and readily available at farmers' markets, grocery stores, and in backyards and garden plots near you!  In case you were wondering, chia seeds can be found at health food stores, Bulk Barn and most larger grocery stores in the natural food or health food section.  

Fresh Ottawa strawberries and rhubarb make this jam extra tasty and provide vitamin C and K.

Fresh Ottawa strawberries and rhubarb make this jam extra tasty and provide vitamin C and K.

STRAWBERRY RHUBARB CHIA SEED JAM 

Makes 3 cups 

Ingredients: 

2 cups, strawberries, cleaned and sliced
3/4 cup, fresh rhubarb, rough chopped
4 Tablespoons, pure maple syrup 
4 Tablespoons, chia seeds 
3 Tablespoons, fresh lemon juice

Directions: 

Add all of the above ingredients to a food processor or blender and pulse for 30 seconds. At this point, you should taste your jam for sweetness and, if it's not quite sweet enough for you, mix in a bit more maple syrup. If you are happy with the taste and texture, stop here. If you prefer a smoother jam, continue blending/processing until you've reached your desired consistency. 

Add your jam to a jar and store in your refrigerator for a few hours or overnight. Once the jam has solidified you can enjoy it on toast or rice cakes, with oatmeal or yogurt, on pancakes, or you might even want to eat it right out of the jar!   You can store your jam for up to two weeks in the refrigerator. 

Kathy's recipe was originally posted on her website, Live The Smart Way.  

Garlic Scape Pesto

A friend of mine, Anne, works for the Ottawa-Carleton Association for Persons with Developmental Disabilities (OCAPDD) and ever since I've known her she has always spoken so fondly of the organization. The OCAPDD works with developmentally disabled children and adults in the Ottawa-area with the goal of helping them integrate into the community by way of assisted lodging, education and access to employment. 

 The OCAPDD has many noteworthy endeavours, but the one that interested me the most was their  Silver Spring Farm Agricultural Project.  Silver Spring Farm, located in the west end of Ottawa at the intersection of Richmond and Baseline Roads, is 100% volunteer based. It has been around for over 50 years, but most recently its focus has been pesticide-free garlic farming. Every fall, volunteers plant 40,000 bulbs of garlic. In mid-July the garlic is harvested, dried, braided and, by August long weekend, it is sold to the public with 100% of the profits being used in support of adults with developmental disabilities. 

This time of year, Silver Spring Farm also harvests and sells garlic scapes. The scapes, which have become somewhat of a delicacy, are the soft, light green coloured stems or "flower stalks" of certain garlic varieties.   Because they are only around for a few weeks each year — usually late-June to early-July — they are highly sought after.  Generally, the scapes are trimmed off, since leaving them in place diverts the plant's strength away from forming a hearty bulb of garlic. 

Scapes can be sweet or pungent, but generally they have a mild garlicky taste. Like garlic, they boast numerous health benefits.  The sulphur compounds in garlic scapes boost glutathione, a powerful antioxidant, which protects the body against oxidative stress. They are also said to promote cardiovascular health and may help prevent cancer and osteoarthritis. 

This weekend I saw Anne at a friend's party and she gave me a sizeable bag of scapes. From the moment I received this generous gift, I have been dreaming up ways to use them.  I have already sautéed some scapes with broccoli. I might try grilling or pickling them. Since I have so many, they will be used as the base, alongside onion, in most of my cooking for the next week or so. I also plan on puréeing a whole bunch in my blender and then freezing the purée in ice cube trays. The frozen scapes cubes can be used later on in soups, stews, sauces, you name it!  

Today, I made a delicious summer pesto, which I subsequently mixed with quinoa pasta noodles, fresh local kale and edamame. The pesto pairs nicely with pasta, but it could also be used on bread or crackers, modified into a salad dressing, or tossed together with sautéed or roasted vegetables.  I do warn you though, scapes can be potent and if you don't tolerate raw garlic, you might want to steam your scapes for about 3 minutes (just enough to soften them up a bit) prior to making your pesto.  However, if you are a garlic lover like me,  I think this recipe will be right up your alley! 

GARLIC SCAPE PESTO

Makes about 1.5 cups ~ dairy free & gluten free 

Ingredients: 

10-12 large garlic scapes, rough chopped
1/2 cup parsley, tightly packed 
1/2 cup (approximately 20) brazil nuts
1 tablespoon miso paste (I used chickpea miso), optional 
3/4 cups extra virgin olive oil
Juice of half a lemon 
Sea salt & cracked black pepper 

Directions: 

Pulse the garlic scapes, parsley, brazil nuts, miso, lemon, 1/2 teaspoon salt, and 1/4 teaspoon pepper in a food processor until very finely chopped.  While your food processor is still running, slowly pour the oil through the opening. Taste a little bit of your pesto, and then re-season with salt and pepper, if necessary. 

The pesto keeps in the fridge, sealed, for 1 week or frozen for about a month. 

The OCAPDD is always looking for volunteers. If you are interested in getting involved with the organization, check out its volunteer page. You can also visit the farm this week for fresh scapes and rhubarb, or stop by in August following the garlic harvest.