Build Your Own Plant-Based Cheese & Charcuterie Board
When I made the switch to a plant-based diet many years ago, I figured my days of enjoying cheese and charcuterie boards were over. I truly assumed plant-based cheese and meat alternatives would be lacklustre. I sort of avoided these products and instead I spent a lot of time making my own cheese spreads, dips and even faux meats that were actually pretty great. However, I have to say, over time I’ve come to know and love several fantastic companies that make phenomenal plant-based cheeses and meats that not only rival traditional versions, but have made it much much easier to make the compassionate choice without having to make everything myself.
As you know, I’m a huge proponent of spending time in the kitchen and learning how to make things from scratch, but I do realize that it’s not always possible especially during busy times (like the holiday season). It’s nice and so convenient to have store bought options that are healthy, delicious, and plant-based.
Nowadays, it’s so easy to put together a beautiful, bountiful spread combining a variety of cheese and meat alternatives along with other components of your choosing. If you’re looking for ideas or inspiration for your next holiday party, scroll down to learn how to build your own plant-based cheese and charcuterie board. Below I share some of my favourite brands and a few healthy holiday recipes too!
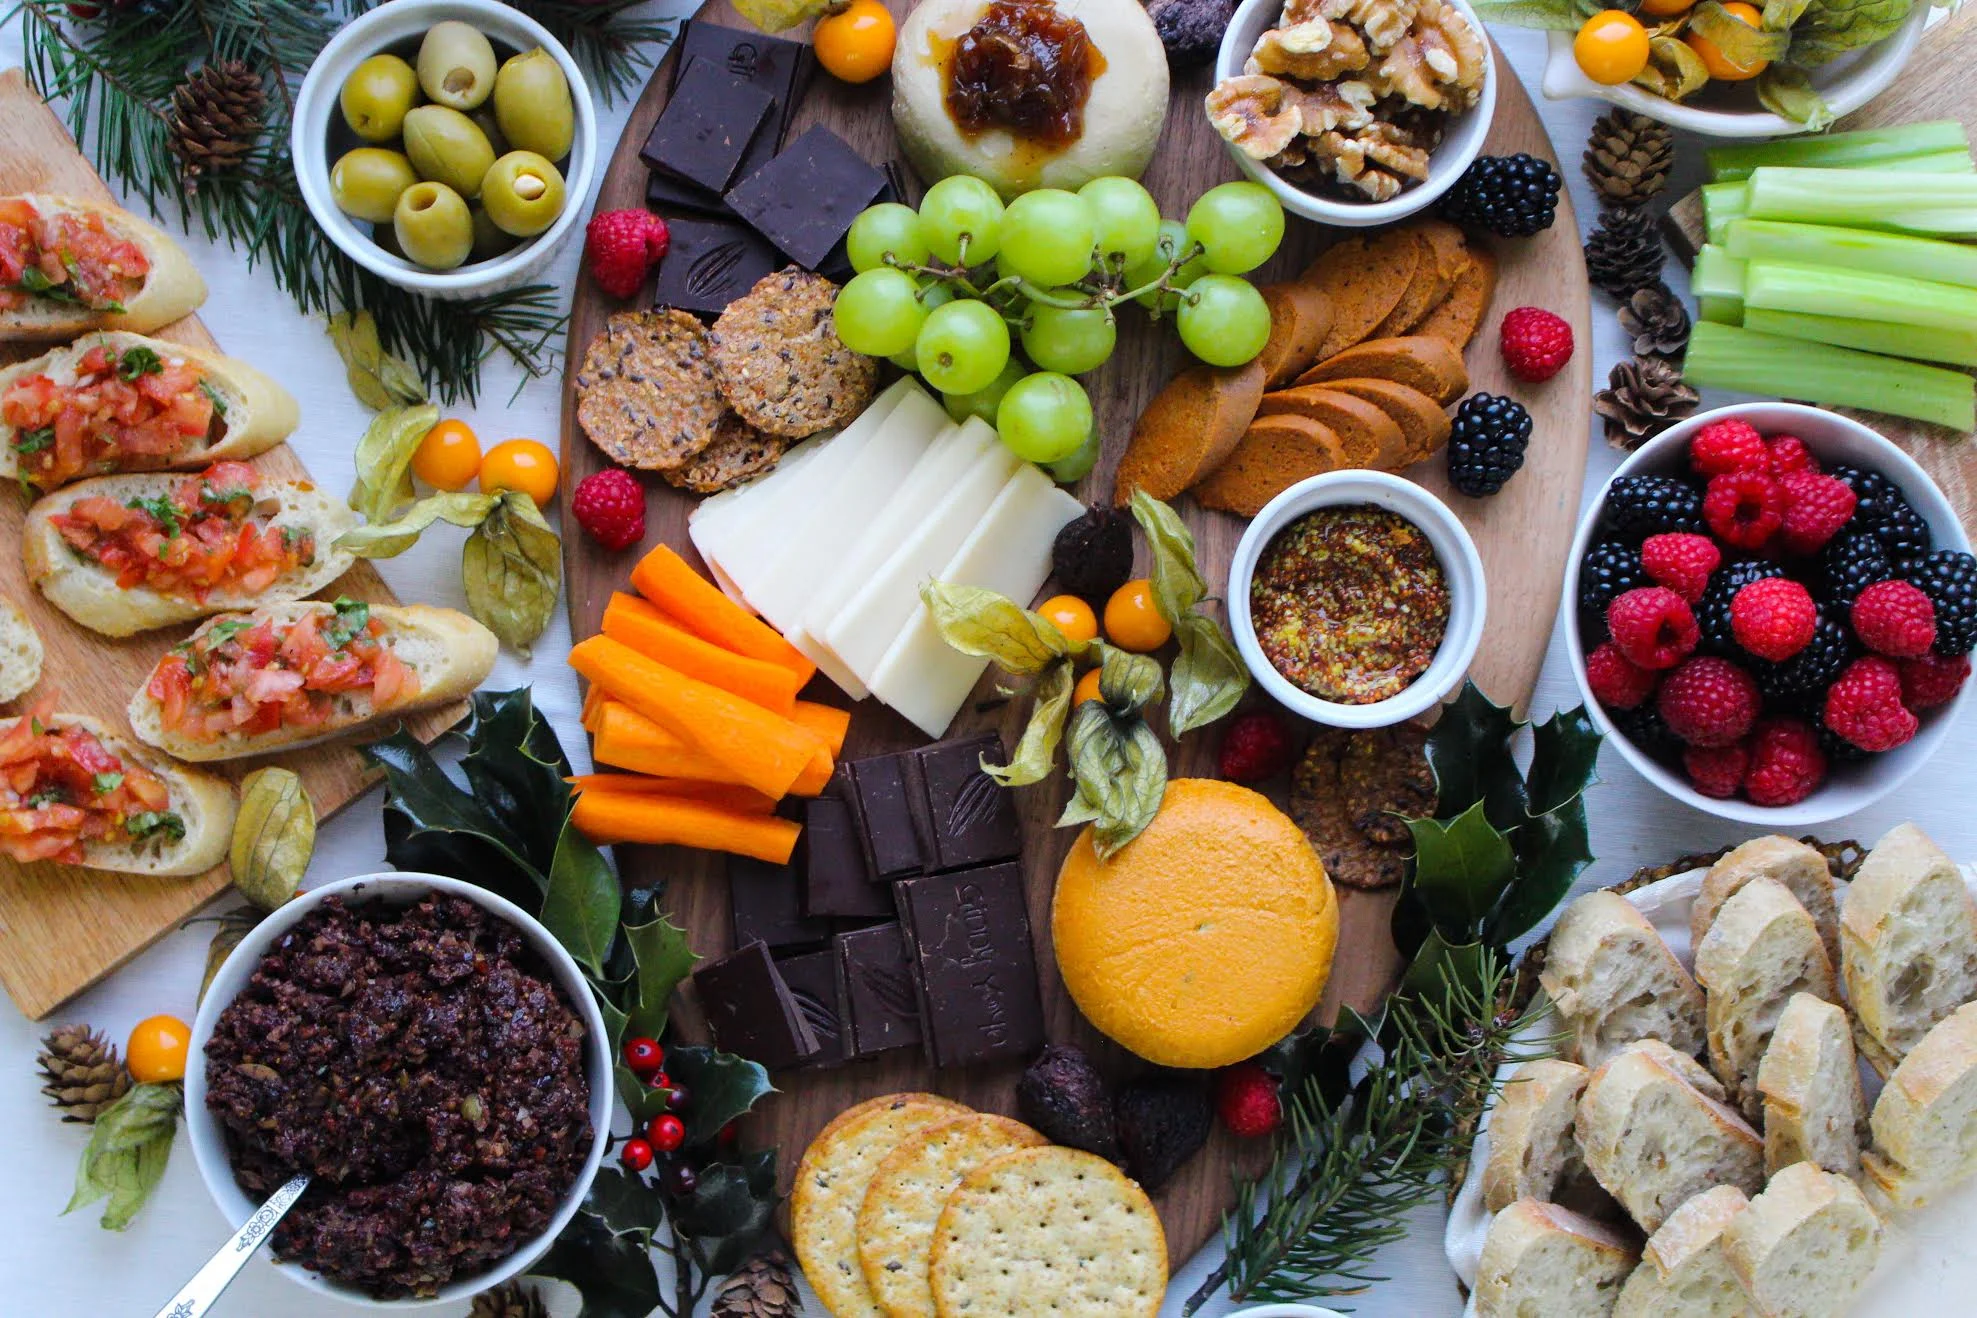
I partnered up with my friends at Animal Justice to make this cheese and charcuterie board. We used Fauxmagerie Zengarry cheeses and GUSTA sausage along with an assortment of other delicious things.
Cheeses - Look for these brands: Daiya (Farmhouse Blocks), Culchered, Earth Island, Fauxmagerie Zengarry, Field Roast (CHAO Creamery), GUSTA, Miyoko's Creamery, Nuts For Cheese, VegCheese and Violife.
Meat Alternatives - Look for these brands: Beyond Meat, Field Roast, GUSTA, Real Fake Meats (available in Halifax, Nova Scotia), Tofurky, The Very Good Butchers, and Yam Chops.
Fruits - Everybody loves grapes, berries, cherries, ground cherries, pomegranate, clementines, and dried fruits like figs, raisins, cranberries or apricots.
Veggies - My favourites include olives, sliced raw vegetables, pickled or fermented vegetables (beets, onions, and gherkin pickles are always popular), roasted red pepper, roasted garlic, black garlic, etc.
Nuts & Seeds - I like walnuts, pumpkin seeds, candied pecans, tamari almonds, and pistachios.
Dips & Spreads - Enhance your board with a nice grainy mustard, hummus, bruschetta, salsa, chutney, jams, compotes and maple syrup. I also love this fig & olive tapenade and zucchini almond dip.
Dark chocolate - Can’t go wrong here!
Bread & Crackers - I like a classic french baguette and/or a mix of crackers including Mary’s Gone Crackers, Le Pain des fleurs Crispbread, and more.
Decor - In the photo above, the decor includes pine cones, holly and ivy, pine branches and of course a few nice cutting boards and decorative bowls. Things like micro greens or delicate leafy greens look pretty. You can also use festive household items like mini-lights, ornaments, candles, or whatever you have on hand to jazz up your board.
Many of the above-mentioned cheeses and meat alternatives are available throughout Canada and the US at health food stores, Whole Foods Markets, and most major grocery stores. In Canada, you can also order a variety of plant-based products online via Vegan Supply and Yam Chops.
Did I miss anything? Tell me your favourites in the comment section below!
Special thanks to Animal Justice for this fun collaboration! Click on the image below to see a fun little video on how we built our board.

